
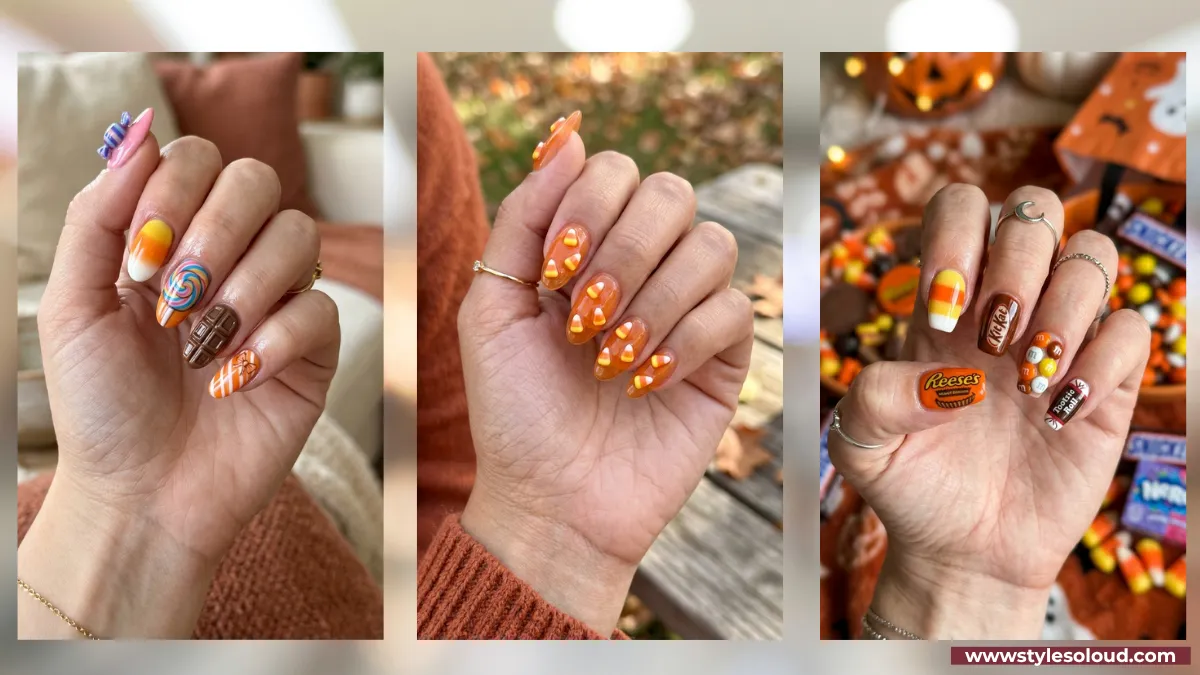
There is something about candy nails that feels like the coziest part of Halloween. The colors are warm and cheerful, the designs are playful, and the whole thing looks good enough to unwrap. Candy corn alone has inspired more manicures than almost any other Halloween motif, and for good reason.
The best part is how beginner-friendly most of these are. A candy-corn ombre is really just three colors softly blended, and even a wobbly first try still looks adorable. From there you can add stripes, faces, sparkle, or a glossy glaze, or branch out into wrappers, lollipops, and chocolate-bar shades when you want a change.
These 25 Halloween candy nails run from the easiest at-home ombre to full glam candy sets, mostly centered on that classic candy-corn look you keep seeing everywhere. You will find simple how-tos, cute variations, and a few chic twists. Pick the ones that match your skill and your sweet tooth, and give your nails their treat.
1. The Classic Candy-Corn Ombre
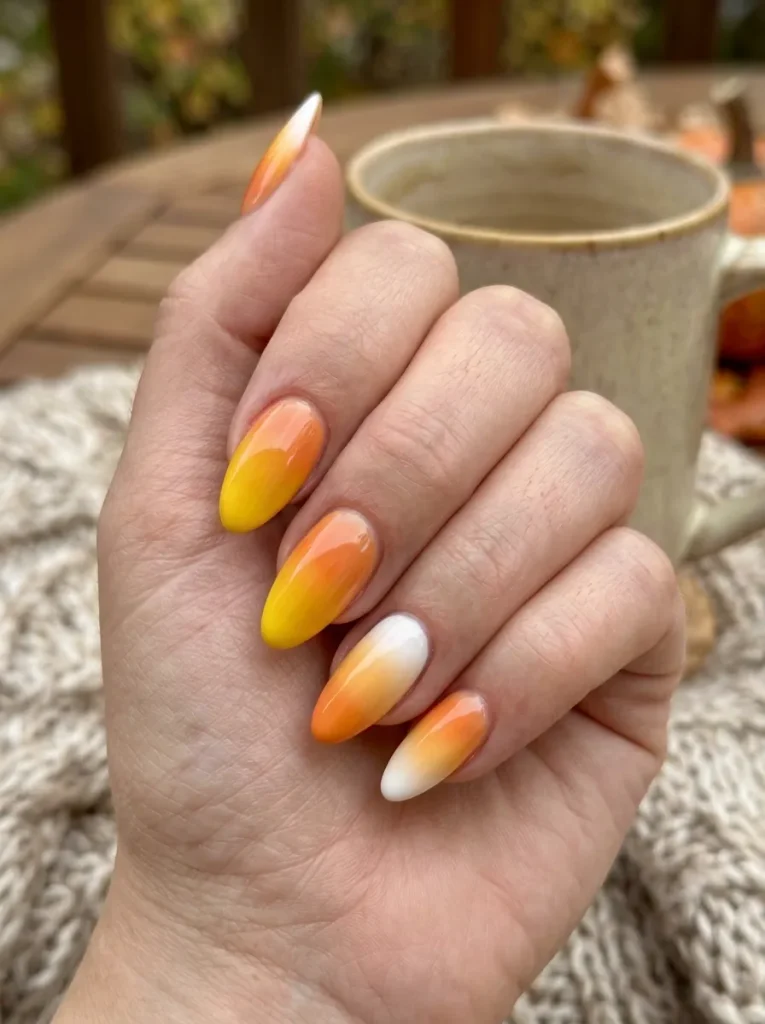
Start with the design that defines the whole trend. A candy-corn ombre blends yellow at the base, orange in the middle, and white at the tip into that instantly recognizable sweet.
The secret is soft blending. Paint the three stripes, then dab gently where they meet with a small sponge while the polish is still wet, so the colors melt together instead of sitting in hard bands. On almond or coffin nails the gradient looks especially long and pretty. Master this one and half the looks on this list open up to you.
2. Candy-Corn French Tips
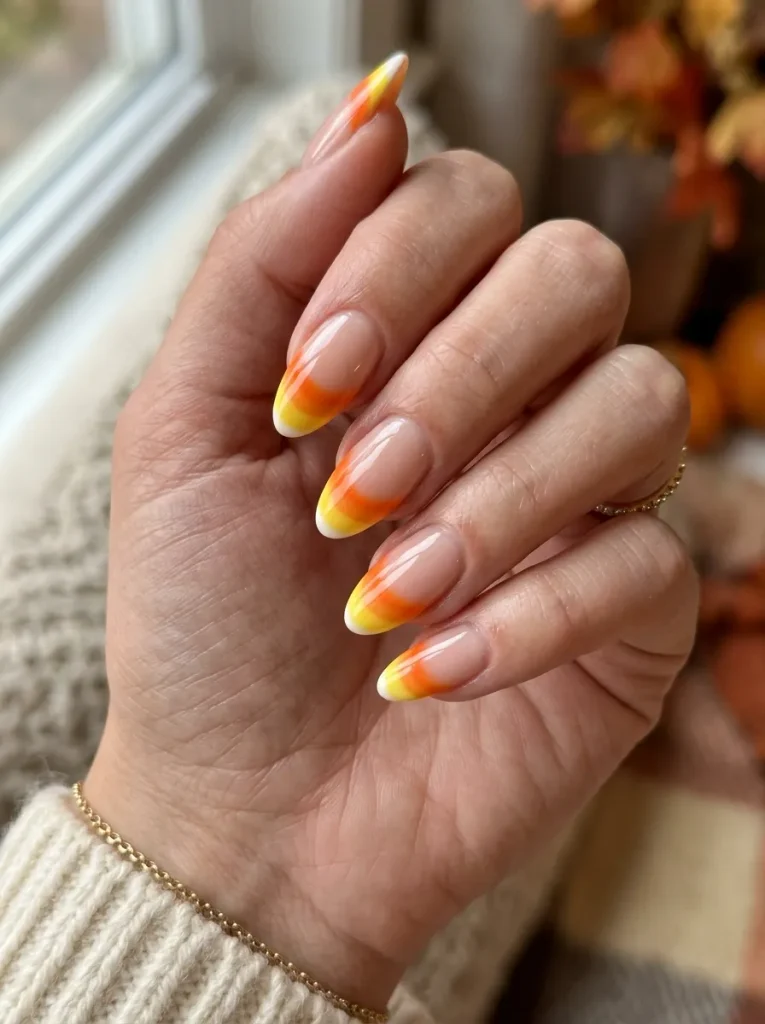
For a cleaner, more modern spin, put the candy corn only at the tip. A candy-corn French tip keeps the base bare or nude and blends the three colors into the smile line, so it reads chic rather than costume-y.
It is the wearable version of the trend. Because most of the nail stays sheer, the design feels fresh and grown-up while still being unmistakably candy corn. Keep the tip on the thinner side and the blend soft for the most polished result.
💡 Quick Tip
Paint the white band closest to the tip first, then orange, then yellow moving up. Working tip to base makes the gradient sit right where a French tip should.
3. A Single Candy-Corn Accent Over Nude
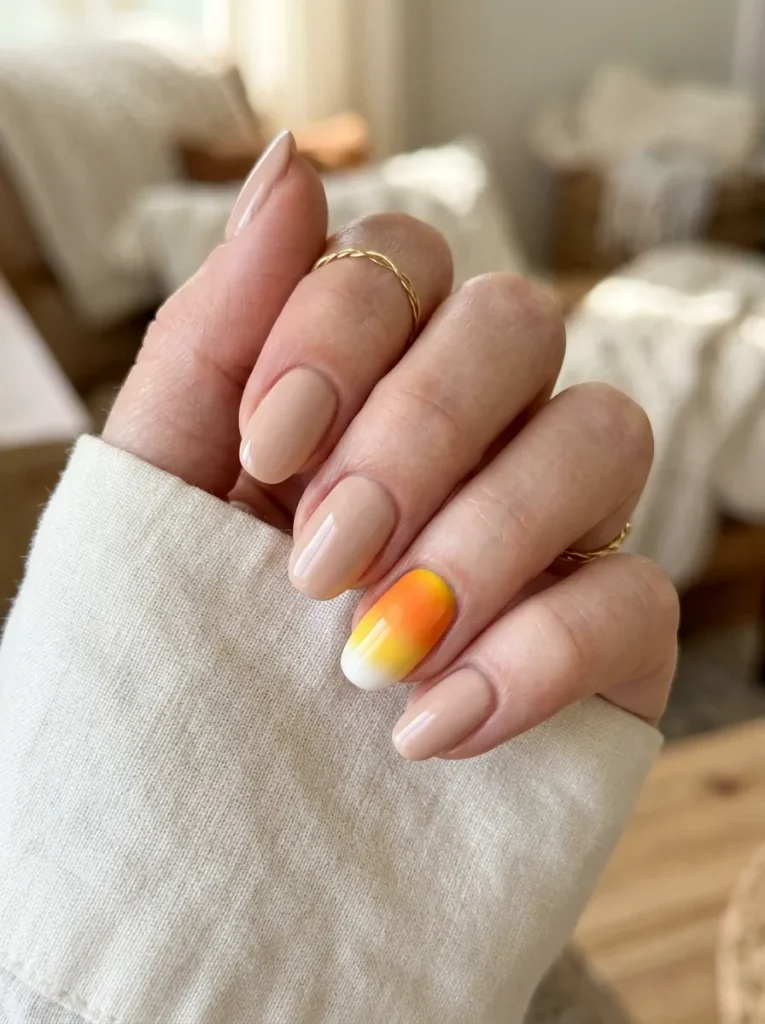
You do not need candy corn on every nail. One candy-corn accent finger with the rest kept nude or soft pink looks intentional and takes almost no time.
It comes together in a few quick steps, and because only one nail carries the design, there is very little room for error.
Nude base
Paint all nails a sheer nude or soft pink.
Candy-corn accent
Blend yellow, orange, and white on one nail.
Seal it
A glossy top coat over every nail.
4. Glazed Glossy Candy-Corn Nails
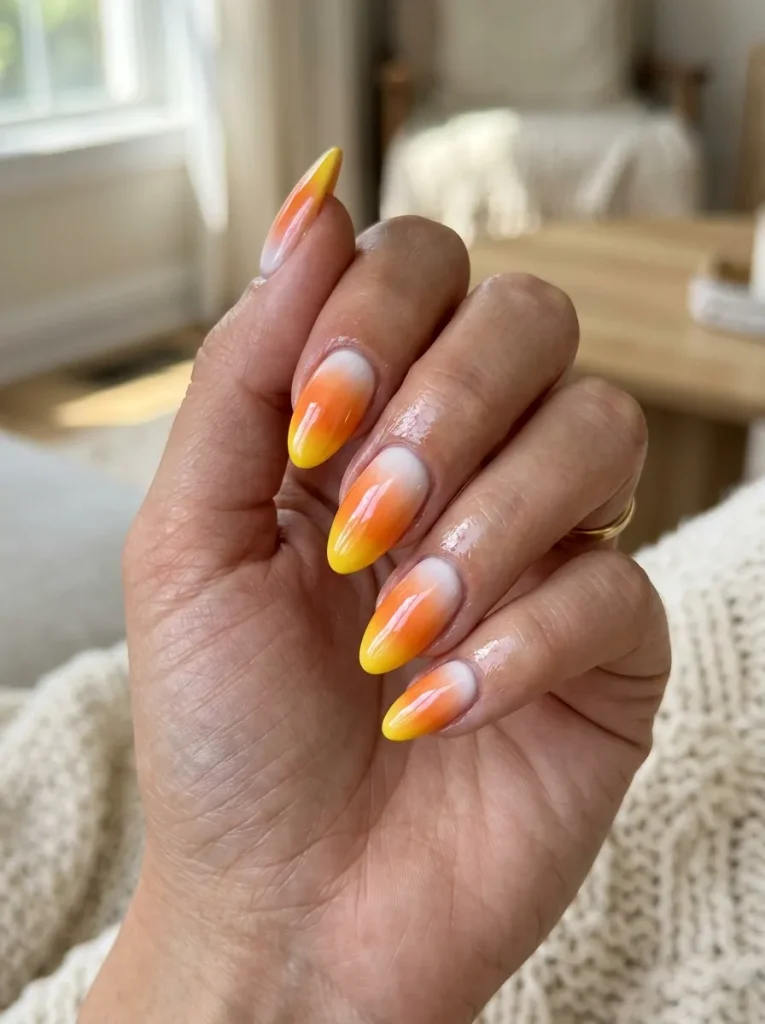
The glazed-donut finish took over nails everywhere, and it looks dreamy over candy corn. A pearly, glossy topper turns the sweet stripes into something that glows.
The magic is in the shimmer layer. Paint your candy-corn ombre, then add a fine iridescent or pearl topcoat and a high-shine seal so the whole nail looks wet and glassy. It elevates a simple gradient into something salon-worthy with one extra step.
| Glazed glossy | Matte finish |
|---|---|
| Pearly, wet, glowing look. | Soft, velvety, muted look. |
| Colors look brighter and deeper. | Colors look softer and dustier. |
| Shows fewer smudges. | Shows fingerprints and dust. |
5. Little Candy-Corn Faces With Dot Eyes
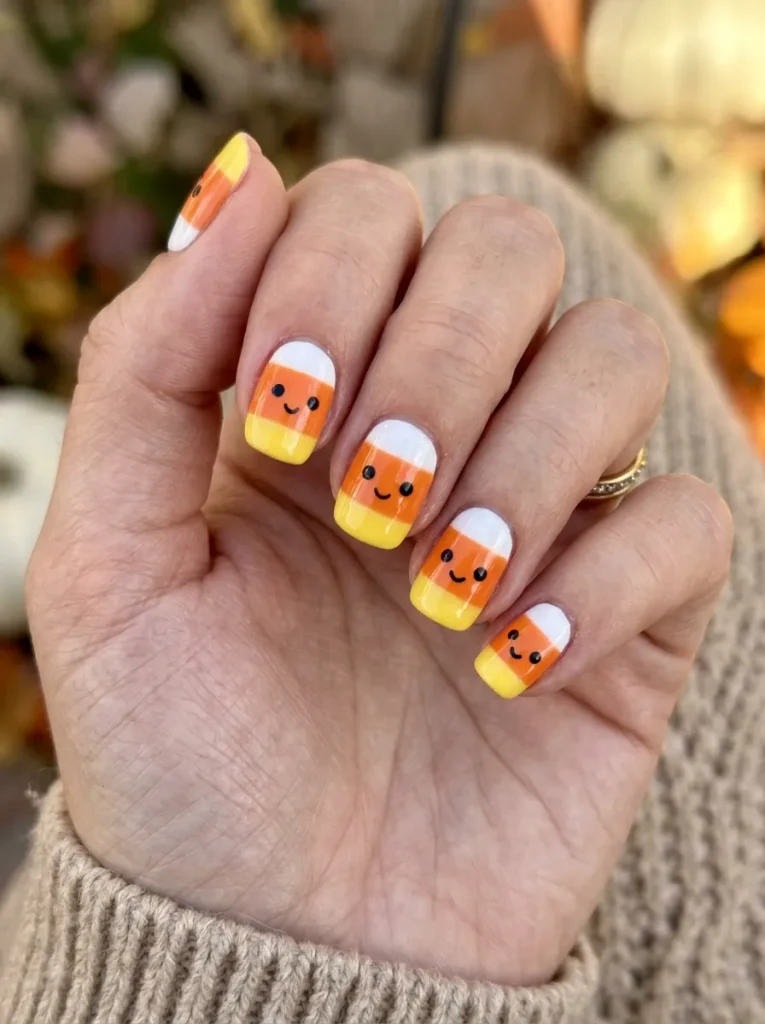
Give your candy corn a personality and it goes from sweet to downright cute. Adding two tiny dot eyes and a little smile to a candy-corn shape turns it into a friendly character.
The difference is charming and simple. Paint a candy-corn triangle, then place two small black dots near the white tip and a curved smile below them. Suddenly your nails are grinning back at you. It is a playful upgrade that kids and grown-ups both love.
A plain candy-corn shape, sweet but a little flat and expected.
Two dot eyes and a smile turn it into a cute little character with personality.
6. Candy-Corn Stripes Instead of Ombre
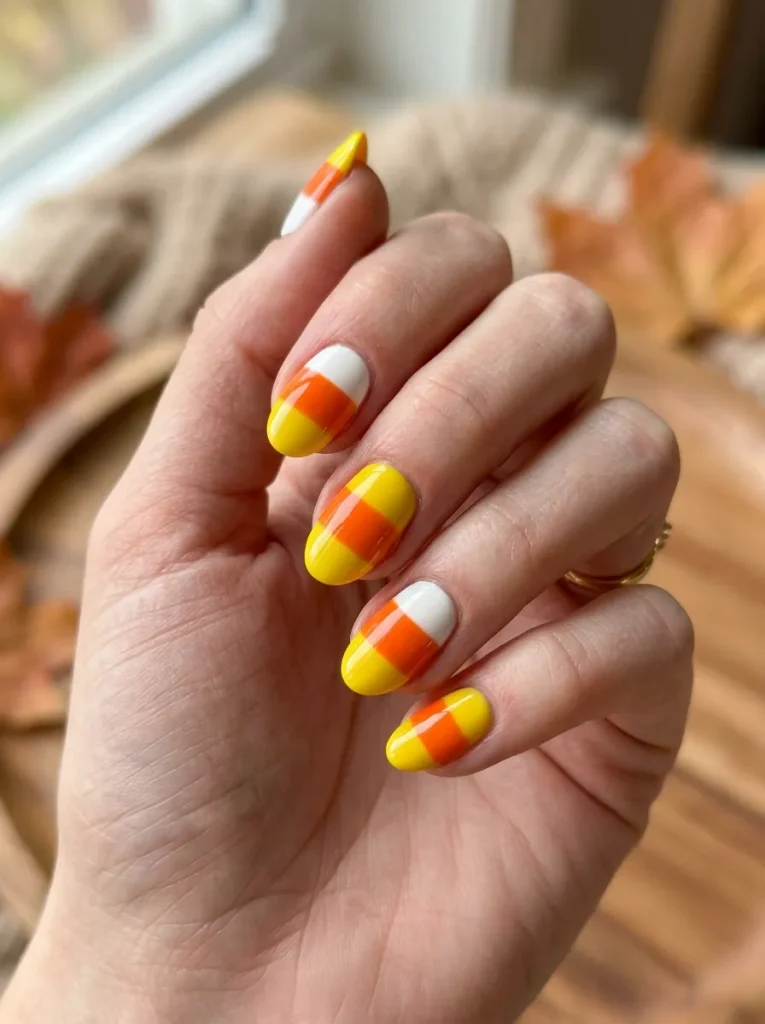
If blending feels fiddly, skip it entirely. Painting candy corn as clean horizontal stripes, yellow, orange, then white, gives you a crisp, graphic version that is even easier for beginners.
The hard lines are the whole point here. Instead of softening the colors, you keep them sharp and defined, which reads bold and modern. Use a bit of tape or a steady brush to keep each band even. It is the no-sponge, no-blend route to the same candy-corn colors.
Getting clean stripes
7. Matte Candy-Corn for a Softer Look
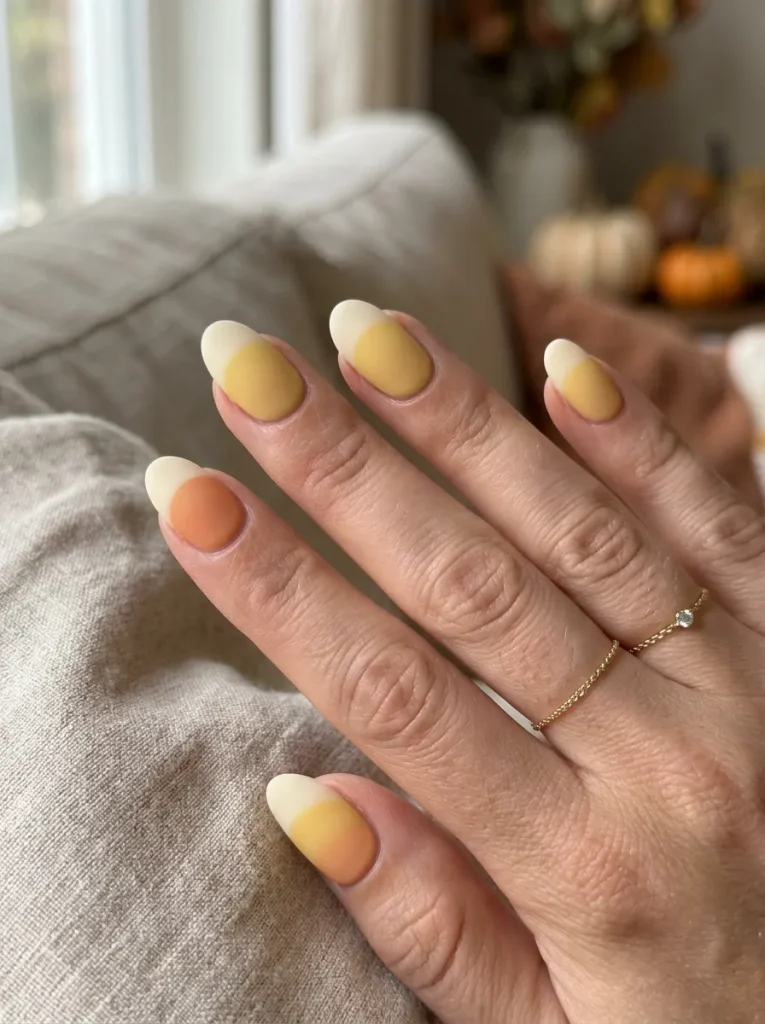
The same candy corn takes on a whole new mood with a matte finish. A matte topcoat over the classic gradient softens the brightness into something dusty and grown-up.
The velvety texture is what changes it. Matte mutes the yellow and orange just enough to feel modern and understated, less candy-shop and more autumn palette. It is a lovely option if the glossy version feels too bold for everyday wear.
8. Candy-Corn Tips on Short Nails
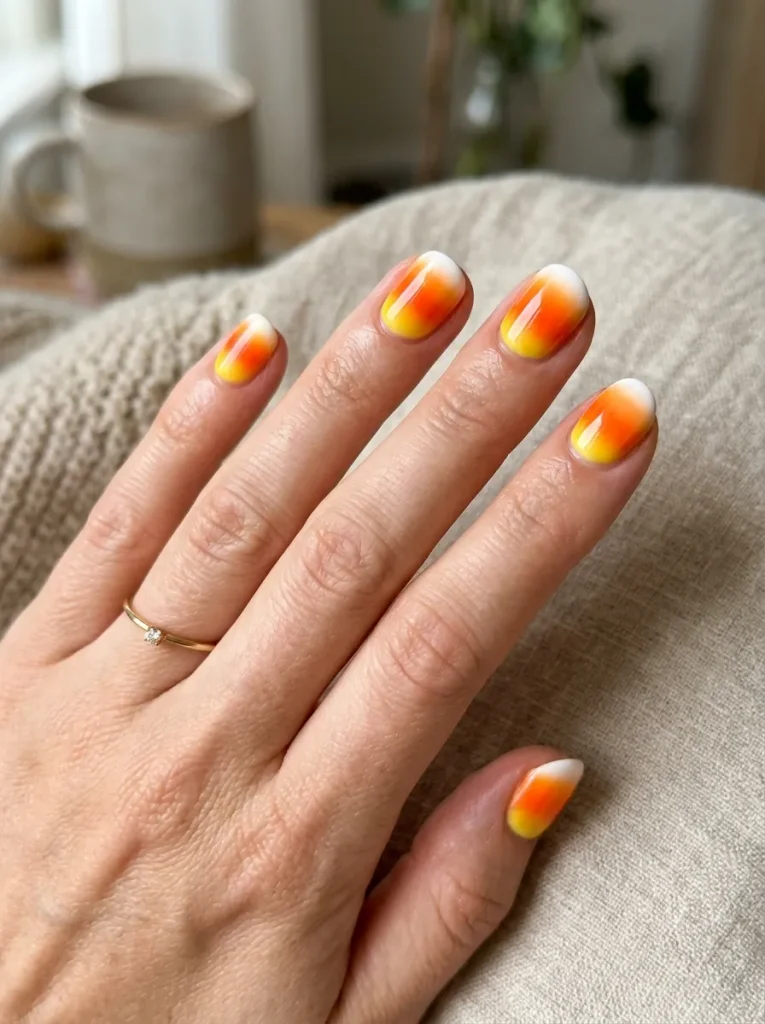
Short nails and candy corn are a perfect match. A small candy-corn tip fits neatly on a shorter nail and looks fresh, tidy, and easy to wear anywhere.
Because the design lives right at the tip, there is plenty of room even on a short nail, and it stays out of the way while you type or work.
“Candy corn belongs at the tip. On short nails, a small blended tip gives you the whole trend with none of the fuss.”
9. Black Base With Candy-Corn Accents
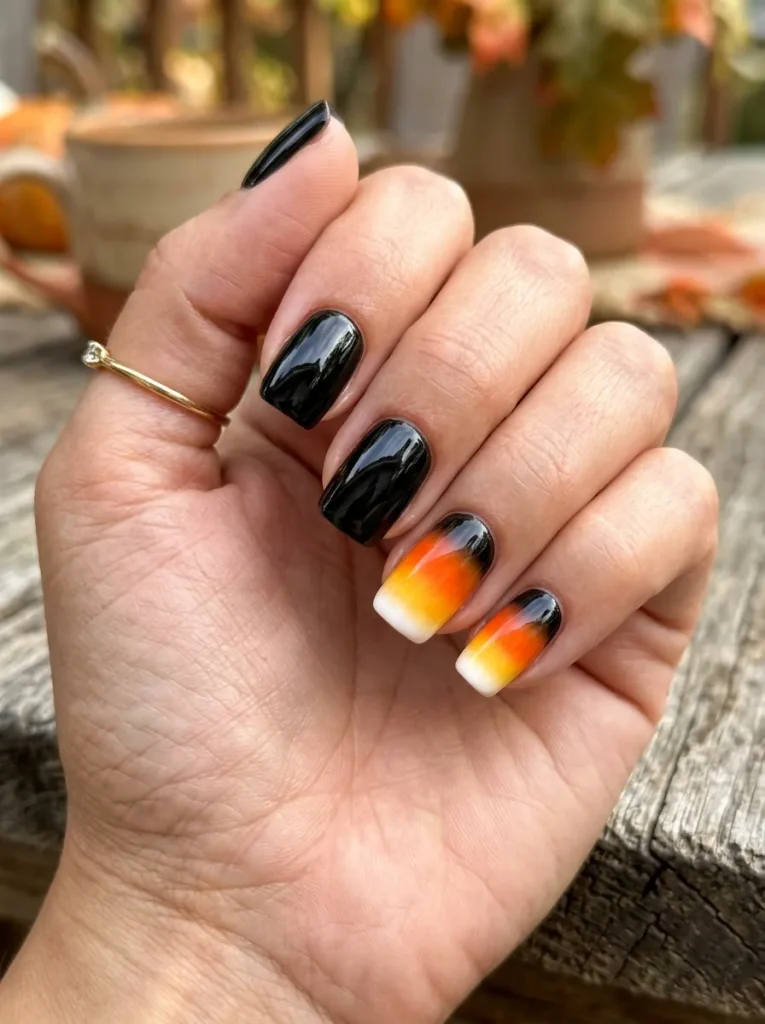
For a little edge, set your candy corn against black. A glossy black base with candy-corn accent nails balances spooky and sweet in one look.
The dark background makes the warm colors glow. Keep most nails a solid glossy black, then add candy-corn ombre or a candy-corn tip on one or two accent fingers so they really pop. It is the perfect blend if you love both the cute and the moody sides of Halloween.
Keep most nails solid glossy black.
Add candy corn on just one or two accent nails.
Candy corn on every nail with black, which looks busy.
A dull, streaky black base that flattens the accents.
10. Candy-Corn Ombre on Long Almond Nails
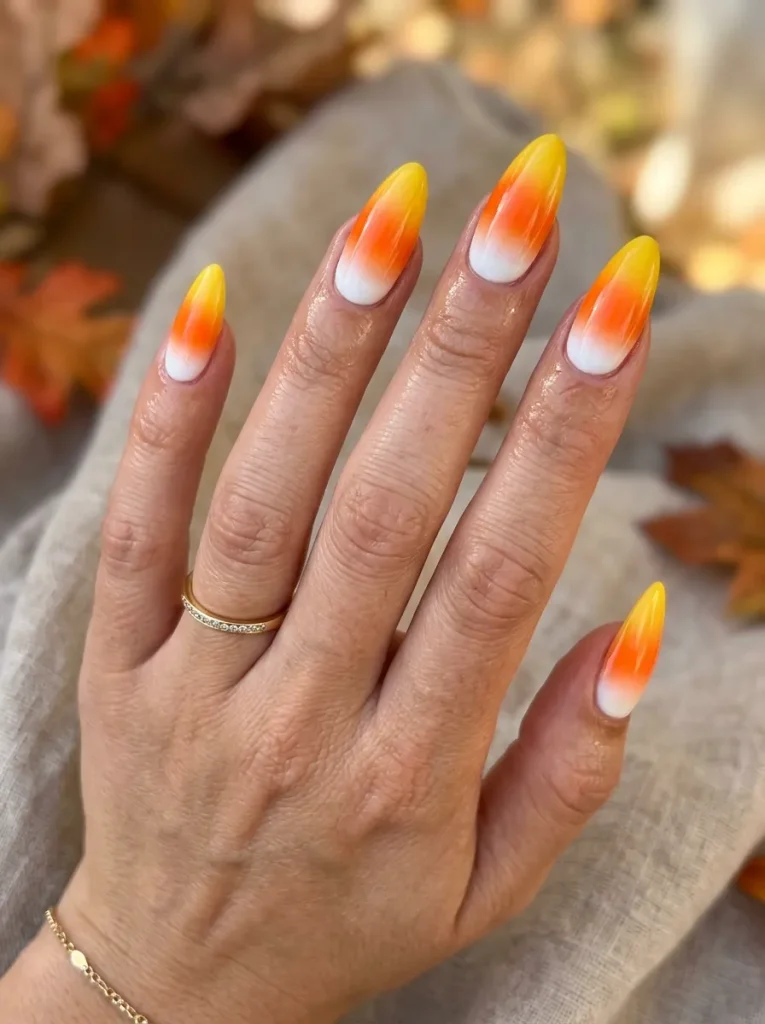
On long almond nails, the candy-corn gradient becomes truly elegant. The extra length lets the three colors stretch into a smooth, elongated blend that looks polished and pretty.
The long canvas is what sells it. Here is how to build it for the cleanest result.
Paint the full nail yellow as your base color.
Sponge orange over the middle and white on the tip.
Dab where colors meet to blend, then seal with gloss.
11. Candy-Corn Butterfly Swirl Nails
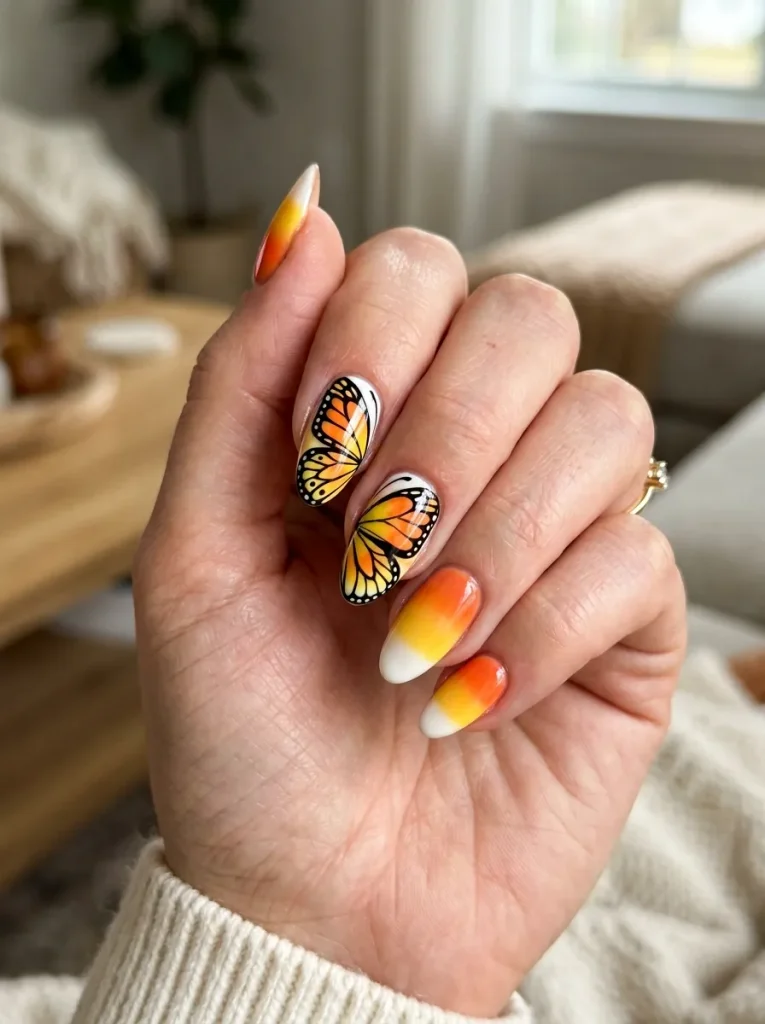
Take candy corn somewhere unexpected and it turns into art. Swirling the yellow, orange, and white into soft butterfly wings across two nails gives you a look that is still clearly candy corn but far more delicate.
This is the glam end of the trend, so it rewards a little patience. Tap each step below to see how the wing comes together.
1 Lay the color swirls — tap for detail
2 Shape the wings — tap for detail
3 Outline and detail — tap for detail
12. Add Tiny Stars and Sparkle to Candy-Corn
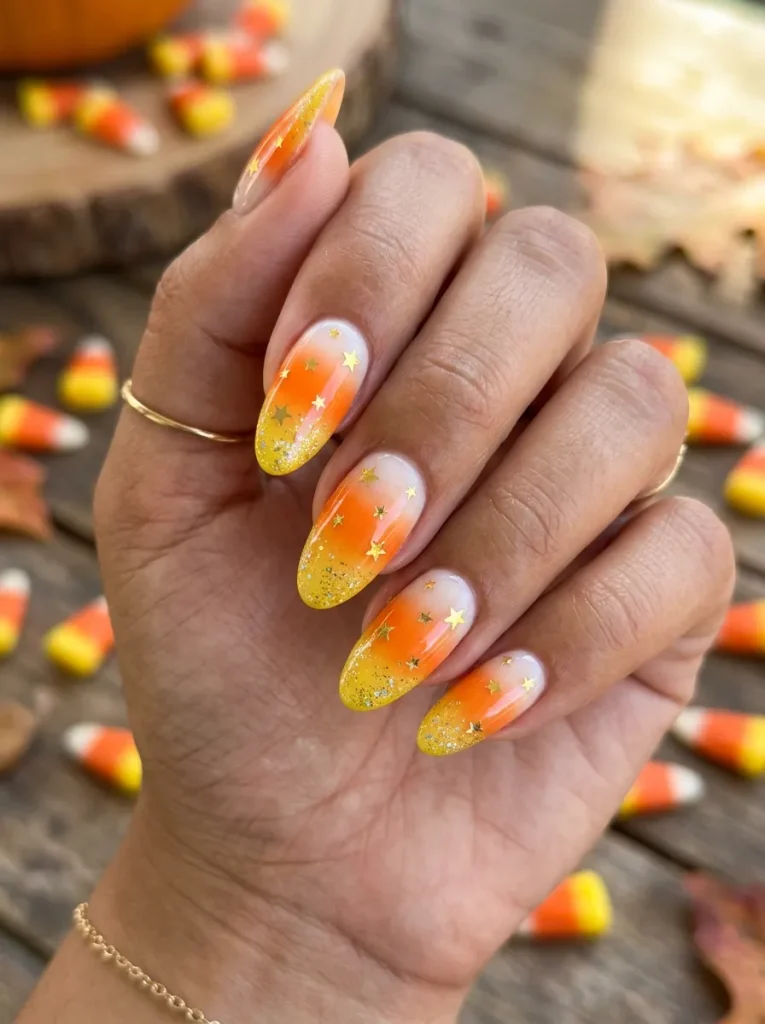
Sometimes a small finishing touch is what makes a design feel special. A scatter of tiny gold stars or a dusting of fine glitter over candy corn adds a little magic without changing the base look.
Keep the sparkle light so it reads as an accent, not a costume. These are the questions people ask most, so tap any to open the answer.
13. A Candy-Wrapper Mixed Mani
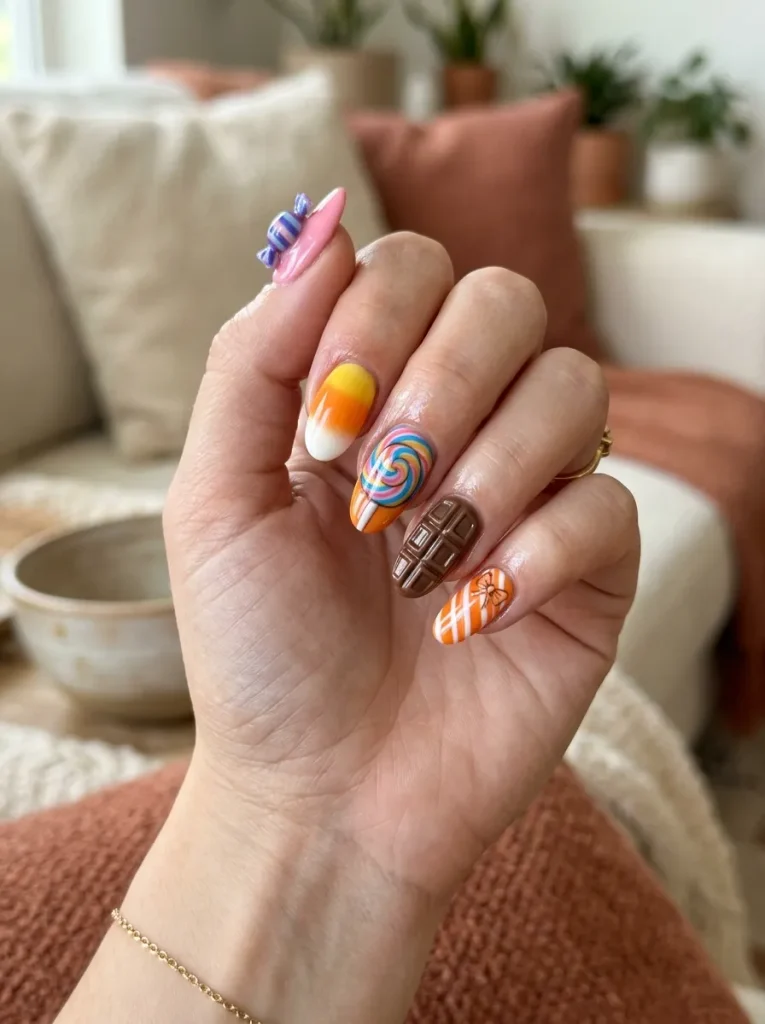
Cannot choose one candy? Put a different sweet on every nail. A candy-wrapper mix mani lets each finger be its own treat, from candy corn to a chocolate bar to a striped wrapper.
The trick to keeping it cohesive is a shared palette. Pick three or four candy colors and repeat them across the hand, so the busy set still reads as one idea. Here is one way to plan the five nails.
| Nail | Candy design | Colors |
|---|---|---|
| Thumb | Candy-corn ombre | Yellow, orange, white |
| Index | Chocolate-bar block | Brown, cream |
| Middle | Striped wrapper | Orange, white |
| Ring | Lollipop swirl | Orange, yellow |
| Pinky | Tiny wrapped sweet | Cream, brown |
14. Chocolate-Brown and Cream Candy-Bar Nails
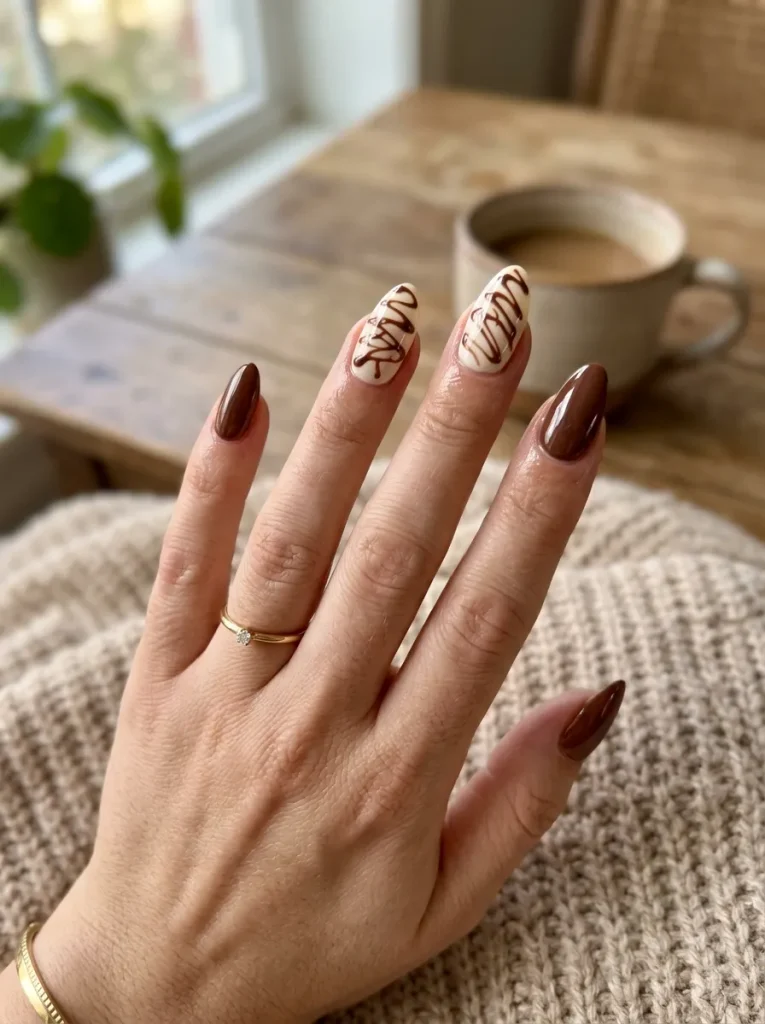
Candy is not all bright yellow and orange. Warm chocolate brown with cream reads like your favorite candy bar and gives you a richer, more grown-up sweet look.
The color pairing does the work, so the designs can stay simple. Tap below for the easy way to fake a chocolate drizzle.
🍫 Tap to reveal the chocolate-drizzle trick
15. Lollipop Swirl Accent Nails
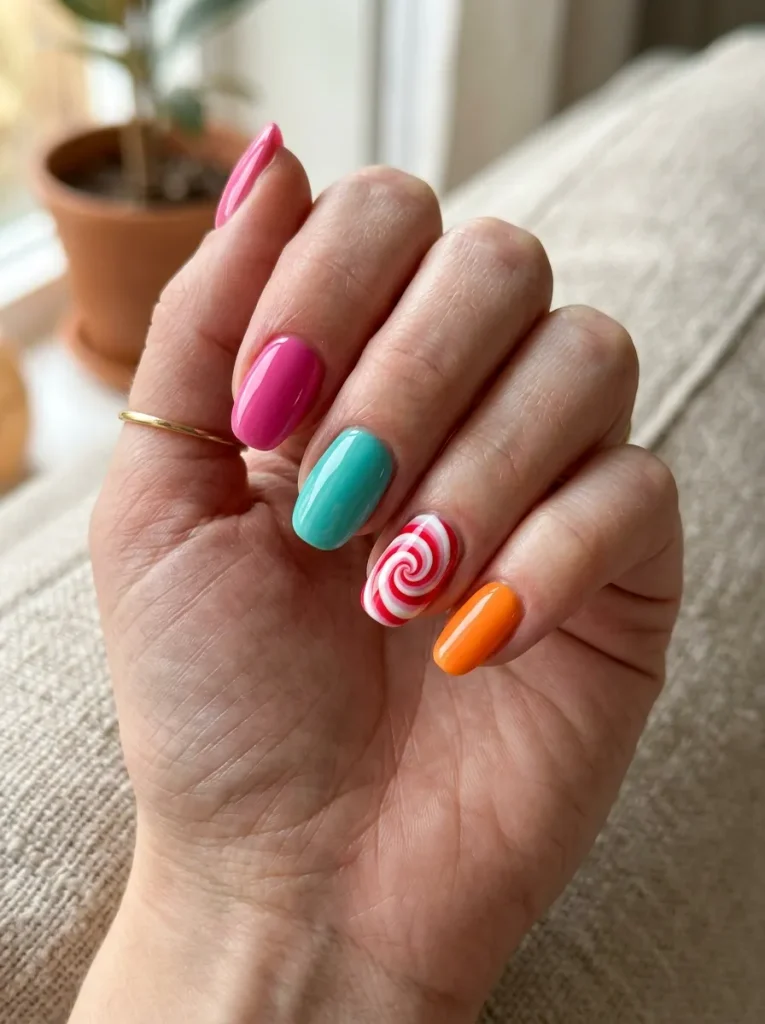
A swirl is one of the most satisfying little designs to paint, and it turns any nail into a lollipop. One swirled accent finger adds a pop of candy fun to an otherwise simple set.
On its own a plain nail can look unfinished, but a single spiral changes everything. Start a dot of color in the center and wind a second shade around it in a loose spiral, letting the two blend slightly at the edges. Keep the rest of the nails a solid candy shade so the swirl stays the star.
A plain solid-color accent nail, fine but a little flat next to the others.
A two-color lollipop swirl in the center turns it into the standout nail of the set.
16. Candy-Corn With a Glitter Accent Finger
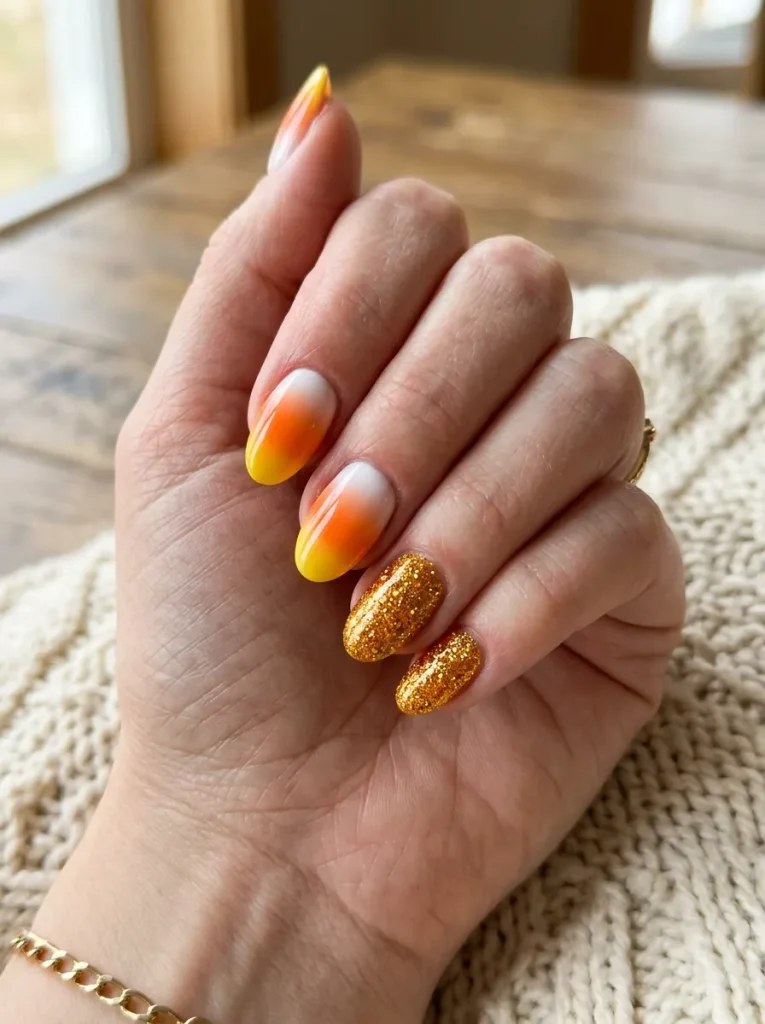
One sparkling nail can lift a whole candy-corn set. Keeping most nails a clean candy-corn ombre and turning a single finger into solid glitter adds shine without competing with the design.
The contrast is what works. The soft blended nails stay the main event, while one orange or gold glitter accent catches the light beside them. It is an easy way to make a simple manicure feel a little more done.
📌 Good To Know
Match the glitter to one color already in the candy corn, like orange or gold. Pulling the accent from the existing palette keeps the sparkle looking planned instead of random.
17. Pastel Candy Nails for a Sweeter Take
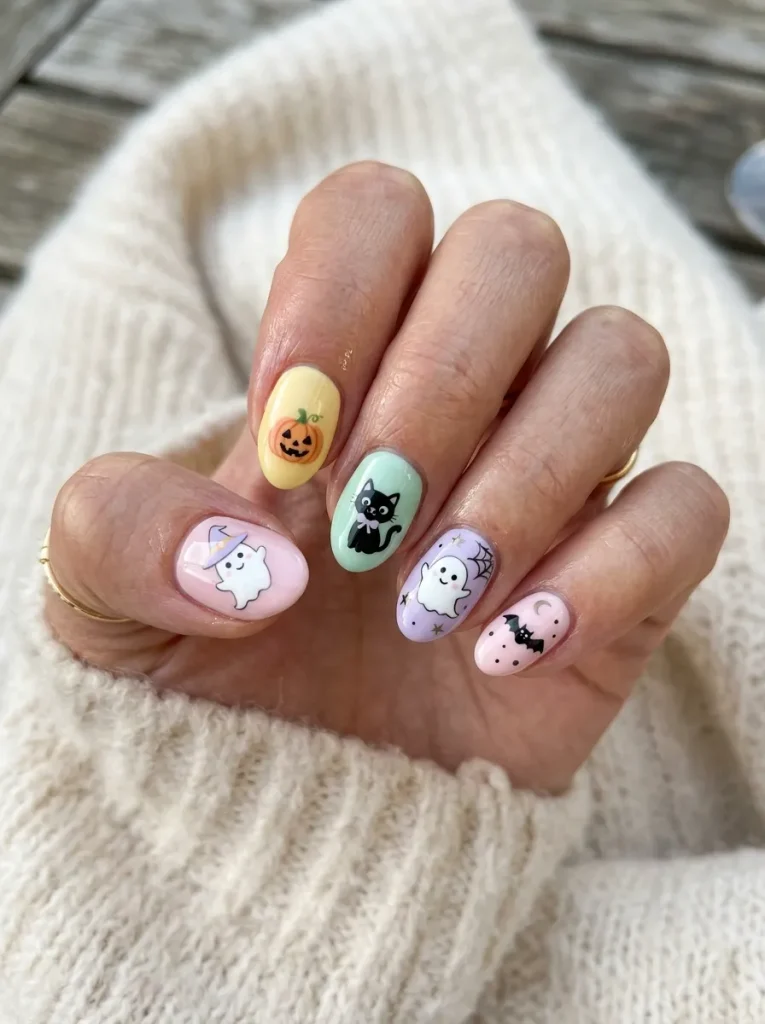
Not all Halloween candy is bold and dark. A soft pastel palette gives you a sweeter, dreamier candy look, all cotton-candy pinks, buttery yellows, and pale mint.
It is a lovely option if the classic orange and black feels too harsh for you. Tap through the steps below to build the softer version.
1 Pick a pastel base — tap for detail
2 Add a tiny motif — tap for detail
3 Seal soft and glossy — tap for detail
18. Candy-Corn Negative-Space Design
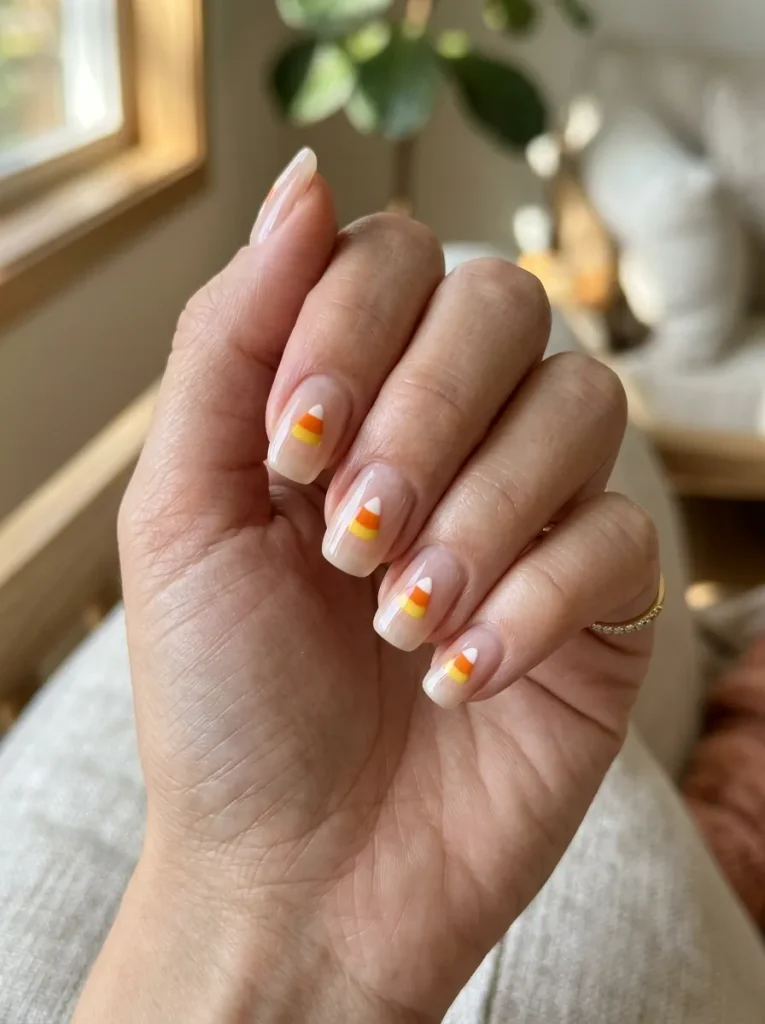
For a modern, minimal spin, let your bare nail do some of the work. A negative-space candy corn paints only the shape and leaves the rest of the nail clear, so the design floats.
The empty space is the whole idea. Instead of filling the nail, you paint a single candy-corn triangle or a slim candy-corn tip and leave the background sheer. It looks clean, current, and much more subtle than a full set.
| Negative space | Full coverage |
|---|---|
| Minimal, modern, and subtle. | Bold and clearly festive. |
| Grows out less noticeably. | Regrowth shows sooner. |
| Wears well past Halloween. | Reads strictly seasonal. |
19. Chrome or Foil Candy-Corn Tips
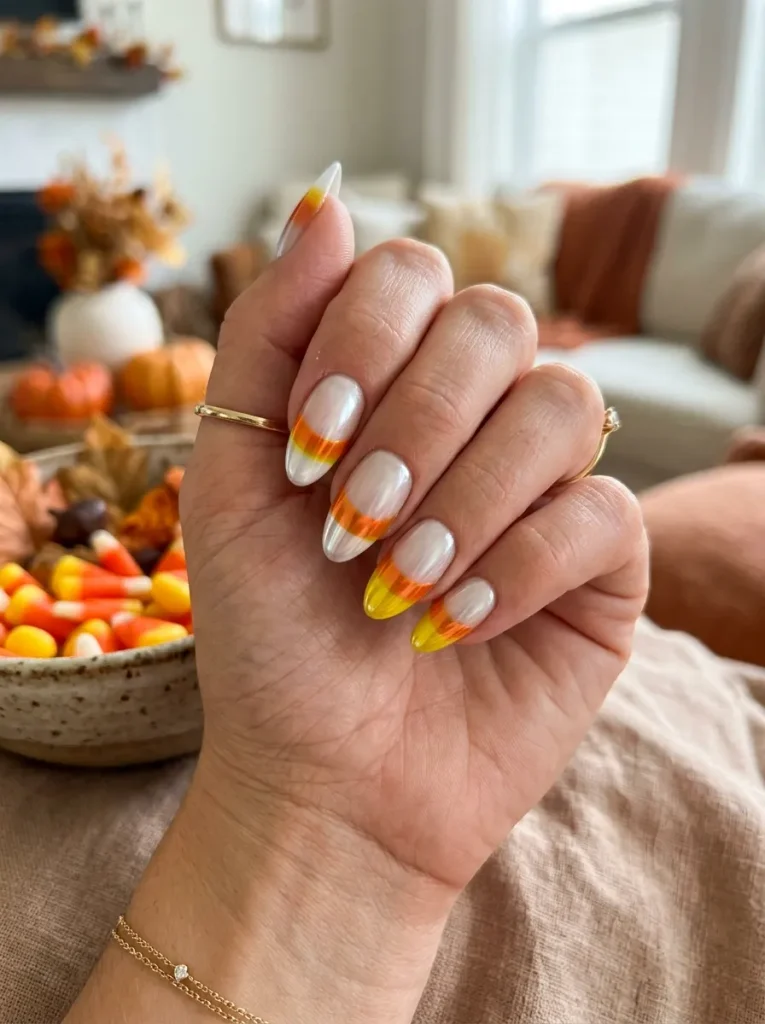
Give candy corn a high-shine, futuristic finish with chrome. A metallic foil over the candy-corn colors makes a familiar design look brand new and expensive.
The mirror-like shine is the upgrade. Rub chrome powder or press nail foil over the yellow, orange, and white so the whole tip gleams and shifts in the light. It takes a familiar design somewhere unexpected with almost no extra drawing.
Apply chrome powder over a fully cured, glossy base. A tacky or matte surface underneath dulls the mirror shine every time.
20. Candy-Corn on a Clear Jelly Base
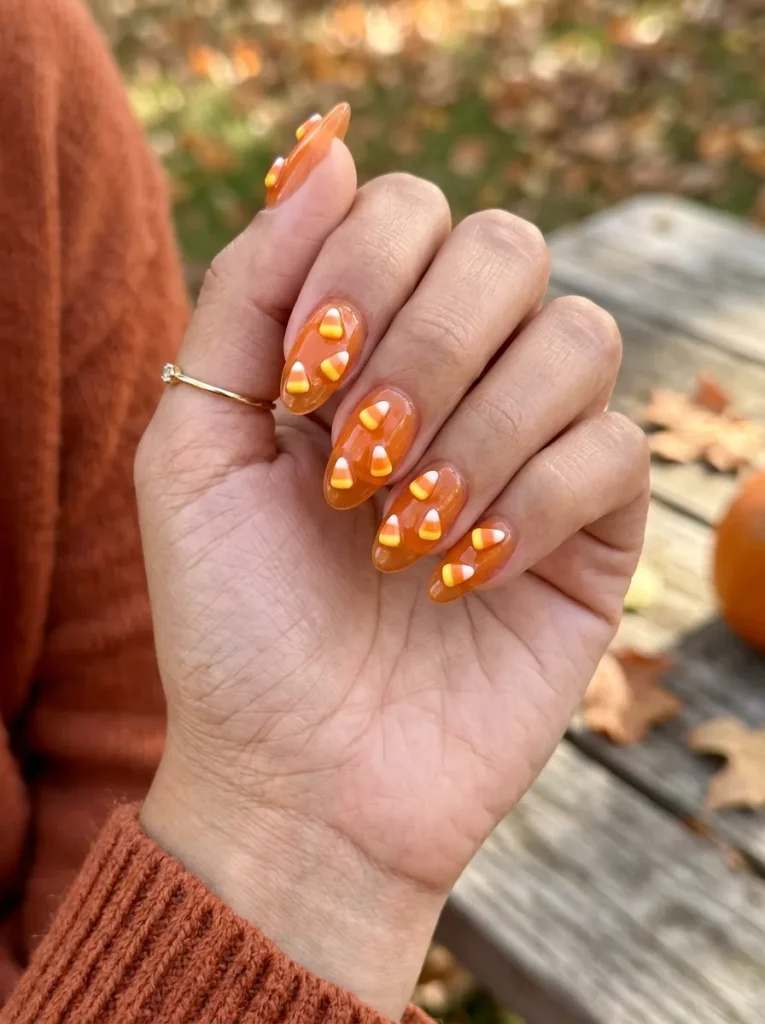
The jelly nail trend gives candy corn a fun, translucent glow. A sheer tinted base makes the whole nail look like a squishy piece of candy, glossy and see-through.
Tap below for the quick guide to getting that jelly finish.
Read the jelly-nail how-to +
Start with a sheer tinted jelly polish, a translucent orange or yellow, and build two or three thin coats until it glows without turning fully opaque.
Add small candy-corn shapes or dots on top in solid color so they sit clearly against the see-through base.
Finish with a thick glossy top coat, which is what gives jelly nails their signature squishy, candy-like shine.
21. A Full Halloween Candy Mix Set
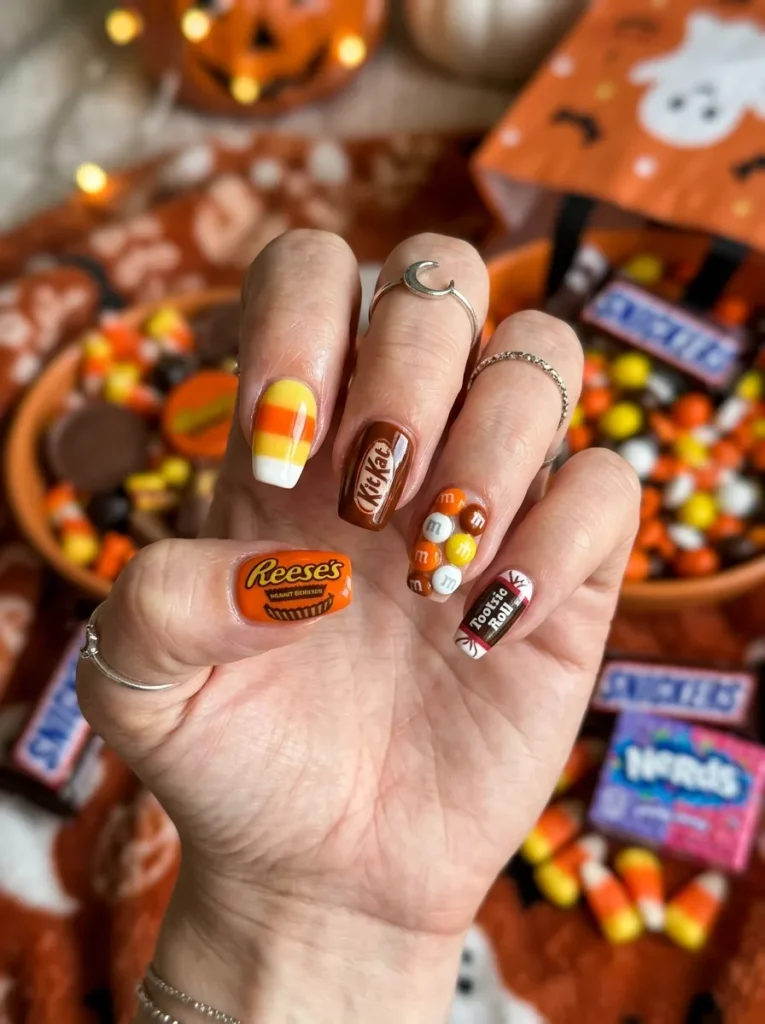
For the boldest candy nails on this list, commit to a full set where every nail is a different sweet. A candy mix set turns your whole hand into a little trick-or-treat bag, packed with color and detail.
This is the advanced end of the list, pulling several techniques into one theme. Tap either panel to weigh it up before you start.
22. Press-On Candy Nails for No Commitment
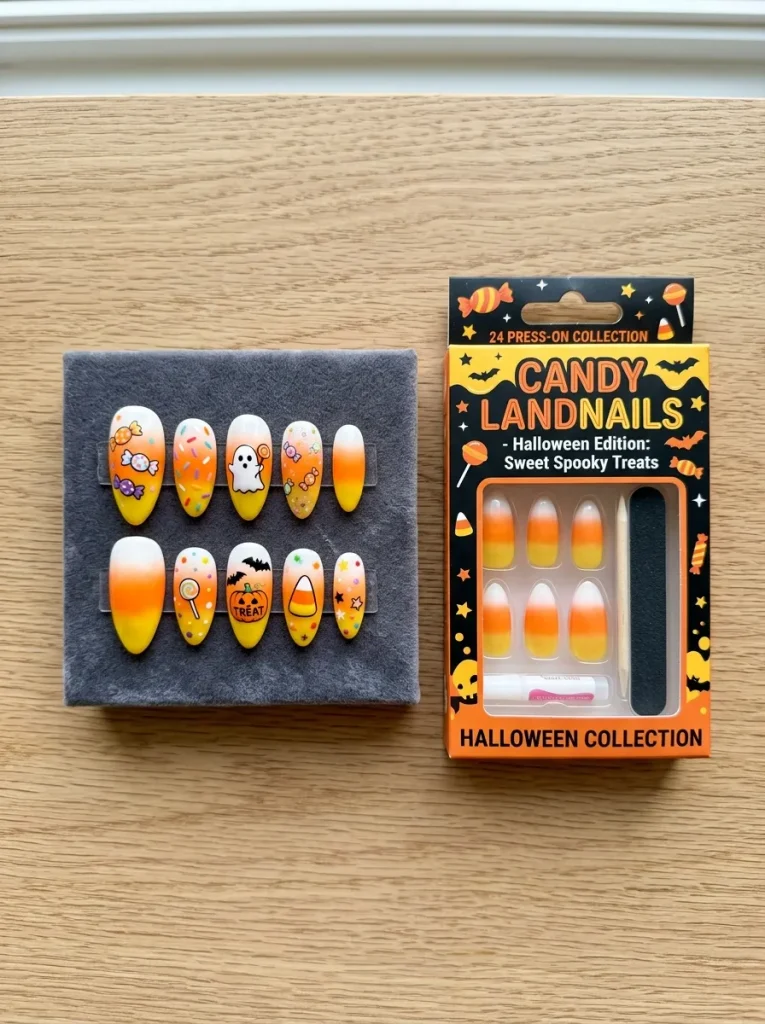
Not everyone wants to hand-paint tiny candy corn or sit for a gel set, and press-ons fix that instantly. A set of ready-made candy press-ons gives you full salon-style art in minutes at home.
The appeal is speed and freedom. You get detailed designs you could never paint yourself, they pop off after the party, and many can be reused. Here is how they stack up against the other ways to get the look.
| Press-ons | Painted at home | |
|---|---|---|
| Time | Minutes | An hour or more |
| Detail level | Salon-style | Depends on skill |
| Lasts | A few days | Up to a week or two |
| Reusable | Often yes | No |
23. Deep Wine and Candy-Corn for an Elegant Twist
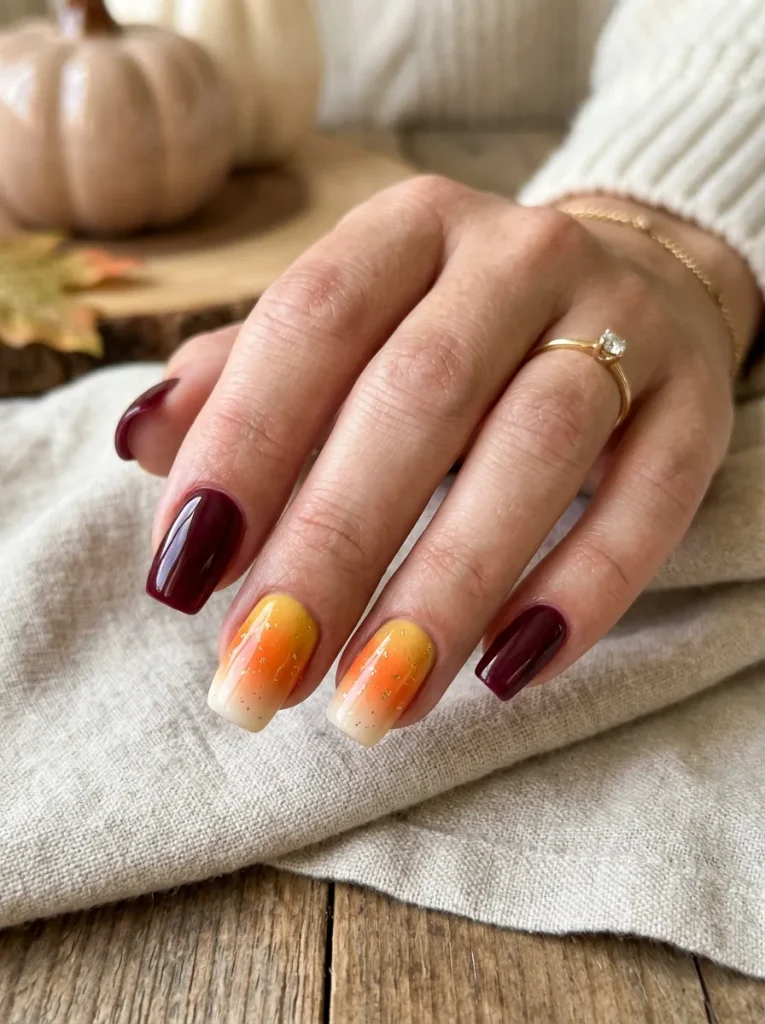
For a more grown-up candy look, pair the sweet colors with something richer. A deep wine base alongside candy-corn accents feels elegant and moody rather than childlike.
The contrast is what elevates it. The dark, sophisticated wine grounds the bright candy corn, so the whole set looks dressy enough for an autumn dinner. It carries you right through the season and even into the holidays, which makes it one of the most versatile looks here.
24. Glow-in-the-Dark Candy Nails
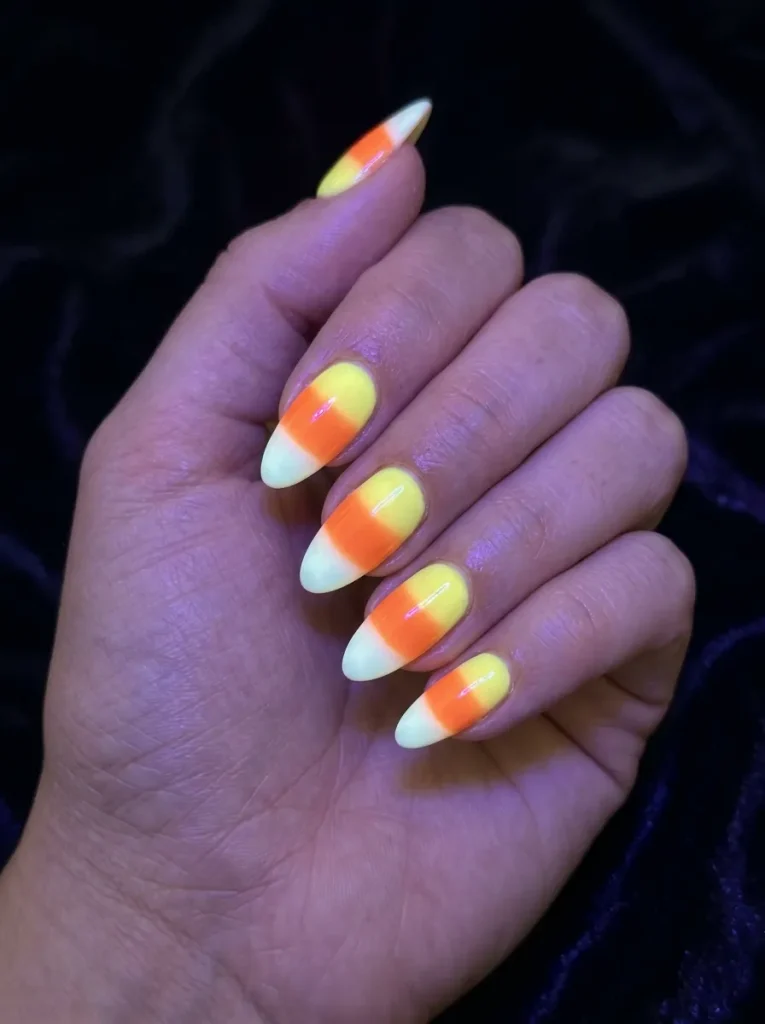
Here is a candy look with a hidden surprise. Glow-in-the-dark candy nails look like a normal sweet manicure in daylight, then light up in the dark for a fun party reveal.
Tap each question to see how it works.
25. How to Keep Candy Nails Neat and Long-Lasting
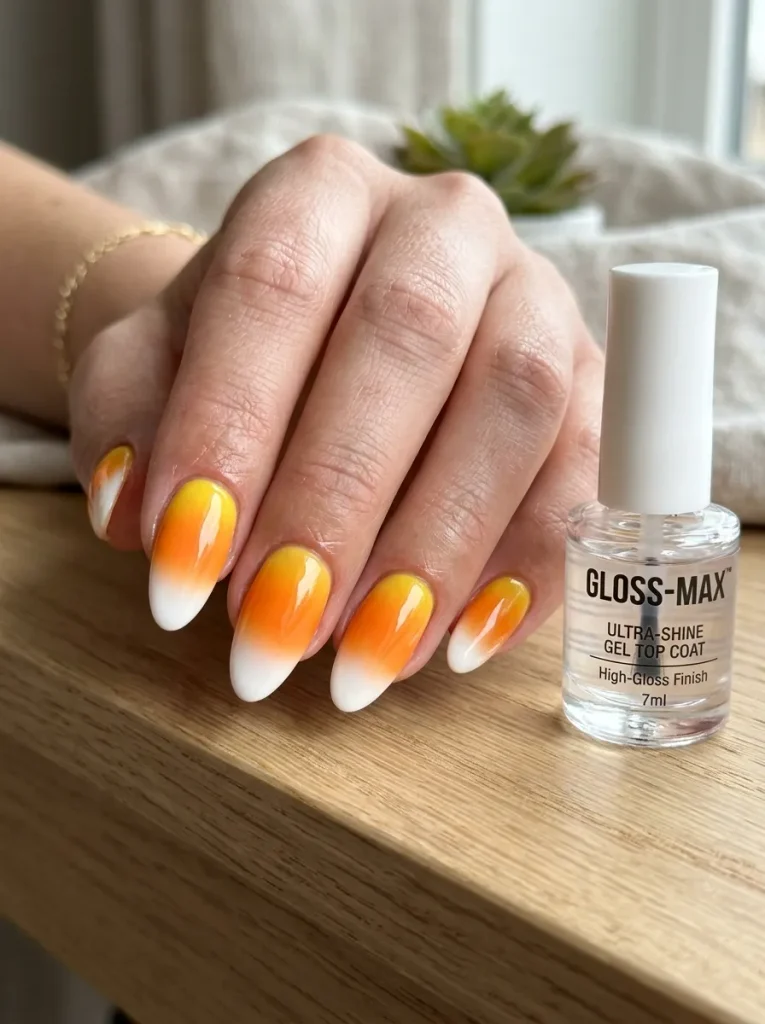
All that blending and detail deserves to last, and a few simple habits make the difference. Good prep and a proper seal keep candy nails looking fresh from the first party to the last handful of candy.
Start with a clean, buffed nail and a base coat so nothing sits between the polish and the surface. Work in thin layers rather than one thick one, let each dry, and always run your top coat along the very tip of the nail. A quick top-coat refresh after a couple of days brings the shine right back.
Pro tip
Blended designs like candy-corn ombre chip most at the tip, where the colors are thinnest. Seal the free edge with every top coat and those soft gradients hold far longer.
A Sweet Finish to Your Halloween Look
Candy nails are proof that spooky season can be more sweet than scary. The colors are warm, the designs are forgiving, and a soft candy-corn blend flatters just about everyone, whether you paint it yourself or reach for press-ons.
Ease in wherever feels right. A simple ombre or a single accent nail is a lovely place to begin, and the glazed, chrome, and full mix sets are waiting for when you want to play. However you wear your Halloween candy nails, they turn getting ready into part of the treat.
Pin this to your beauty board and you will always have a candy design on hand when the craving to switch up your nails hits.