
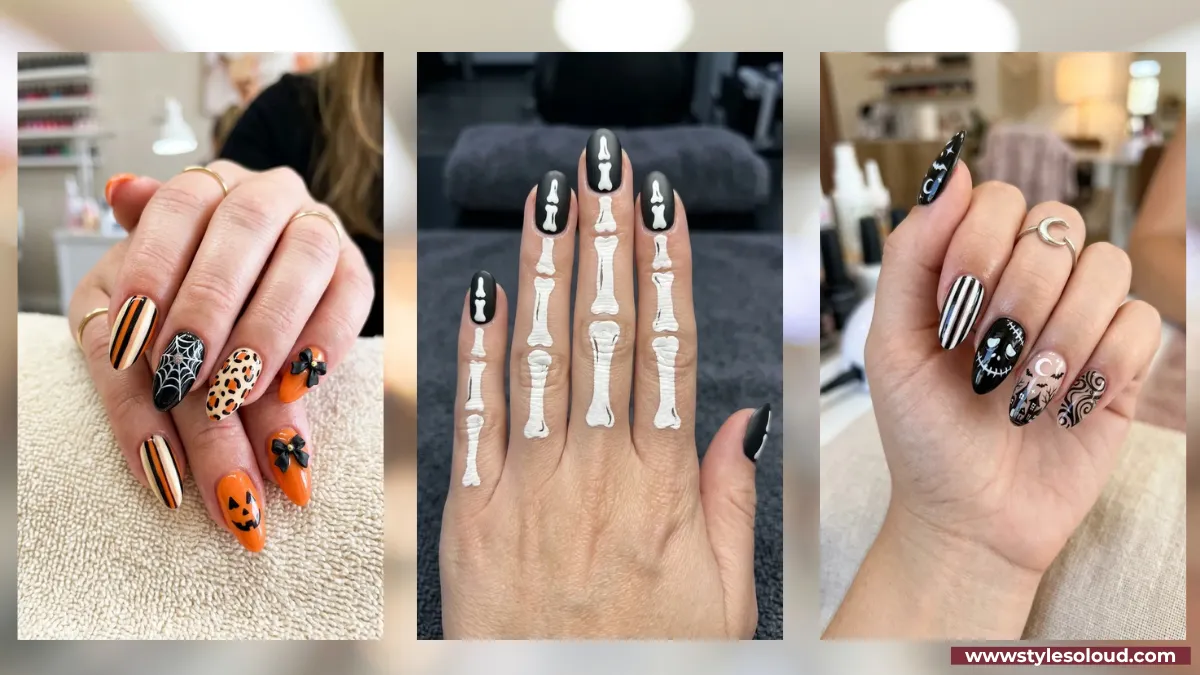
Your outfit and your candy bowl are ready, but your nails are still bare. Halloween is the one time of year when a little skull or a spiderweb on your fingertips feels completely right, and you do not need to be a nail artist to pull it off.
The best part is how much range there is. A single ghost face on an accent nail takes five minutes. A full set of glittery black coffin nails with tiny painted skulls is pure drama. Somewhere in between sits every level of effort, from a quick swipe of matte black to a mismatched mani where every finger tells a different spooky story.
These 31 Halloween nail art ideas cover all of it, sorted from the easiest at-home looks to the boldest salon-worthy sets. You will find simple how-tos, cute cartoon designs, chic minimal options, and full glam. Pick the ones that match your skill and your mood, and give your fingertips their moment this season.
1. Glossy Black Coffin Nails as Your Base
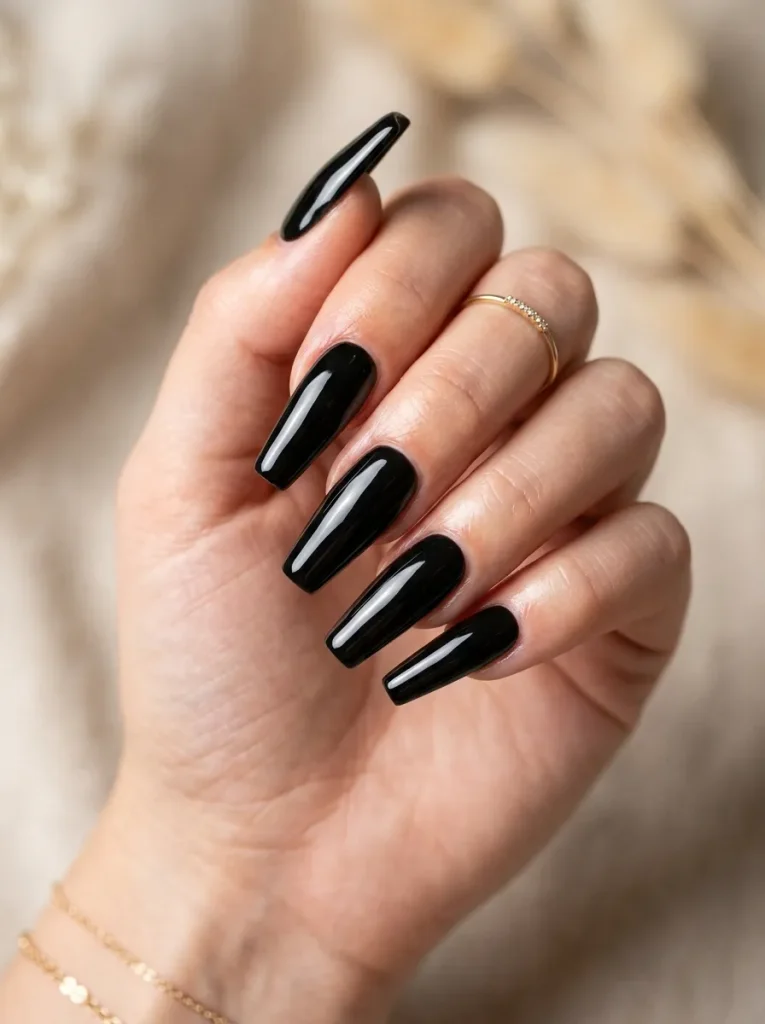
Before any design, start with the shape and shade that make everything look expensive. Long glossy black coffin nails are a Halloween statement all on their own, no art required.
The high-shine black reads sleek and a little witchy, and the coffin shape gives you a dramatic canvas. This is also the perfect base to build on, since a single painted accent pops beautifully against solid black. If you do nothing else, a clean, glossy black set already feels like the season.
2. Orange-and-Black Spiderweb Tips
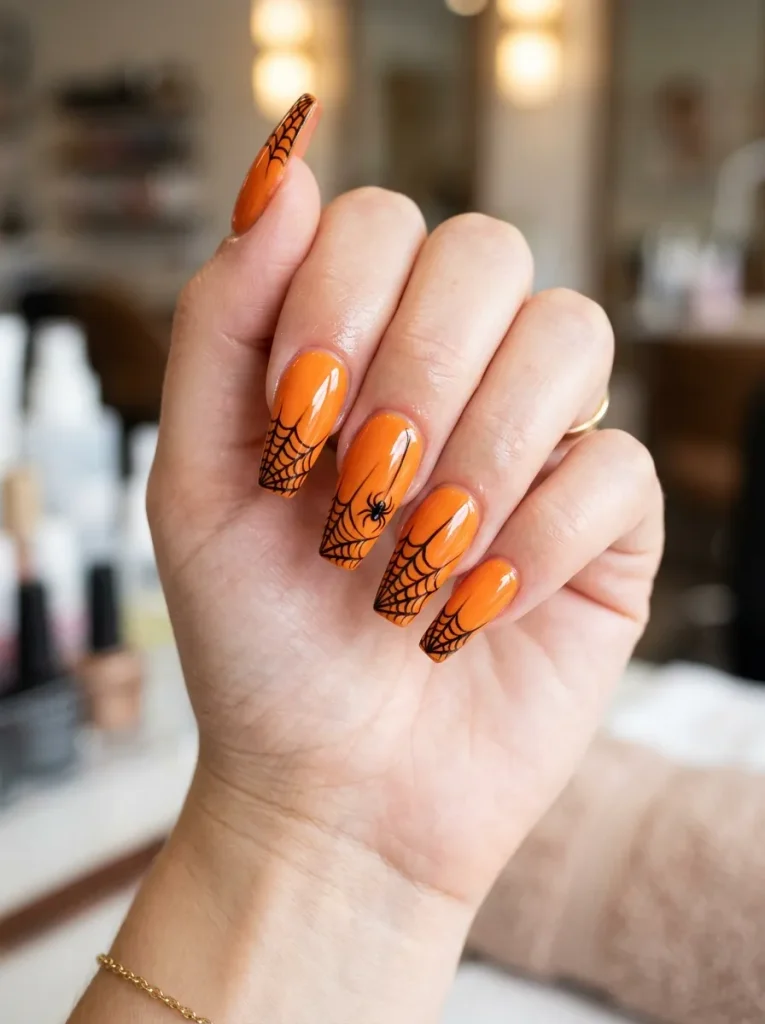
Few designs say Halloween as fast as a spiderweb, and it is easier to paint than it looks. An orange base with a black web spun out from one corner is a classic that always lands.
The web is really just a few curved lines crossing shorter ones, so a steady hand and a thin brush are all you need. Start the lines from the top corner of the nail and fan them out, then connect them with little arcs. Add one tiny spider if you want, or leave the web clean.
💡 Quick Tip
Use a striping brush or even a toothpick for the web lines. The thinner the tool, the more delicate and professional the web looks, and thin lines hide small wobbles.
3. A Simple Ghost-Face Accent Nail
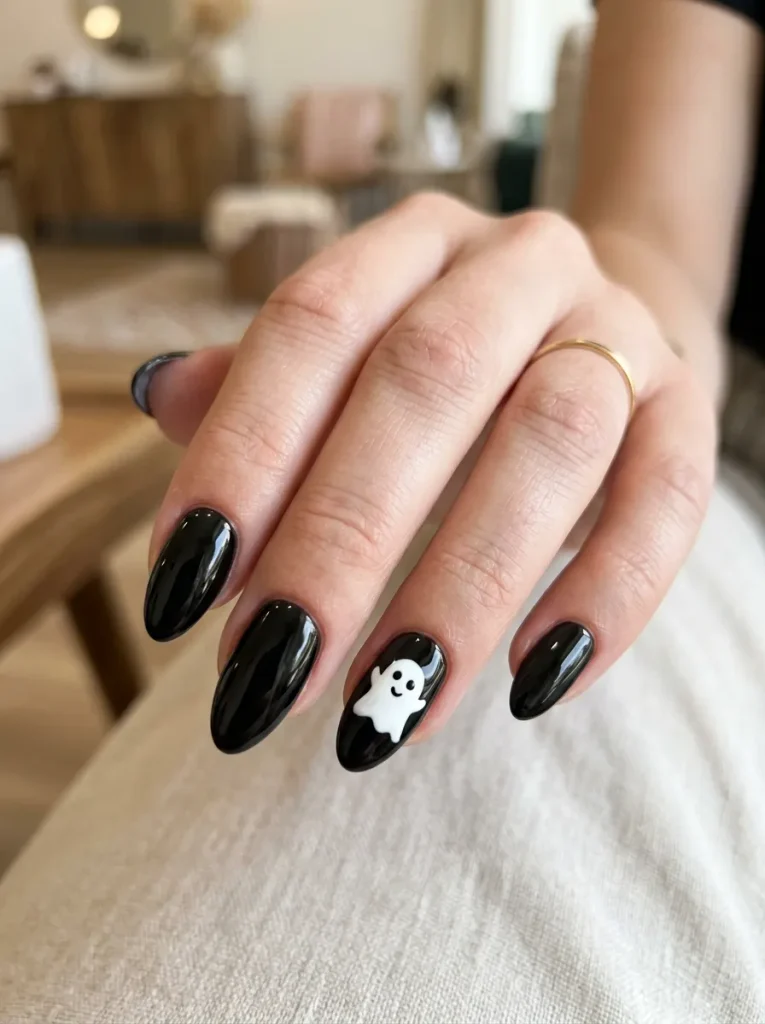
One friendly ghost is often all a manicure needs. A little white ghost with two dot eyes on a single accent nail is beginner-friendly and endlessly cute.
It comes together in a few quick steps, and even a slightly wobbly ghost still reads adorable.
Paint the body
A white blob with a wavy bottom edge over your base.
Add the face
Two black dots for eyes and a small oval mouth.
Seal it
A glossy top coat to smooth and protect it.
4. Tiny Bats Over a Nude Base
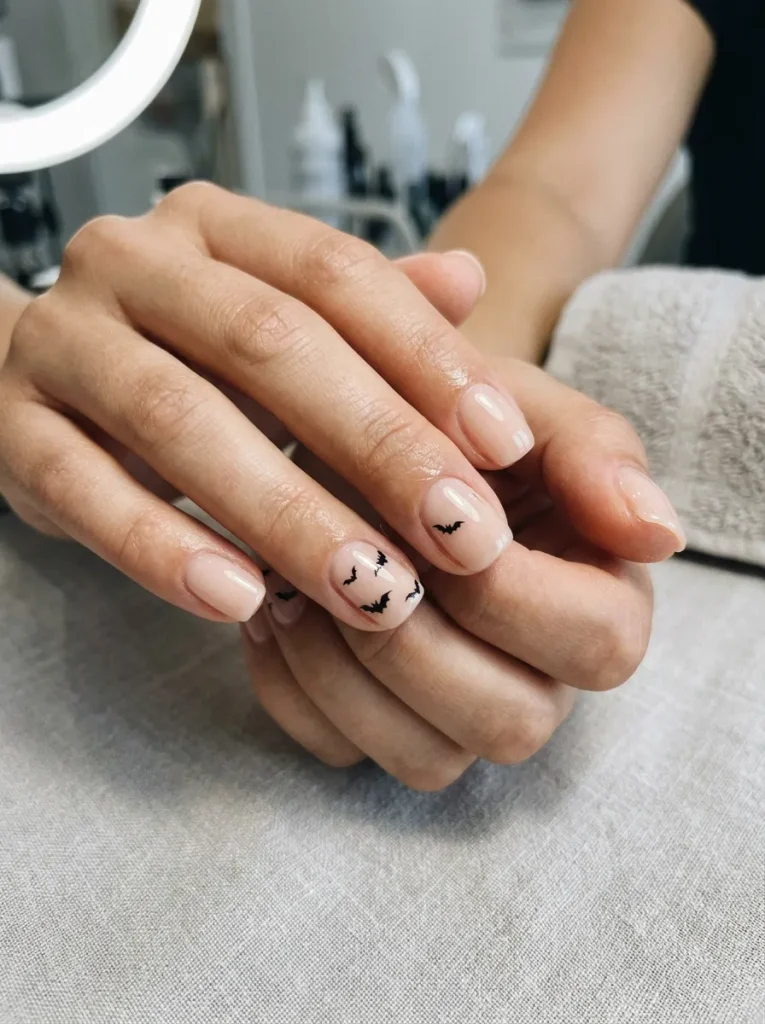
For a subtle look that still nods to Halloween, scatter a few small bats over a sheer nude base. It is understated enough for work and clearly seasonal up close.
A bat is simpler than it seems: two little humps for the wings and a small rounded body in the middle. Space two or three across a couple of accent nails and leave the rest bare or soft pink. The result feels chic rather than costume-y.
What you’ll need
5. Classic Candy-Corn Ombre
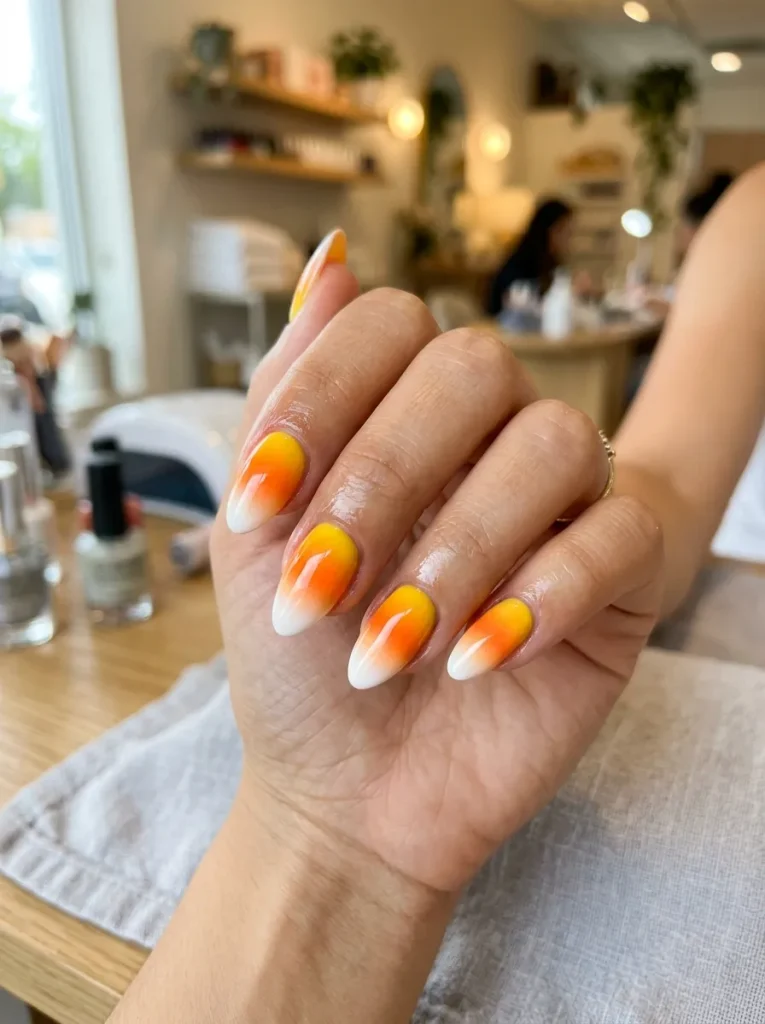
Nothing says Halloween candy like candy corn, and its three colors make a sweet ombre. Yellow at the base, orange in the middle, and white at the tip blend into a nostalgic, cheerful look.
The magic is in the blending. Paint the three stripes, then gently dab where they meet with a small sponge to soften the lines while the polish is still wet. Done well, the colors melt into each other instead of sitting in hard bands.
Three flat stripes of yellow, orange, and white with hard, obvious lines between them.
A soft sponged blend where the colors melt together into a smooth candy-corn ombre.
6. Matte Black With One Glitter Accent
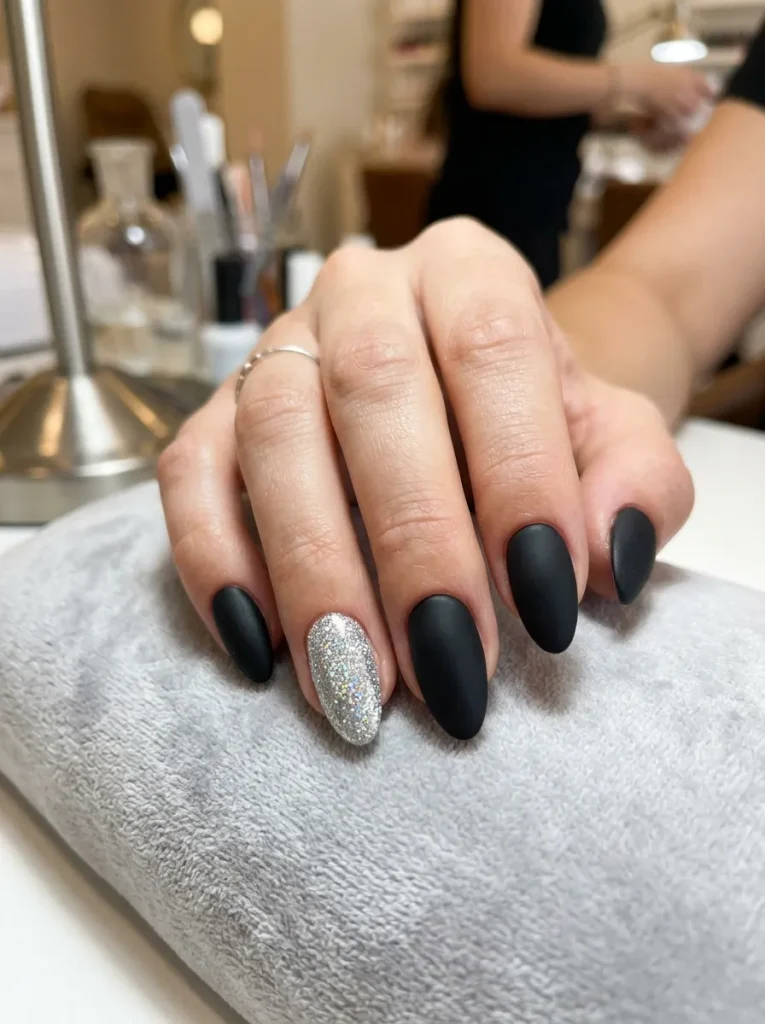
Sometimes the most striking look is the simplest one done well. A full set of matte black nails with a single glitter accent finger is effortless, moody, and very Halloween.
The contrast is what makes it. Matte black soaks up the light while one sparkling nail catches it, so the design feels intentional with barely any effort. A matte top coat over black polish gives you that velvety finish, and a black or silver glitter on the ring finger completes it.
| Matte black | Glossy black |
|---|---|
| Moody, velvety, hides ridges. | Sleek, high-shine, shows every bump. |
| Makes glitter pop harder. | Blends more with shiny accents. |
| Shows dust and fingerprints. | Wipes clean and stays shiny. |
7. Little Pumpkin Faces on Short Nails
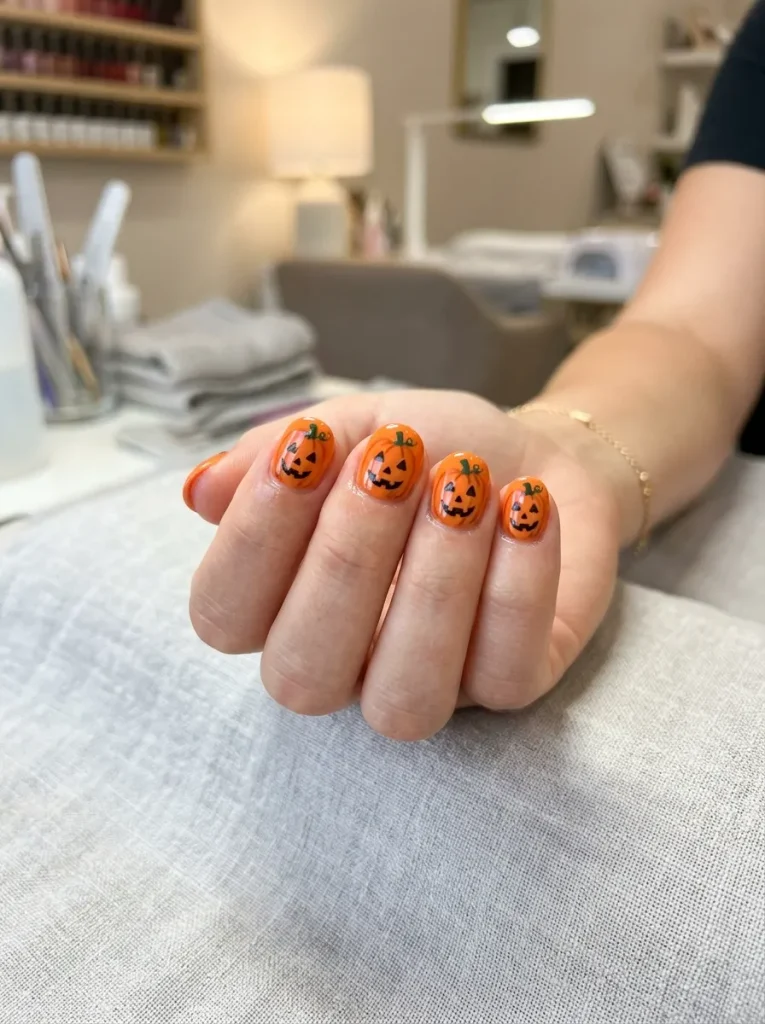
You do not need long nails for cute Halloween art. A tiny jack-o’-lantern face fits perfectly on a short, rounded nail and looks adorable.
Paint the nail orange, add two small triangle eyes and a smiling zigzag mouth in black, then a little green stem at the top. On short nails the simple face reads clearly without crowding. It is proof that a great Halloween manicure has nothing to do with length.
8. Black-and-White Striped “Spooky Man” Nails
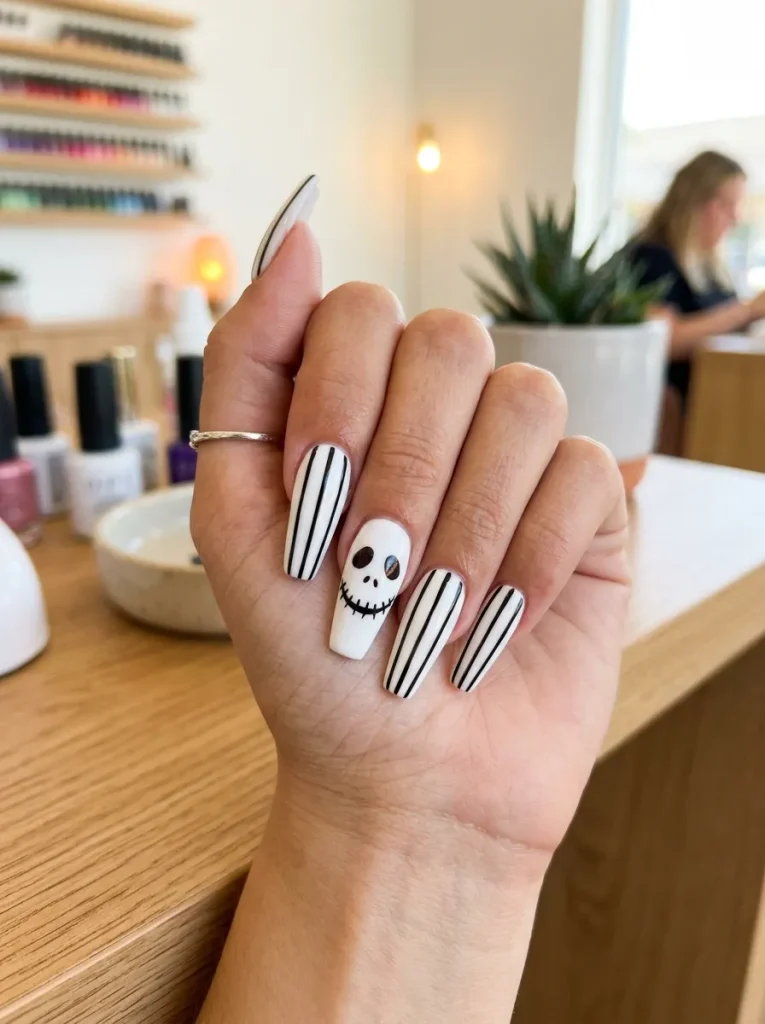
That famous striped skeleton character from a certain stop-motion film inspired a whole nail trend, and you can capture the look without copying it exactly. Vertical black-and-white stripes plus a simple stitched grin read as spooky-fun on their own.
Paint the base white, add thin vertical black stripes across a couple of nails, and give one accent nail a friendly stitched-mouth face. Keep the stripes slightly uneven for a hand-painted, storybook feel.
Paint a clean white base and let it dry fully.
Add thin vertical black stripes with a striping brush.
Paint a stitched-mouth face on one accent nail.
9. A Cute Cartoon Skeleton Face
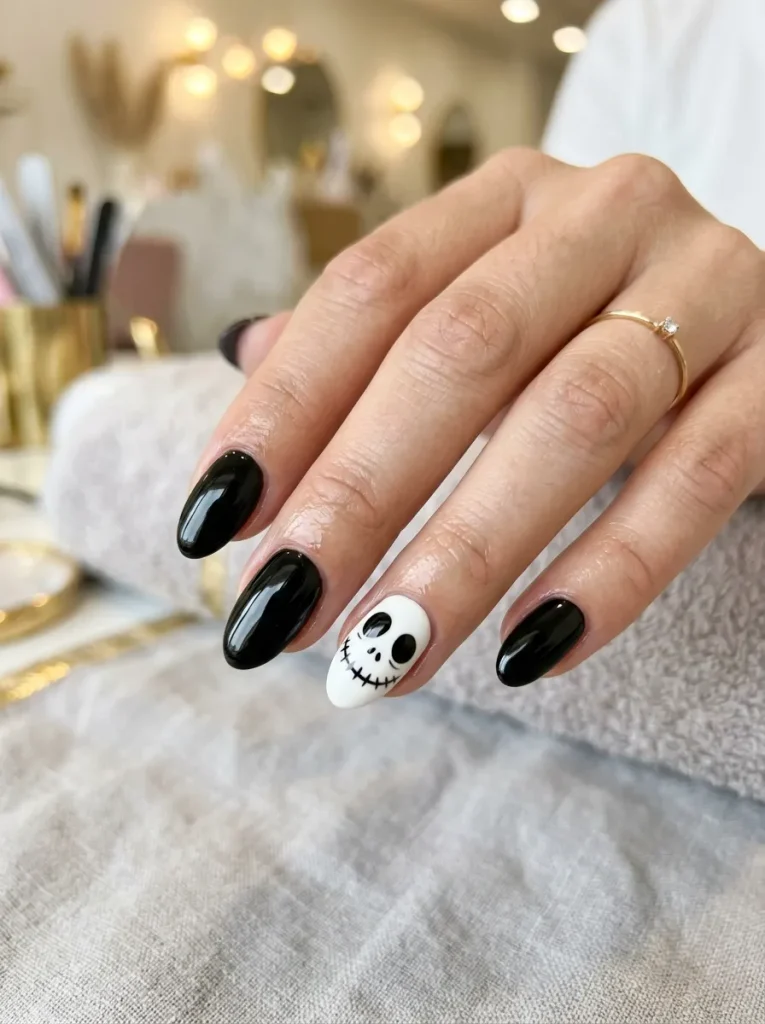
A friendly cartoon skeleton face is a Halloween favorite because it is spooky and sweet at once. A white nail with two big black eye sockets and a stitched smile has real personality.
The soft, rounded features keep it cute rather than scary, which suits almost anyone. It is a little more involved than a ghost, so it helps to know the trade-offs before you commit a whole set to it.
10. Purple and Black Galaxy Nails
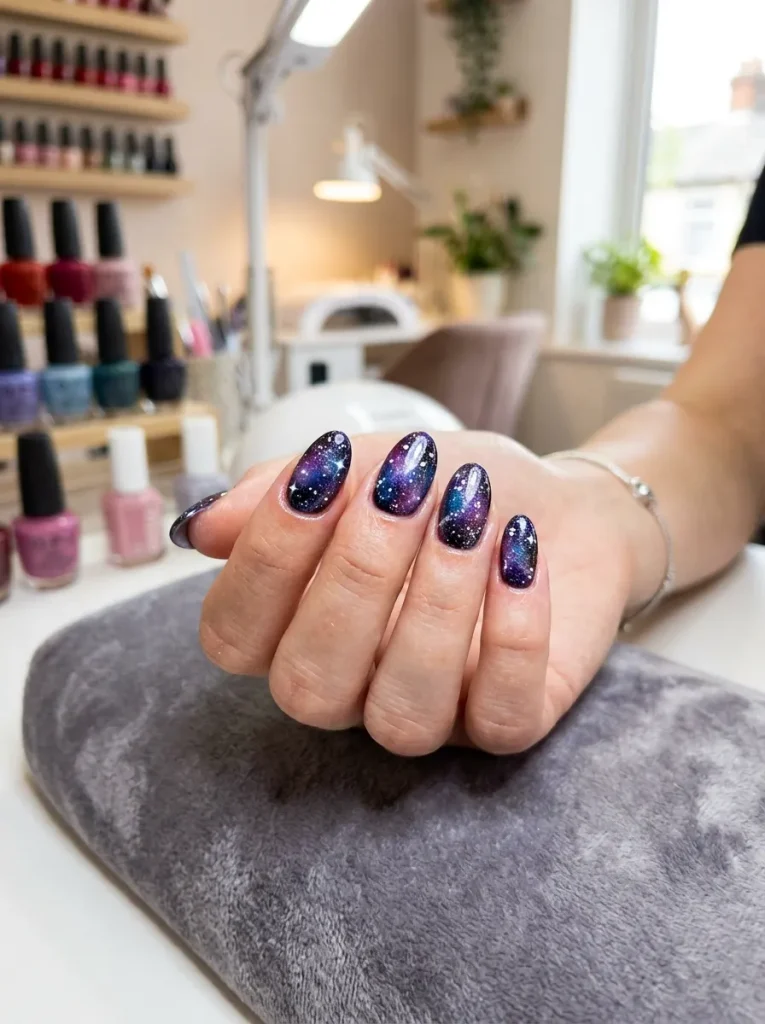
For something spooky but a little dreamy, galaxy nails blend deep purple, black, and specks of white into a mysterious night sky. It is Halloween without a single pumpkin or ghost.
Sponge purple and black together over a dark base, then flick on tiny white dots for stars. The soft, cloudy blending hides mistakes, which makes this look more forgiving than it appears. A shimmer top coat adds the final cosmic sparkle.
“Galaxy nails are the most forgiving spooky design there is. The cloudy blending turns every little mistake into another star.”
11. Neon Green French Tips With Black
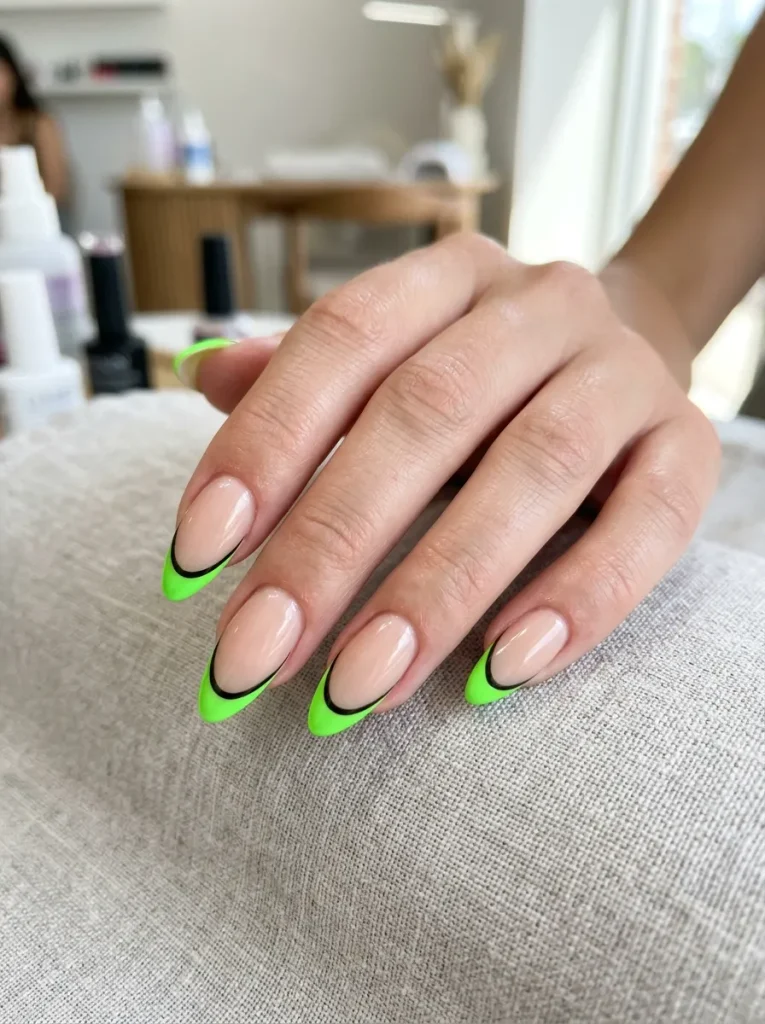
French tips get a Halloween makeover with one bright twist. Swapping the classic white tip for neon green outlined in black turns a timeless shape into something electric and spooky.
The outline is the trick that makes it pop. Paint a neon green tip, then trace a thin black line along the smile line and the very edge so the color looks framed and sharp. On a nude base it feels modern and clean rather than costume-y, which is why this one photographs so well.
Outline the green tip in thin black for a crisp frame.
Keep the base a clean, sheer nude.
A thick, uneven tip that looks heavy.
Skipping the outline, which flattens the whole look.
12. Blood-Drip Tips Over Nude
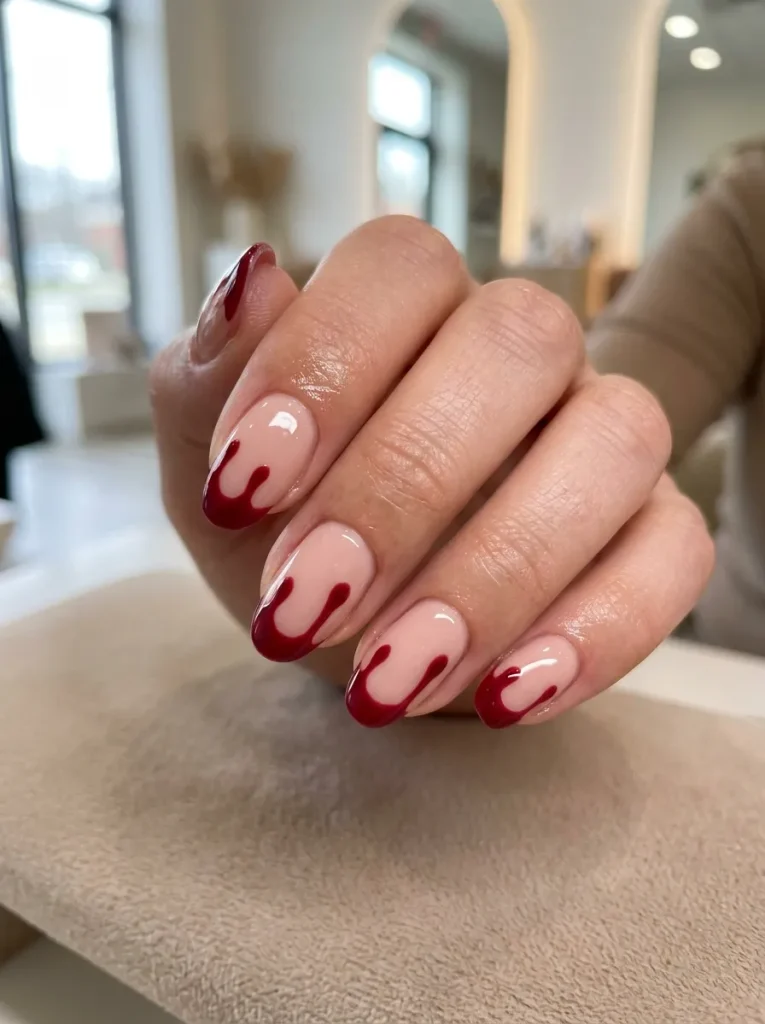
Few designs are as instantly Halloween as blood drips. Red “drips” running down from the tips over a nude base look dramatic and are genuinely simple to paint.
The effect comes from a dotting tool. Load red polish at the tip, then pull small teardrops downward so they look like they are running. Vary the length of each drip so it looks natural rather than uniform. Here are the questions that come up most with this one.
❓ How do I get clean drips?
Use a dotting tool or a toothpick and pull slowly. Rushing makes the lines thick and blobby.
❓ What red looks most like blood?
A deep, slightly dark red reads more realistic than a bright cherry red.
❓ Can I make it less gory?
Swap red for black, green, or purple drips for the same effect with a cuter, less bloody feel.
13. A Mismatched Halloween “Mix” Mani
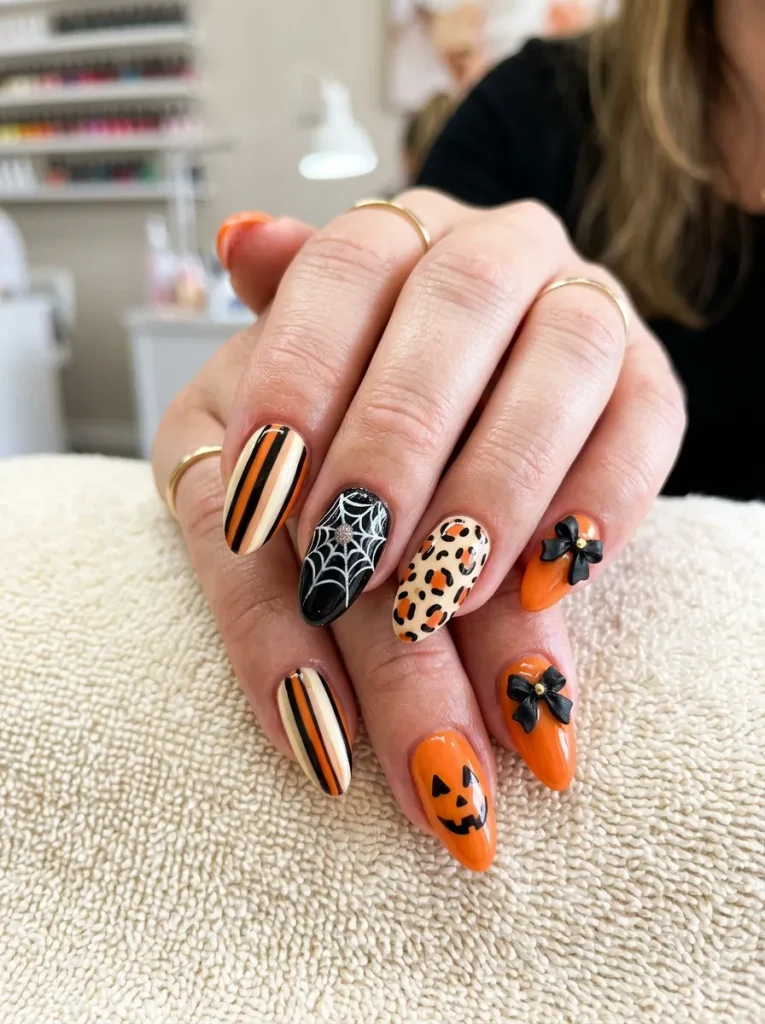
Cannot pick just one design? Do not. A mismatched mani where every nail is different is one of the most fun Halloween nail art ideas, and it lets you show off several looks at once.
The trick to keeping it cohesive is a shared color story. Choose two or three colors, say orange, black, and cream, then vary the design on each nail: a pumpkin here, stripes there, a web, a bow, a leopard print. Because the palette stays consistent, the whole hand looks styled instead of chaotic.
| Nail | Design idea | Color |
|---|---|---|
| Thumb | Pumpkin face | Orange |
| Index | Vertical stripes | Black + cream |
| Middle | Spiderweb | Black on nude |
| Ring | Leopard spots | Orange + brown |
| Pinky | Tiny bow | Black |
14. Leopard Print in Orange and Brown
Leopard print is not just for fall clothes. In warm orange and brown, those spots read as a subtle, chic Halloween look that skips the obvious motifs entirely.
The spots are forgiving because they are meant to be irregular. Paint an orange or nude base, add small brown blobs, then outline part of each blob with a broken black ring. No two spots need to match, which makes this one surprisingly relaxing to paint.
- ▸Start with an orange or warm nude base.
- ▸Dot on irregular brown blobs, spaced apart.
- ▸Outline part of each blob with broken black lines.
- ▸Leave the spots uneven for a natural print.
15. Skeleton Hand and Bones Nails
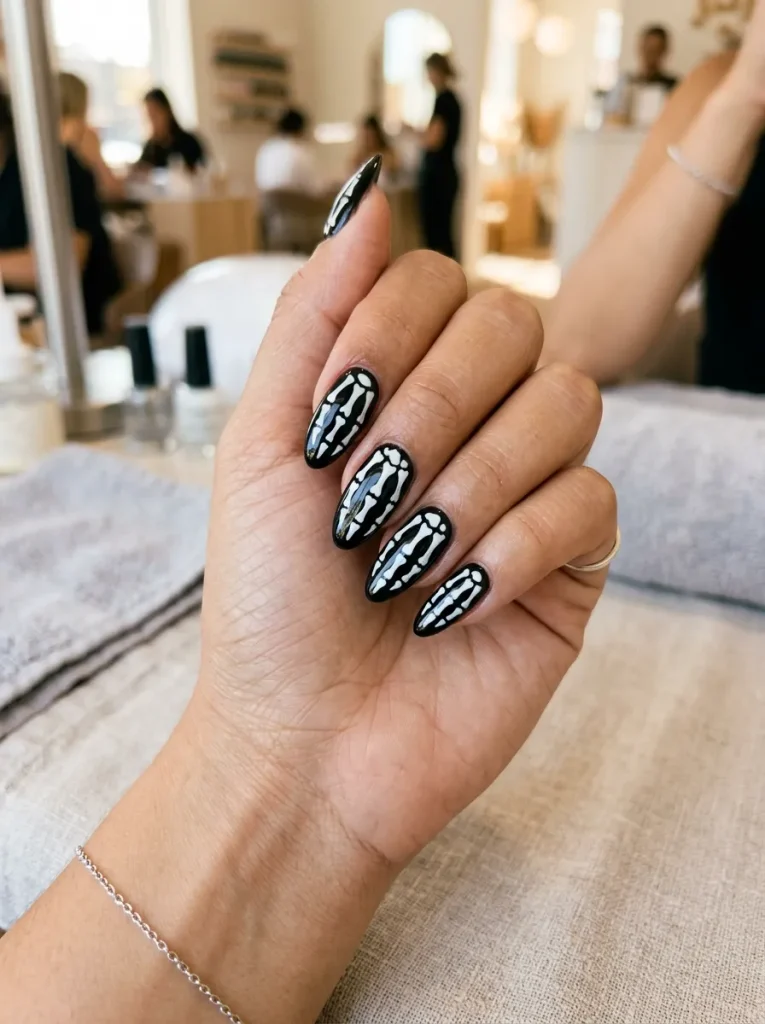
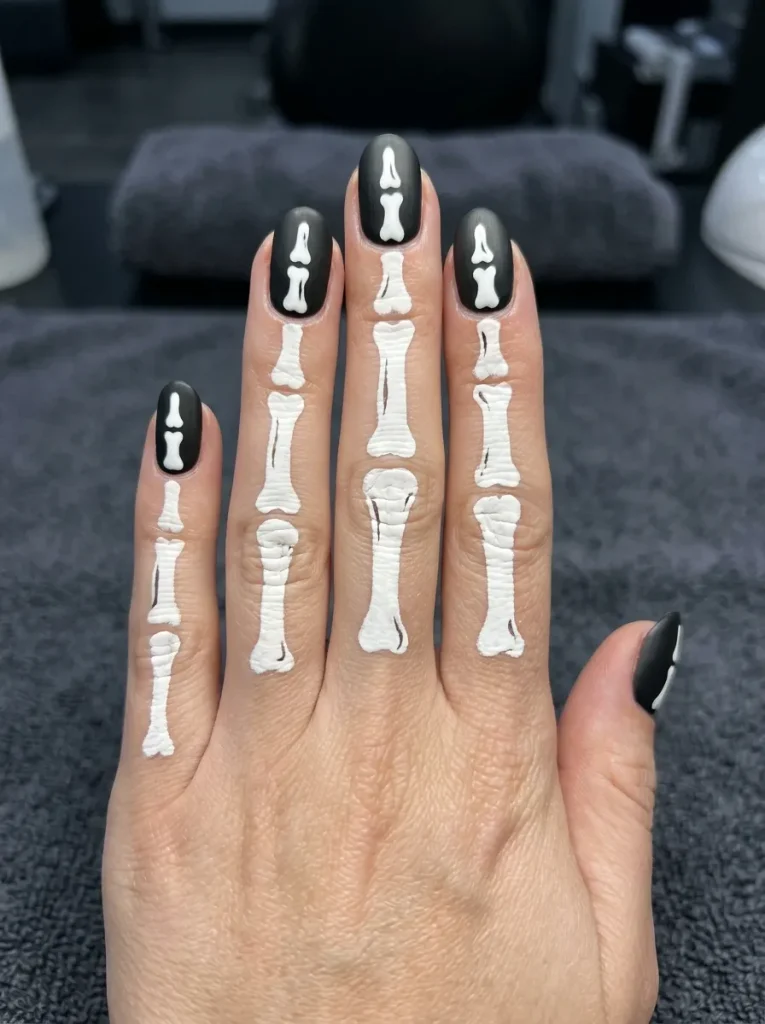
For a bold, anatomical look, paint bones down your nails so your hand looks like a skeleton. Little white bones on a black or nude base are dramatic and a real conversation starter.
Line the bones up so they run from your knuckle down each nail, and the effect ties the whole hand together into one image. It takes patience and a steady hand, but the payoff is one of the most striking sets on this list.
Line the bones up across all five nails so they read as one skeleton hand, not five separate designs.
16. Glitter Skull Accent on Clear
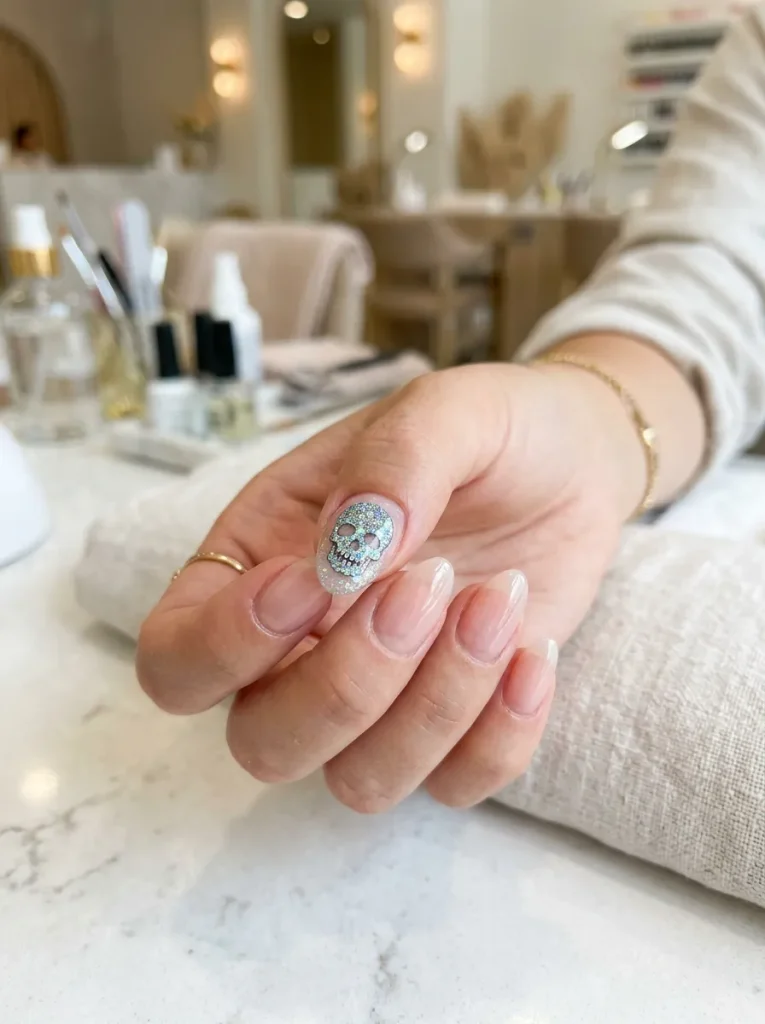
A skull sounds spooky, but done in glitter over a clear nail it turns almost pretty. A shimmering skull floating on a sheer base is a favorite for good reason: it is glam and eerie at once.
The clear base is what makes it special. A holographic or iridescent glitter shaped into a small skull looks like it is suspended in ice. Paint the skull outline first, fill it with fine glitter, then seal it under a thick glossy top coat so it glows.
📌 Good To Know
Keep the skull on one or two accent nails, not every finger. Against solid black or clear nails, a single glitter skull reads as a jewel; a full set of them loses the effect.
17. Chrome or Foil Spiderweb
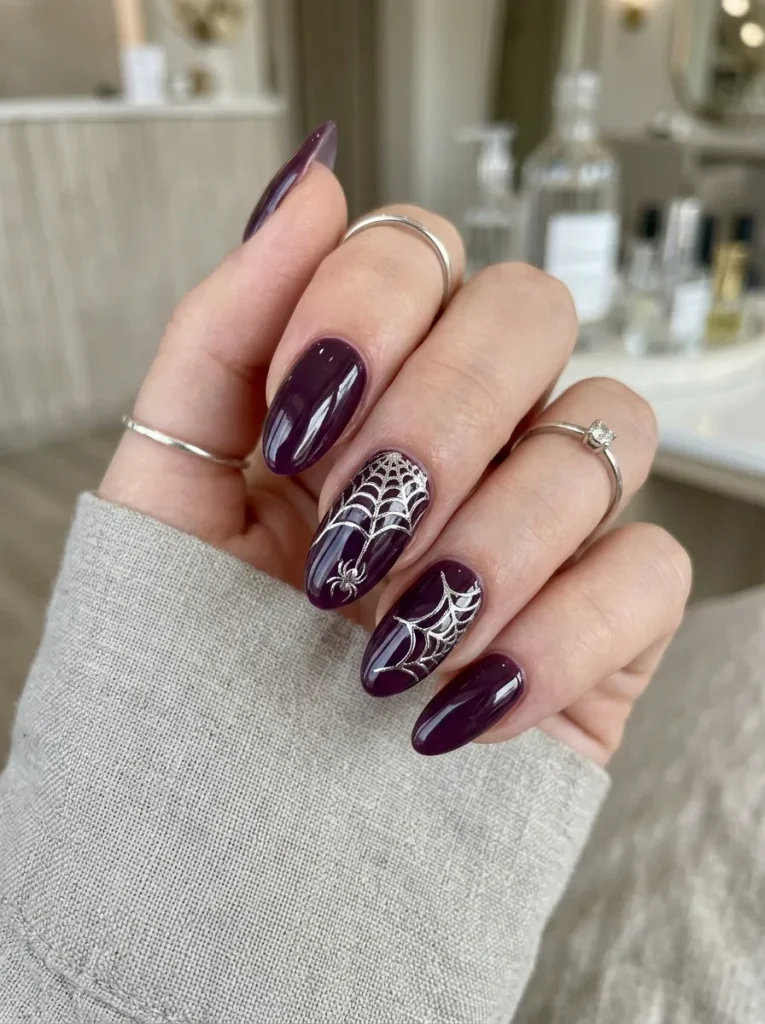
Take the classic spiderweb somewhere futuristic with chrome. A silver foil web over a dark base shimmers and shifts in the light, which makes a familiar design feel brand new.
The metallic finish does the heavy lifting. Paint your web in a chrome or foil polish, or press on nail foil and seal it, over black or deep plum. As your hand moves, the web catches the light and almost looks liquid. It is an easy upgrade to a design you may already know how to paint.
Dark base
Paint black or deep plum and let it cure.
Chrome web
Draw the web in chrome polish or press on foil.
Seal it
A glossy top coat locks in the shine.
18. Long Coffin With Green Slime Drips
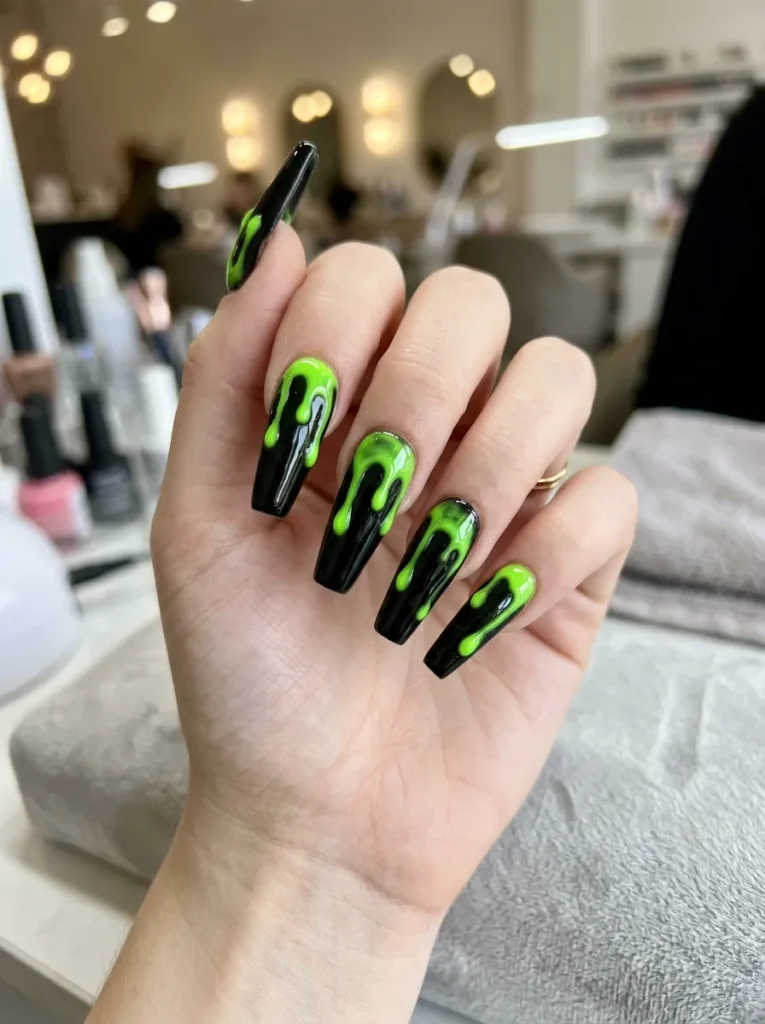
Slime drips are pure Halloween fun, and they look incredible on long coffin nails. Neon green “ooze” running down from the cuticle over a black base is bold, glossy, and a little gross in the best way.
The drips are the same technique as blood, just brighter. Pull neon green teardrops down from the top of the nail with a dotting tool, keeping the lengths uneven. The color you choose sets the whole mood.
| Drip color | The vibe |
|---|---|
| Neon green | Toxic slime, playful and bold. |
| Deep red | Classic spooky, more intense. |
| Purple | Witchy potion, softer and dreamy. |
19. A Spooky Face on One Statement Nail
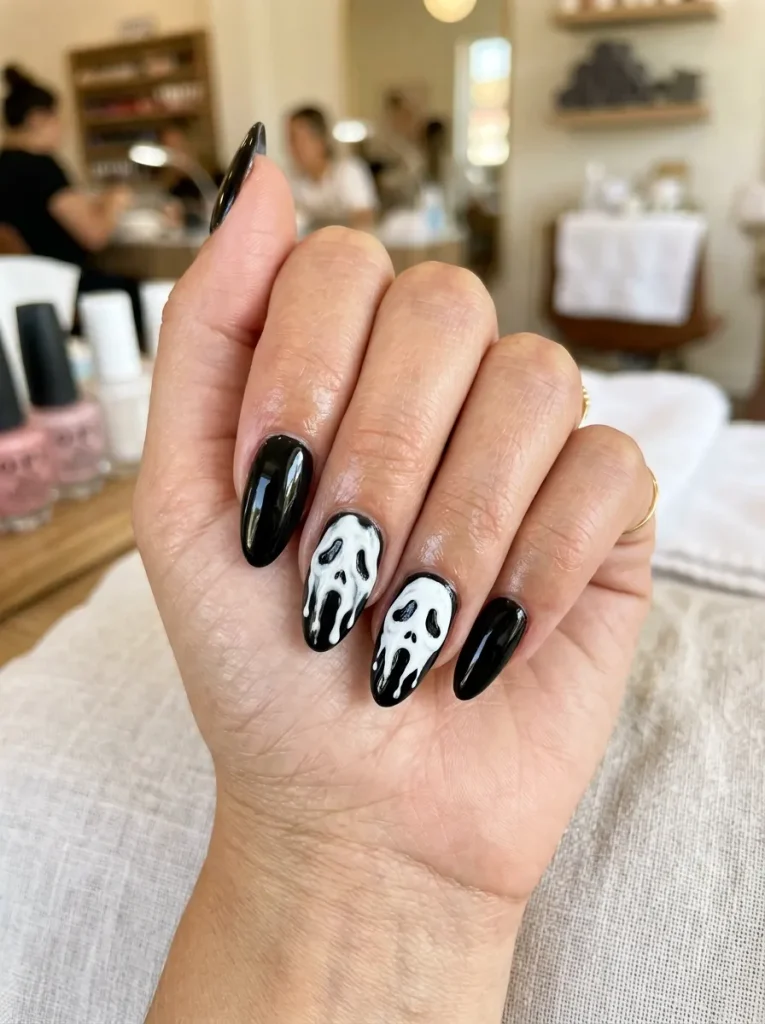
You do not have to fill every nail with art. Painting one dramatic spooky face on a single statement nail and keeping the rest simple looks intentional and modern.
A white ghost-style face with a dripping black mouth on one nail, with the others left glossy black or nude, gives you a striking focal point. Letting one nail carry the drama keeps the whole hand from looking overworked. It is the kind of restraint that reads as high-end.
A spooky face painted on all five nails, busy and hard to read.
One face on a statement nail with the rest kept plain, clean and high-end.
20. Blood-Red Almond Nails, Minimal and Chic
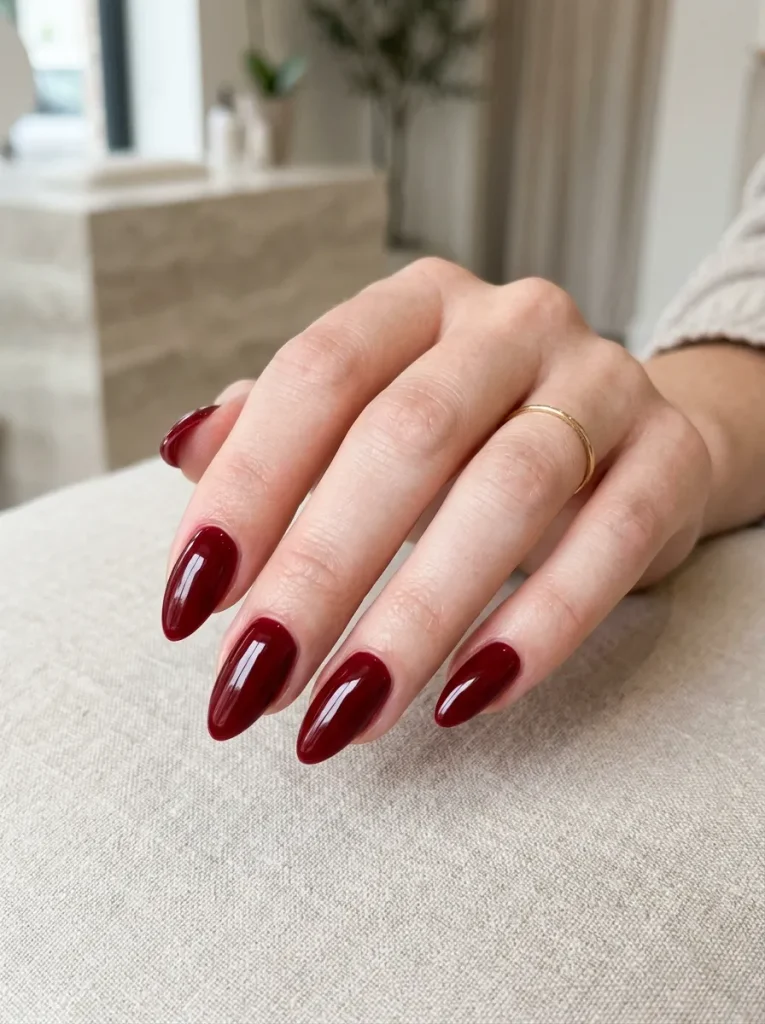
Not every Halloween manicure needs a picture on it. A set of deep blood-red almond nails is elegant, a little vampy, and perfectly seasonal on color alone.
The shade does everything. A dark, oxblood red on a smooth almond shape looks expensive and grown-up, easy to wear from a party to the office. It is the sophisticated choice for anyone who wants to nod to Halloween without any cartoon spookiness at all.
Getting the chic version right
21. Ghostface-Style Web Tips
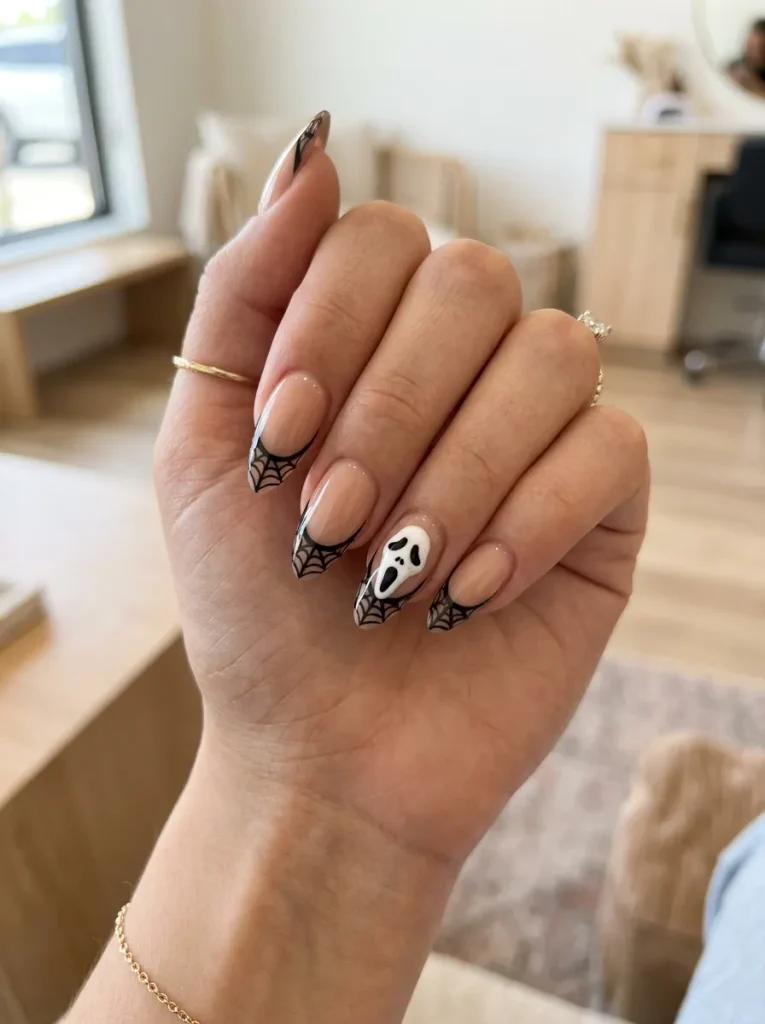
That famous slasher-movie mask inspired a huge nail trend, and you can capture the feeling without copying the exact character. A white ghostly face with a hollow mouth on one nail, paired with black spiderweb French tips on the rest, reads instantly eerie.
The web tips carry most of the look. Paint fine black webs fanning out from the tip corners over a nude base, then add one simple white ghost-face accent. Together they feel like a horror-movie night without leaning on any one film.
22. Black Cat and Full-Moon Nails
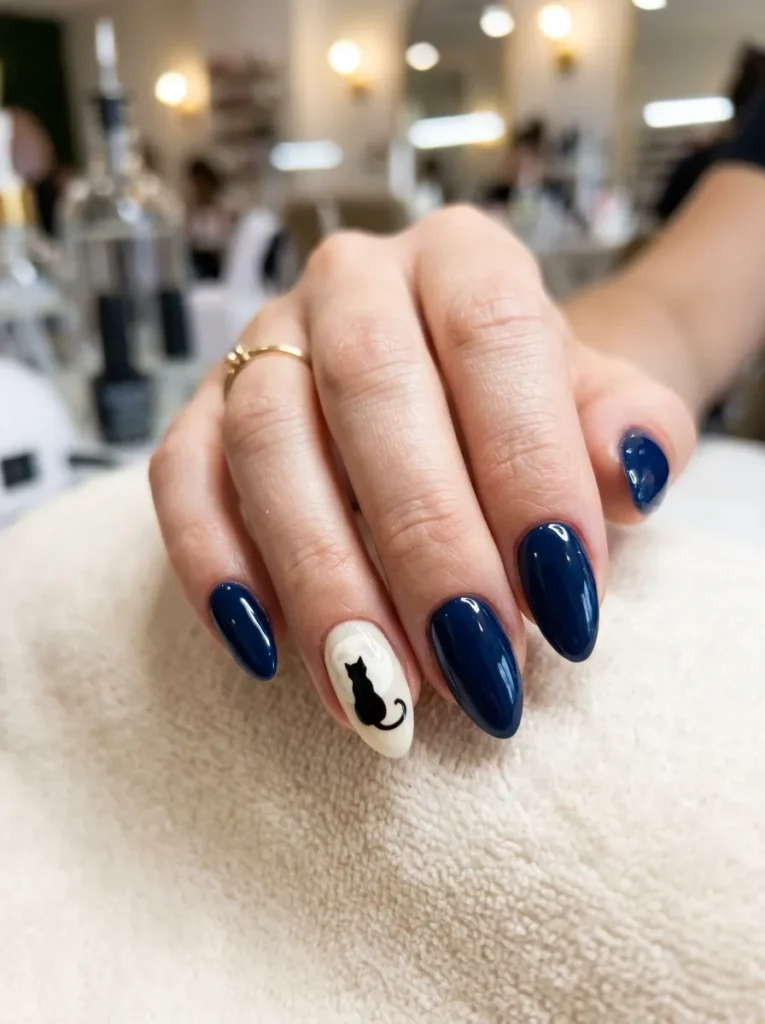
A black cat against a full moon is a witchy little scene that fits perfectly on a nail. The silhouette style is easier than it looks and feels charmingly old-fashioned.
Because it is all silhouette, you only need two colors. Paint a pale yellow or cream moon, then add a simple black cat shape sitting or arching in front of it. Keep the cat as a clean outline with no detail inside, and it reads clearly even on a small nail.
“Silhouette designs are the secret to painting a whole spooky scene on a nail. A solid black shape needs no detail to read perfectly.”
23. Web Detail With Rhinestone Spiders
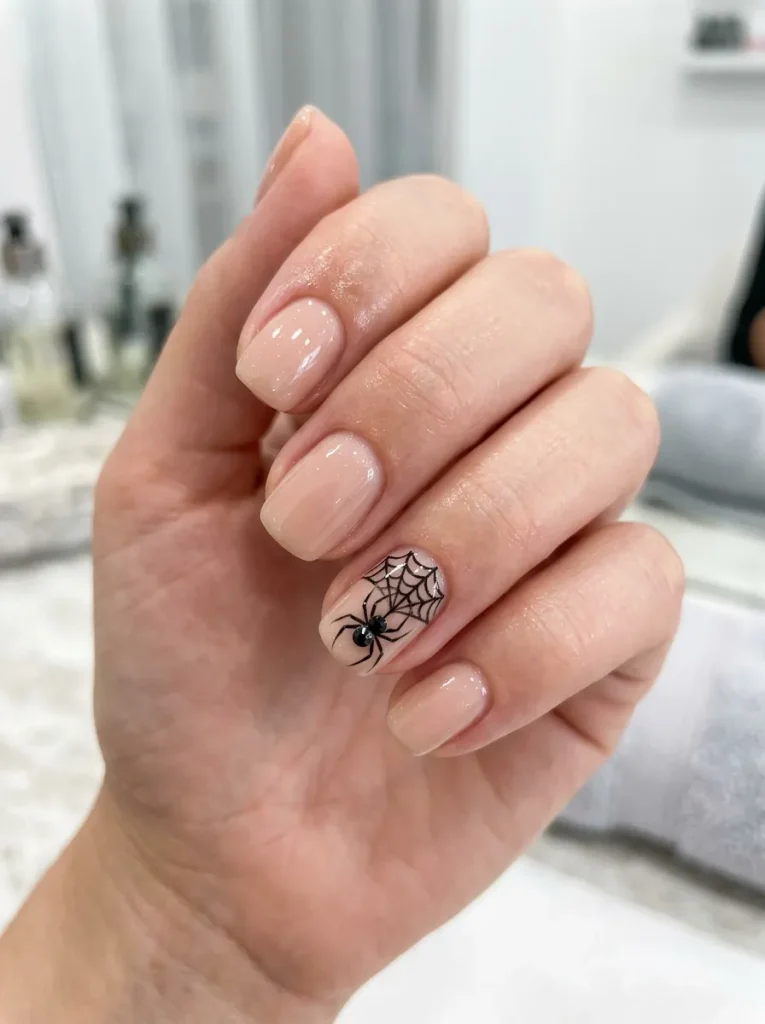
For a touch of glam, add a little sparkle to the spooky. A delicate spiderweb finished with a tiny rhinestone spider brings texture and a hint of luxury to a simple design.
The gem is the payoff. Paint your web, then glue a small black or crystal rhinestone where the spider would sit and add thin painted legs around it. Keep it to one or two nails so the sparkle stays special rather than busy.
Set the rhinestone in a dot of gel and cure or seal it well.
Add thin painted legs so it reads as a spider.
Gluing gems on every nail, which looks cluttered.
Using too little glue, so the spider pops off by morning.
24. Mummy Wrap Nails in Cream
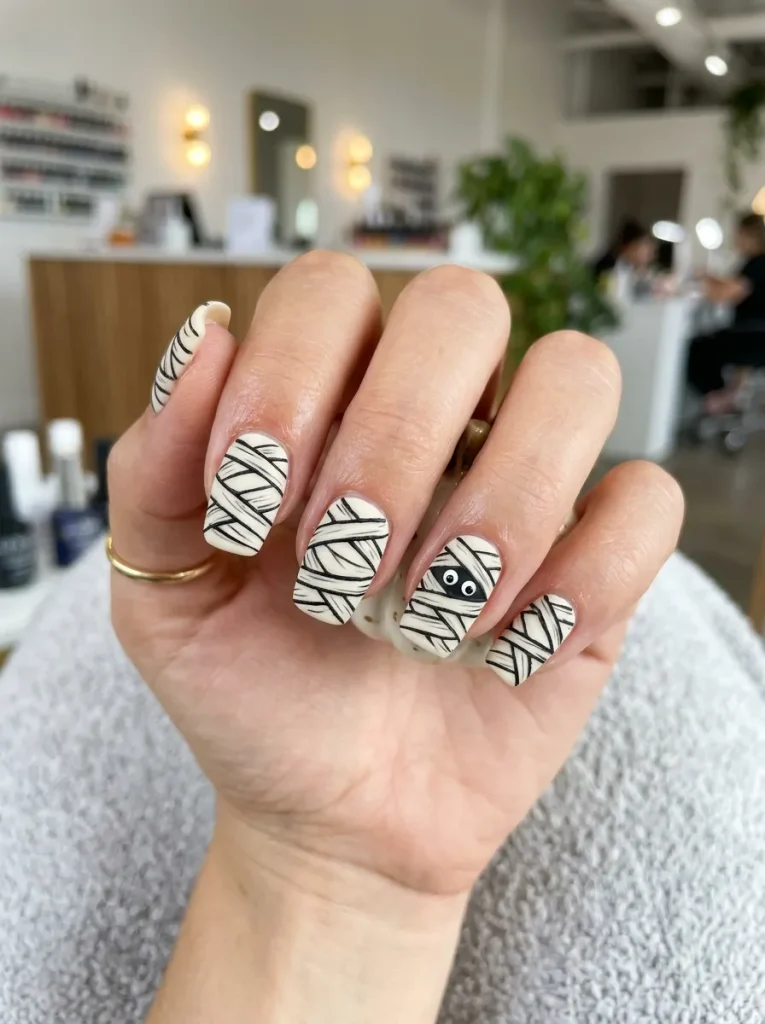
Mummy nails are a cute, textured look that feels like a craft project in the best way. Crisscrossing cream “bandage” strips with two little eyes peeking out are playful and beginner-friendly.
Paint a cream or off-white base, then use a striping brush to lay thin bandage lines across the nail at different angles, leaving a small gap. Add two tiny black or googly-style dot eyes in the gap. The uneven wrapping is the whole charm, so there is no need for it to be neat.
Paint a cream or off-white base and let it dry.
Lay crisscross bandage lines at angles, leaving a gap.
Add two little dot eyes peeking through the gap.
25. Deep Wine and Gold for an Elegant Fall Witch
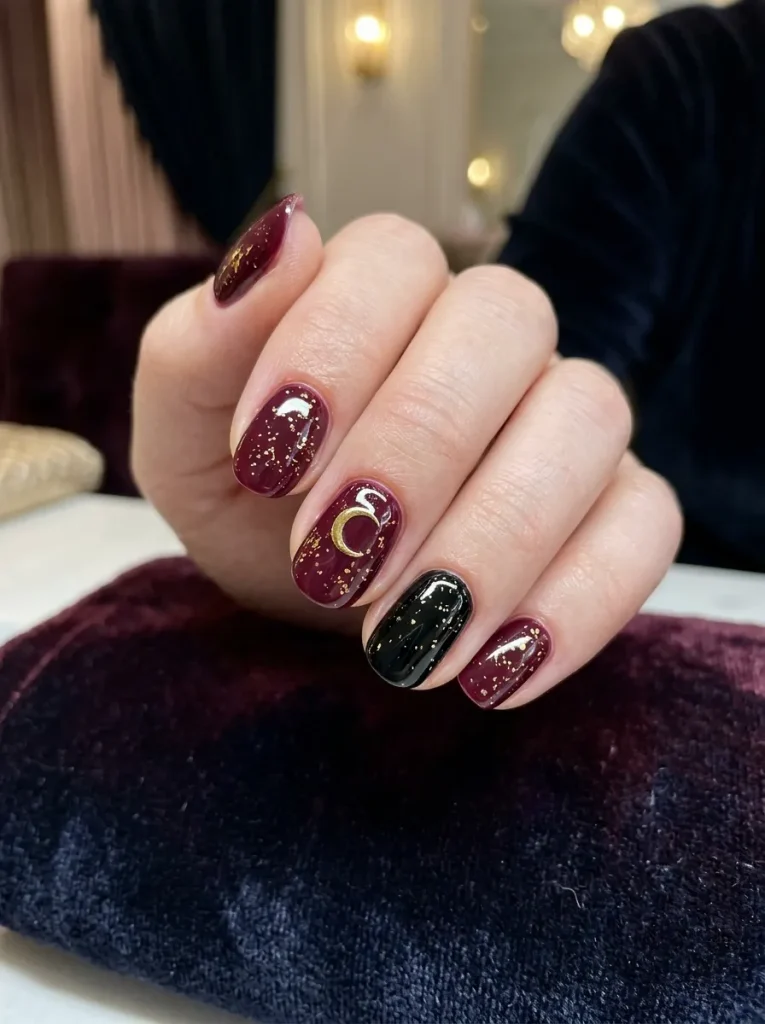
For the most grown-up Halloween nails on this list, skip black entirely. Deep wine with delicate gold accents feels like an elegant fall witch, rich, moody, and dressy enough for any autumn event.
The combination is what makes it special. A dark wine base with a thin gold moon, a few gold flecks, or a single gold French line looks luxe rather than spooky. It carries you right through the season and into the holidays, which makes it one of the most versatile picks here.
26. Glow-in-the-Dark Halloween Nails
Here is a design with a hidden trick: it changes after dark. Glow-in-the-dark nails look like a normal manicure in daylight, then light up under blacklight or in the dark for a party surprise.
The effect comes from special polish. A glow topcoat over any color, or a full set of glow polish, charges up in light and then shines. It is a fun layer to add over a web, a ghost, or slime drips. A few things are worth knowing before you try it.
❓ Do they glow on their own?
Most need to charge in bright light first, then glow softly. Blacklight-reactive polish lights up brightest under a UV party light.
❓ Where do I put it?
Add glow polish over your accent design, like slime drips or a ghost, so the surprise lands on the spookiest part.
❓ Does it look normal in the day?
Yes. Most glow polishes look slightly cloudy or tinted in daylight and save the magic for the dark.
27. Press-Ons for a No-Commitment Look
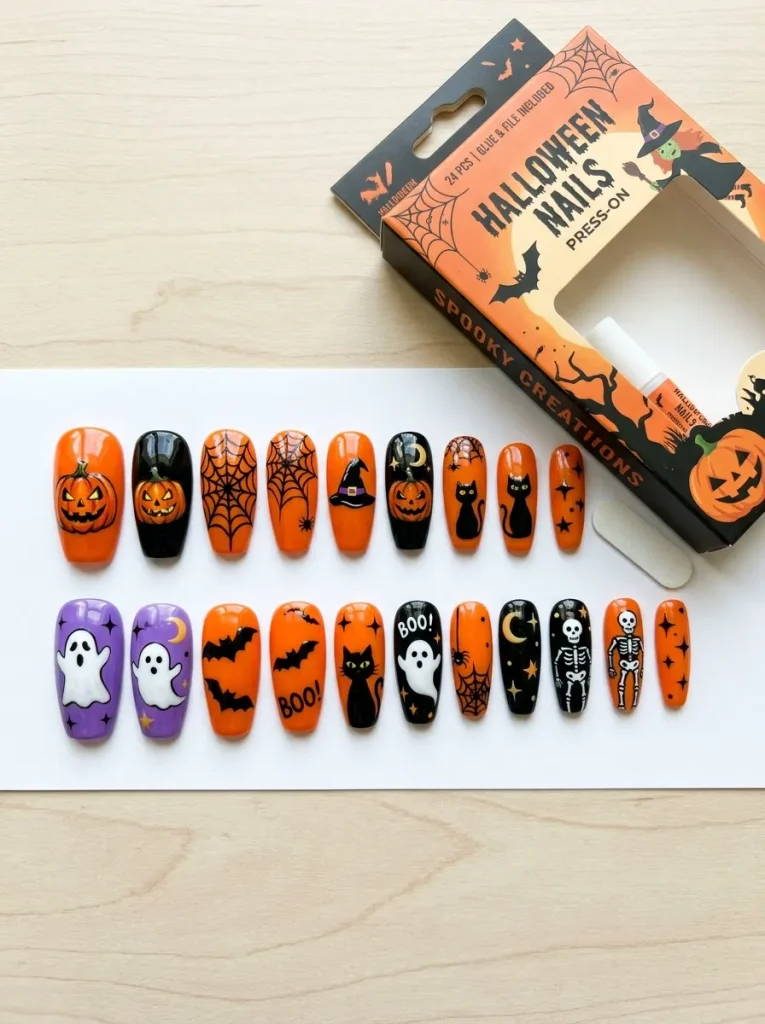
Not everyone wants to paint tiny skulls or sit for a gel appointment, and press-ons solve that completely. A set of ready-made Halloween press-on nails gives you full salon-style art in minutes at home.
The appeal is speed and freedom. You get intricate designs you could never paint yourself, they pop off when the party is over, and you can reuse them. It is the perfect option if you want the drama without the time or the commitment, though they suit some situations better than others.
| Press-ons | Gel set | |
|---|---|---|
| Time | Minutes at home | A salon appointment |
| Cost | Low | Higher |
| Lasts | A few days | Two to three weeks |
| Reusable | Yes | No |
28. Negative-Space Spiderweb
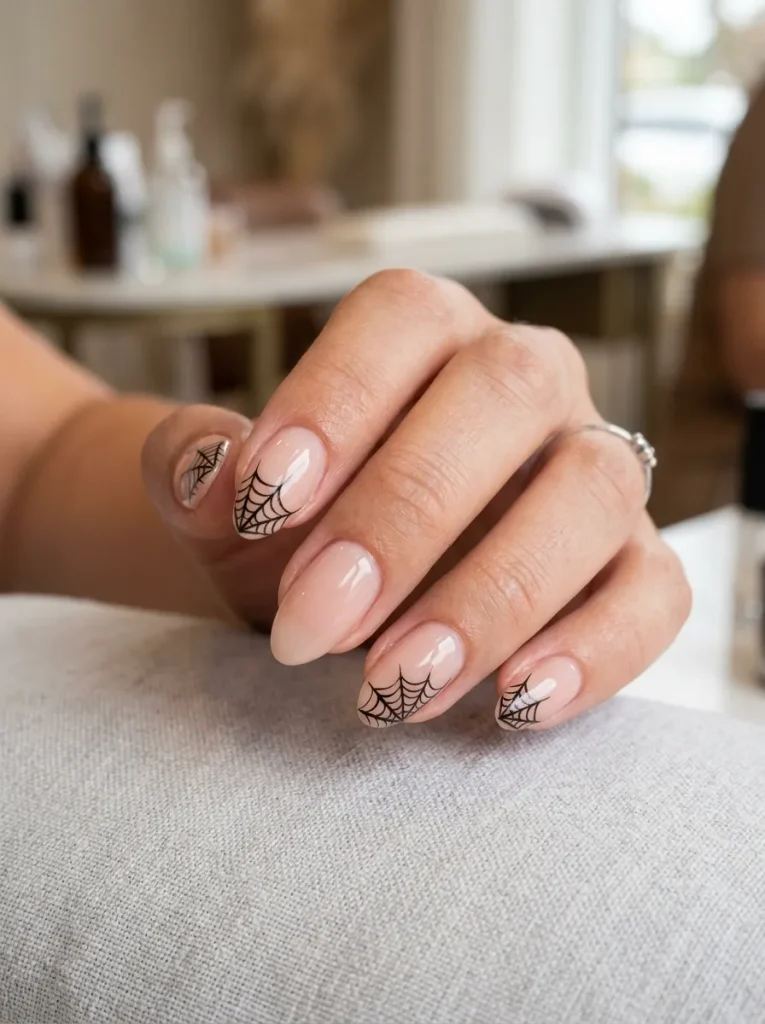
For a modern, minimal spin, let your bare nail become part of the art. A negative-space spiderweb uses the natural nail as the background, with just a fine web painted in one corner.
The empty space is the design. Because most of the nail stays bare or sheer, a single delicate black web in the upper corner looks clean and current rather than heavy. It is proof that Halloween nails can be understated and still unmistakably spooky.
- ▸Start with a clean, bare or sheer nude nail.
- ▸Paint a fine black web in just one corner.
- ▸Leave the rest of the nail empty on purpose.
- ▸Seal with a glossy top coat for a polished finish.
29. A Full “Nightmare” Themed Set
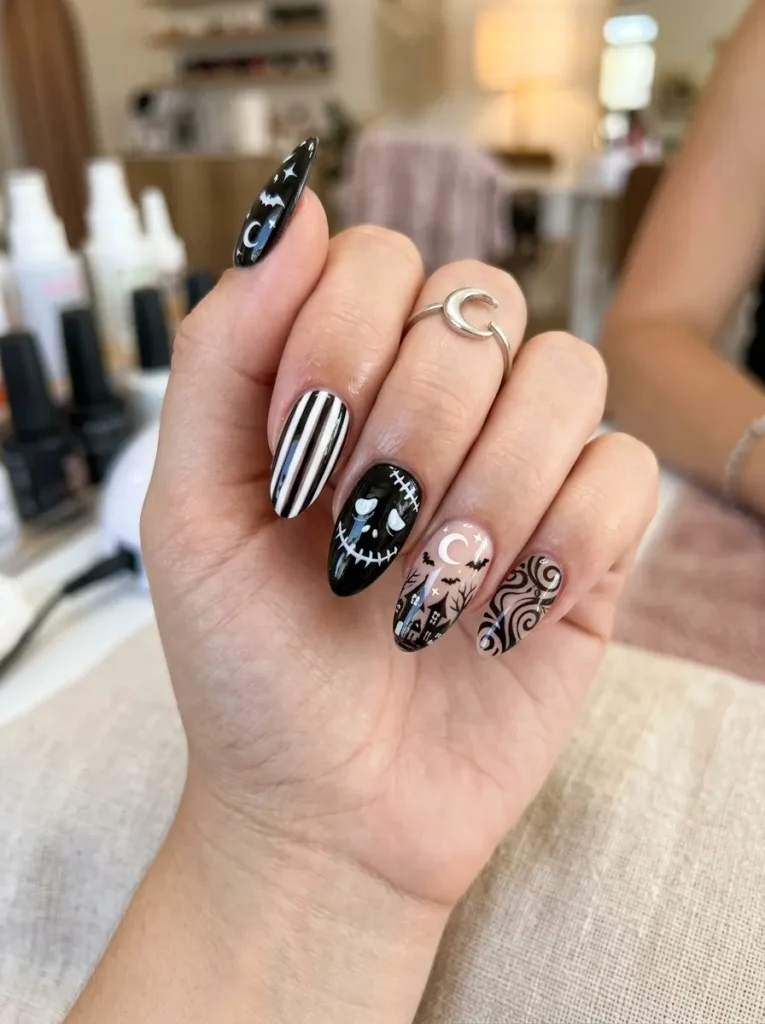
If you want to go all out, commit to a full themed set where every nail plays a part. A coordinated “spooky town” set, with stripes, a stitched face, a moon, and a swirl of black on nude, tells a whole story across your hand.
This is the advanced end of the list, pulling several techniques into one cohesive theme. Plan which design goes on which nail before you start, and keep the palette to black, white, and nude so the busy set still reads as one idea. It is a labor of love, but the finished hand is unforgettable.
Plan every nail before you start and hold to a three-color palette. That is what keeps a busy themed set looking like one design instead of five.
30. Short Nail Halloween Ideas That Still Pop
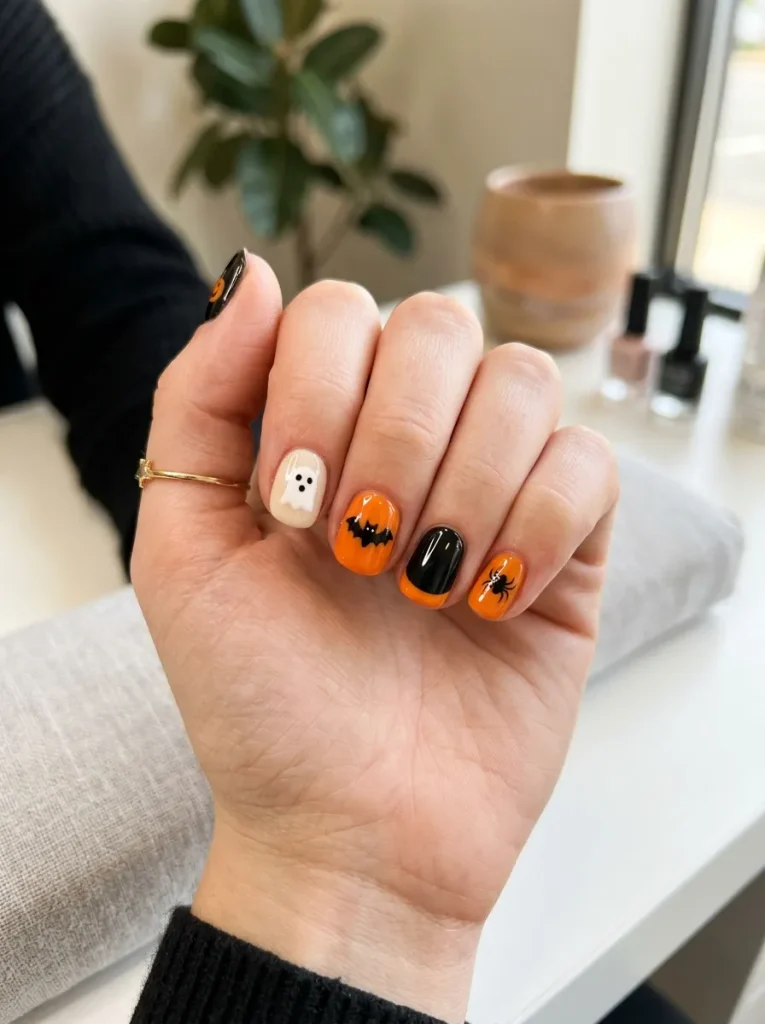
Short nails deserve just as much Halloween fun, and plenty of designs actually look better on them. Simple, bold motifs read clearly on a small canvas without any crowding.
The trick is to keep each nail to one clear idea. A single pumpkin, one ghost, a solid orange tip, or a tiny bat gives you festive impact without needing length. These Halloween nail art ideas prove that a great spooky mani is about the design, not the size.
| Works great short | Better left long |
|---|---|
| One pumpkin or ghost per nail. | Long slime or blood drips. |
| Solid color tips and dots. | Full skeleton-hand bones. |
| A tiny bat or single web. | Detailed multi-part scenes. |
31. How to Make Any Design Last Through the Night
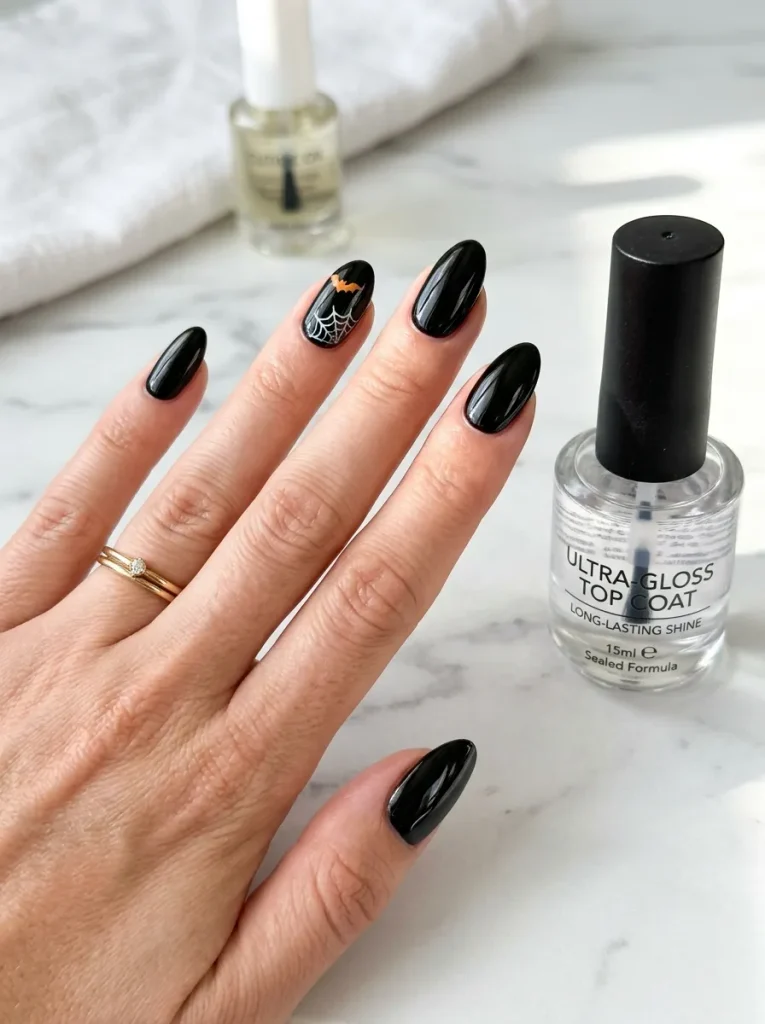
The prettiest Halloween nails are wasted if they chip before the party even starts. A few simple habits keep any design looking fresh from the first doorbell to the last piece of candy.
Prep is where longevity begins. Gently buff the nail, push back cuticles, and wipe each nail clean so nothing sits between the polish and the surface. A good base coat, thin layers instead of one thick one, and a top coat that seals the very tip of the nail all add days. Reapply top coat after a couple of days to refresh the shine and lock everything back down.
Pro tip
Always seal the free edge, that thin front tip of the nail, with your top coat. Running the brush along the edge is the single biggest thing that stops chips and peeling.
The Fun Part of Getting Ready
The best thing about Halloween nails is that there is a design for every skill level and every mood. Whether you paint a quick ghost the night before, book a full glam set, or press on something dramatic in five minutes, your fingertips get to join the fun.
Come back to the looks that made you want to grab a brush, start with the easy ones, and work up to the bold sets as you get comfortable. These Halloween nail art ideas are here to make the getting-ready part just as fun as the night itself.
Save this list to your Halloween board so it is ready the moment you want to give your nails their spooky season moment.