
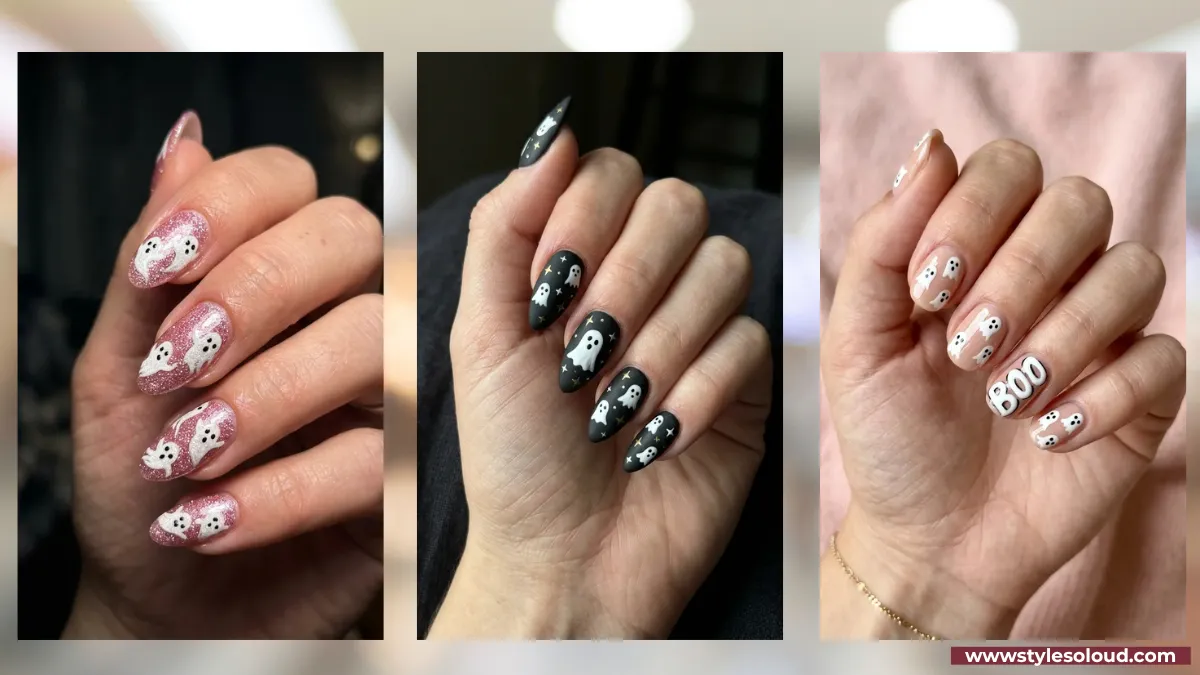
Of all the Halloween nail designs out there, the little ghost might be the sweetest. It is friendly instead of scary, it looks adorable on any base color, and it is genuinely one of the easiest things to paint. A ghost is really just a white blob with two dot eyes, and even a slightly wobbly one still looks cute.
That simplicity is what makes ghosts so fun to play with. You can float one ghost on a single accent nail, scatter a whole crowd of them across a black base, tuck them into a French tip, or give them rosy cheeks and a little wink. From soft pink to bold matte black, they fit whatever mood you are after.
These 21 cute ghost Halloween nails run from the easiest single accent to full glam coffin sets, with French tips, color options, and cute combos along the way. You will find clear how-tos and plenty of variations to make them your own. Pick the ghosts that match your skill and your style, and let them haunt your fingertips this season.
1. A Single Cute Ghost Accent Nail
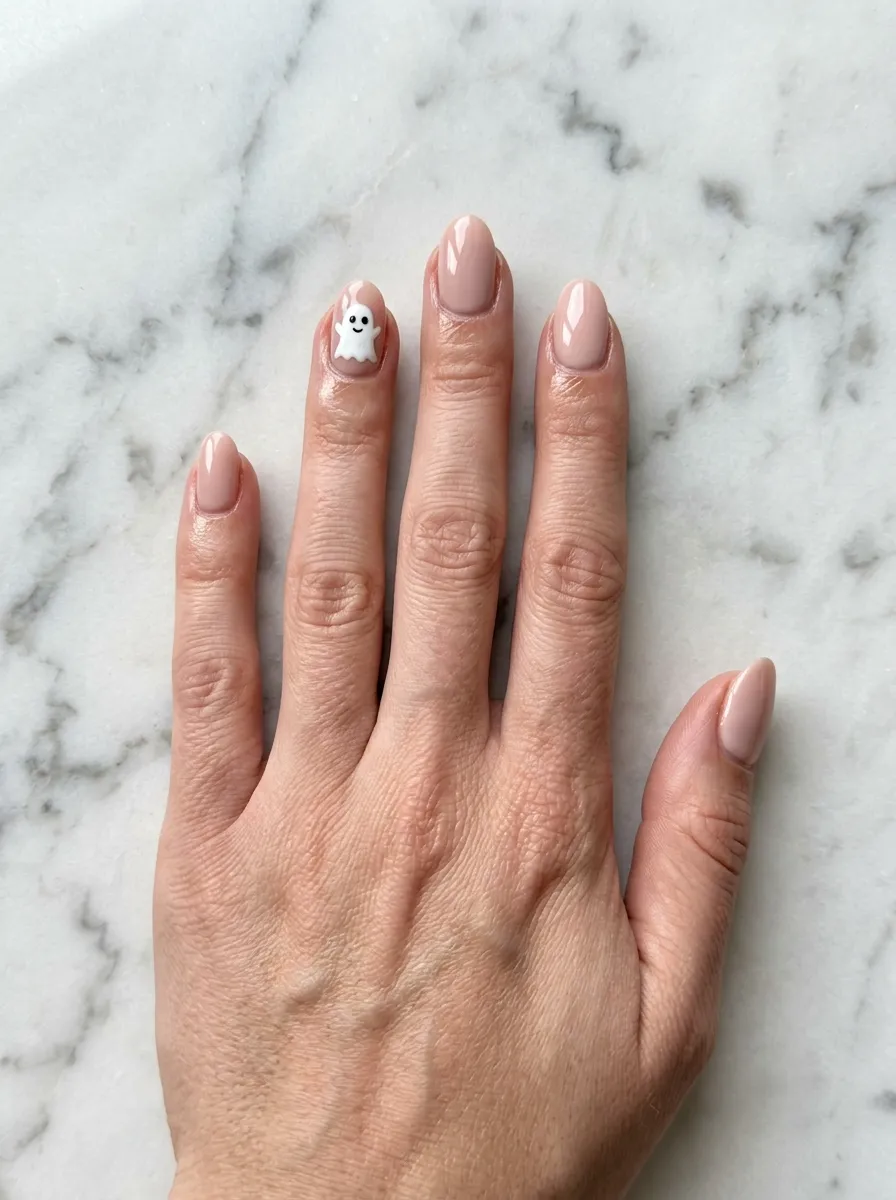
The easiest way to try ghost nails is to keep it to one. A single cute ghost on an accent finger, with the rest kept plain, is beginner-friendly and takes almost no time.
Because only one nail carries the design, there is very little room for error, which makes it perfect for a first attempt. Paint a white ghost on your ring or middle finger over any base, add two dot eyes and a little mouth, then keep the other nails a solid glossy shade. It is proof that one small ghost is all a manicure needs.
2. White Ghosts on a Black Base
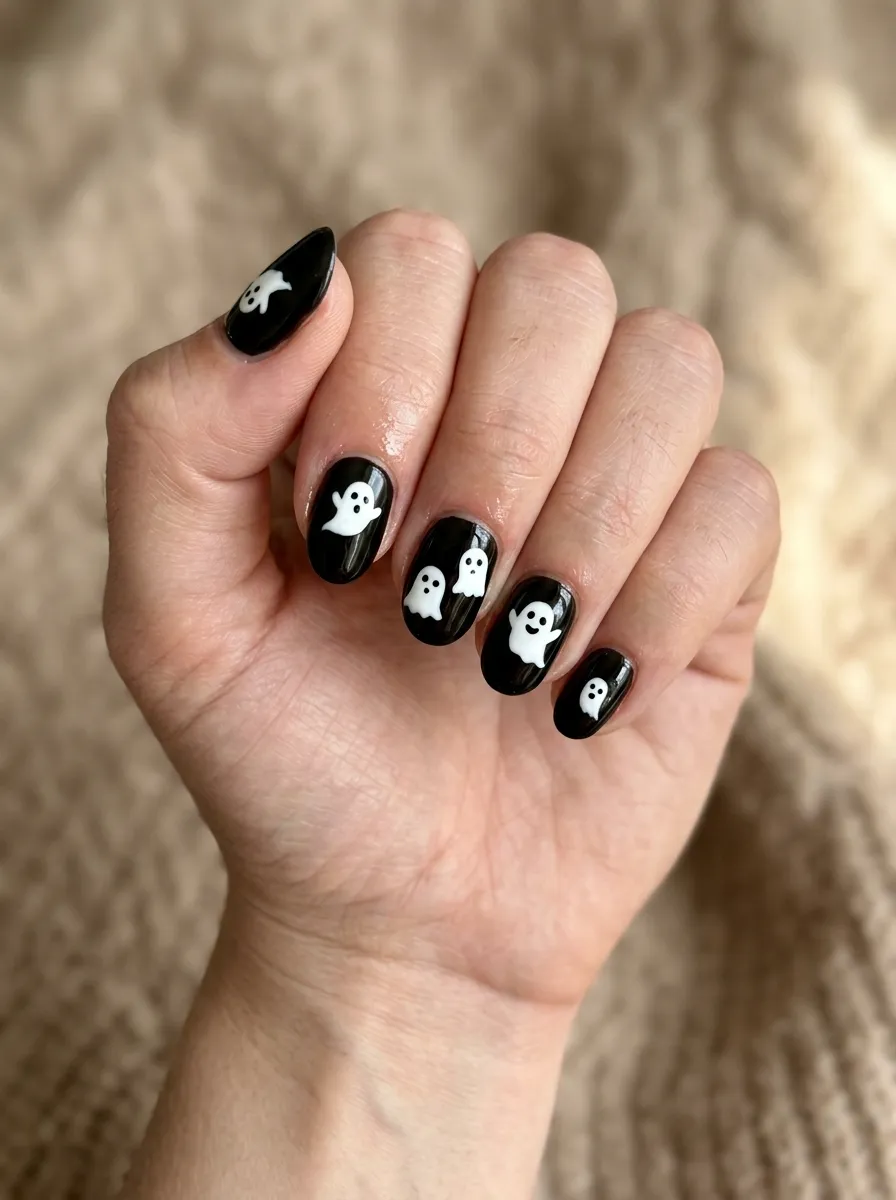
For a look that is both cute and a little spooky, float white ghosts on a glossy black base. The high contrast makes the ghosts glow and reads instantly as Halloween.
The black background does the dramatic work while the ghosts keep it sweet. Paint your nails a solid glossy black, then add one or two white ghosts per nail, letting a few float at different heights. It is one of the most popular ghost looks for good reason: it works on every skin tone and never looks fussy.
💡 Quick Tip
Paint each ghost body in two coats of white so it stays bright against the black. A single coat looks grey and see-through, which dulls the whole design.
3. Ghost French Tips
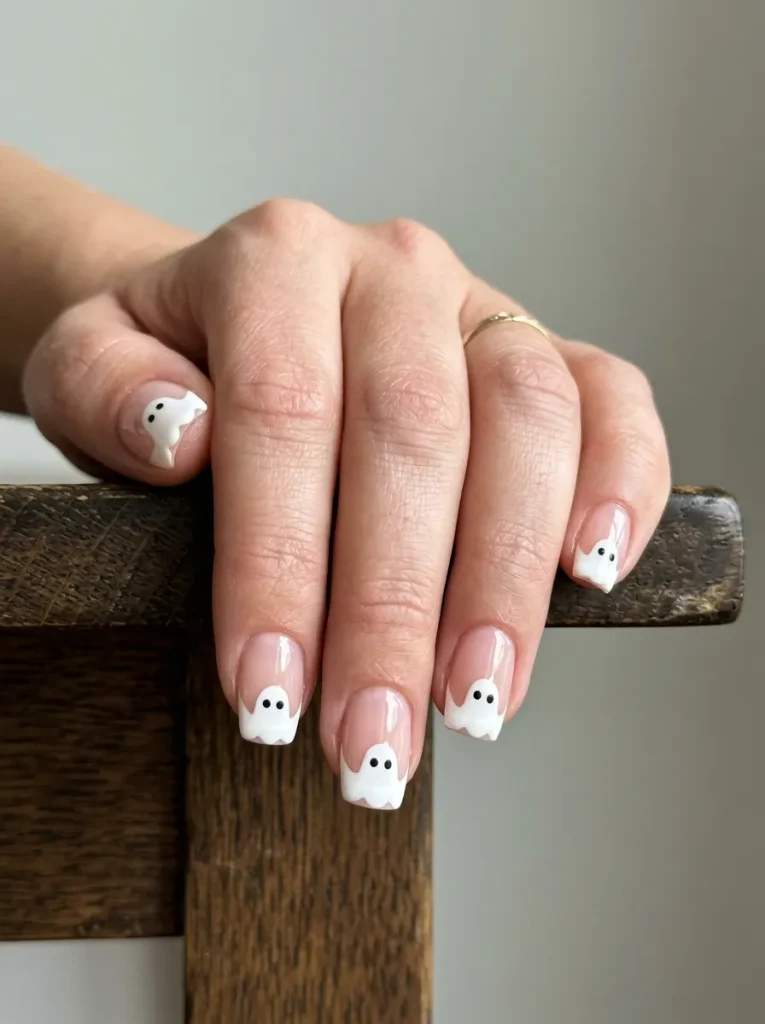
Give the classic French manicure a cute Halloween twist. Adding a little ghost to a French tip keeps the elegant shape while making it clearly seasonal and sweet.
It comes together in a few steps, and the nude base keeps it wearable for work or everyday.
Nude base
Paint a sheer nude or soft pink over the whole nail.
White tip
Add a white French tip, curving the bottom into ghost humps.
Face and seal
Add tiny dot eyes, then finish with glossy top coat.
4. Ghosts on a Soft Pink Base
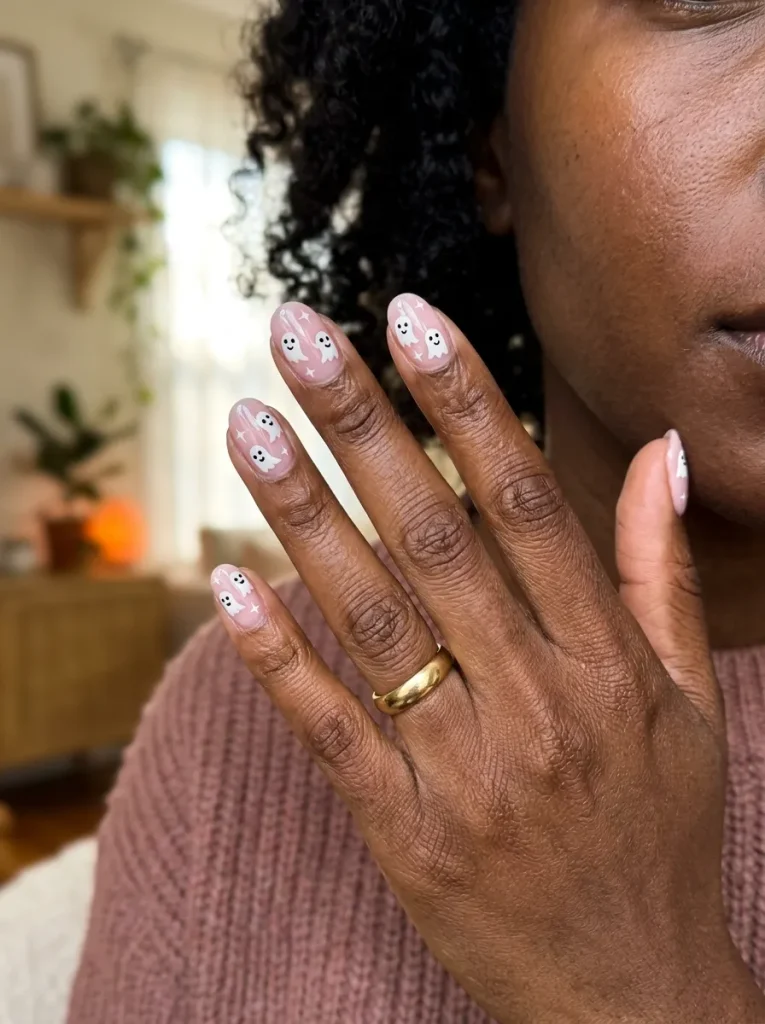
Swap the black for pink and your ghosts turn dreamy and girly. White or pale ghosts on a soft pink base is one of the sweetest, most Pinterest-worthy versions of this design.
The pink keeps things pretty while the ghosts add the Halloween touch, a balance that suits almost everyone. Choose a milky or bubblegum pink depending on how bold you want it, then float your ghosts on top. It is spooky season made soft.
| Pink base | Black base |
|---|---|
| Sweet, soft, and girly. | Bold, high-contrast, spooky. |
| Ghosts read subtle and cute. | Ghosts pop and glow. |
| Wears easily past Halloween. | Reads strictly seasonal. |
5. Matte Black Ghost-and-Star Nails
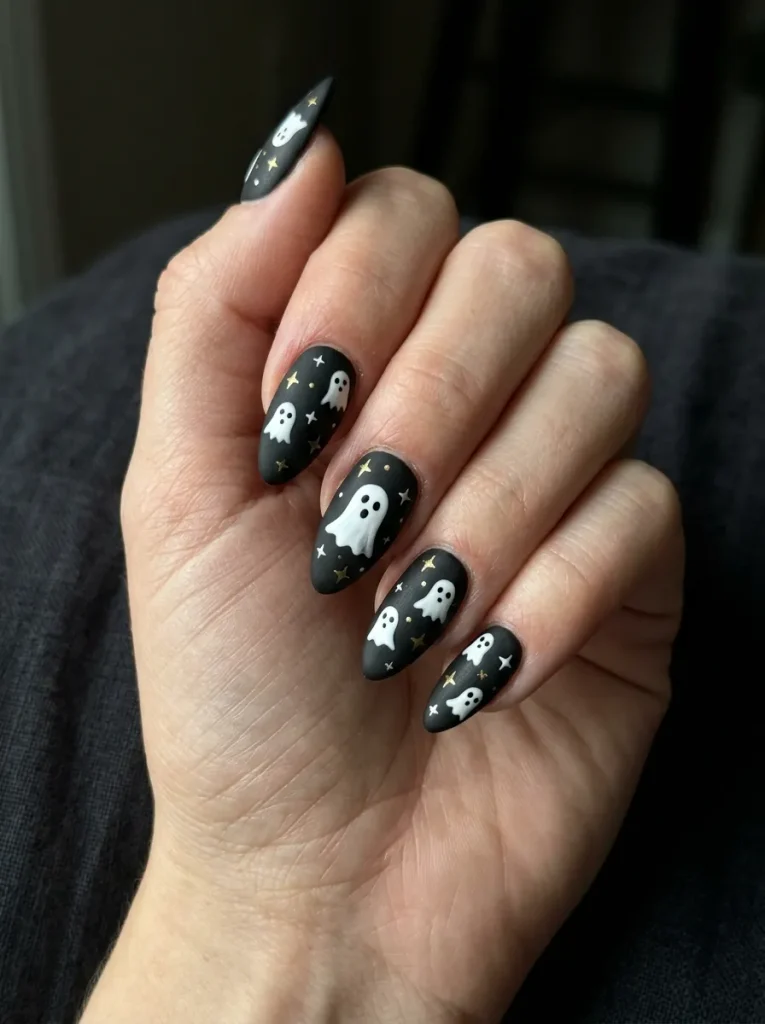
Add a few stars and a matte finish, and your ghosts get a whole night sky to float in. Matte black nails with white ghosts and tiny gold or white stars is a dreamy, cohesive look that feels styled.
The stars fill the space around the ghosts so the design looks complete. Paint a matte black base, add your ghosts, then scatter small dots and star shapes between them. The velvety matte finish is what ties it all together and keeps it modern.
Ghosts alone on black, cute but with a lot of empty space around them.
Add tiny stars and dots and the ghosts float in a full, finished night sky.
6. A Boo-Lettering Accent Nail
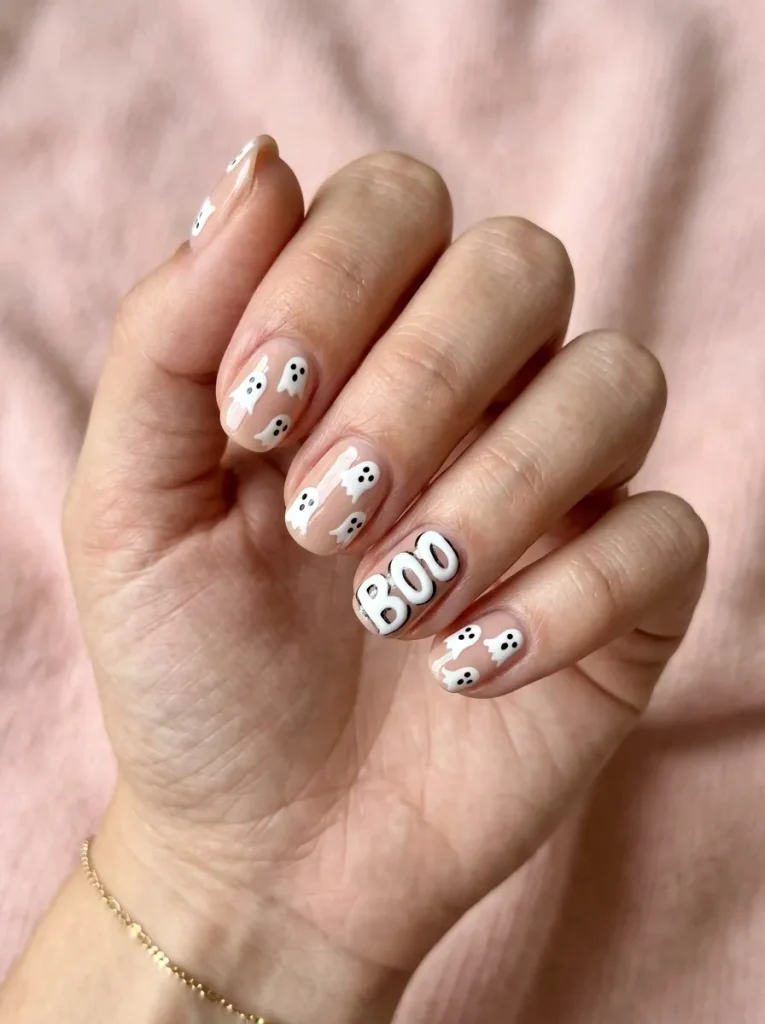
Add a little word to the mix and your ghosts get a caption. A “BOO” lettering accent nail, painted in black or white beside your ghost nails, adds a playful, retro touch.
The lettering is easier than freehand art suggests. Keep the letters chunky and slightly uneven for a fun, hand-drawn feel, and place them on just one accent nail so they stay a highlight. Pair it with plain ghost nails on either side, and the whole hand tells a little spooky story.
Getting clean lettering
7. Ghosts Over a Nude French Base
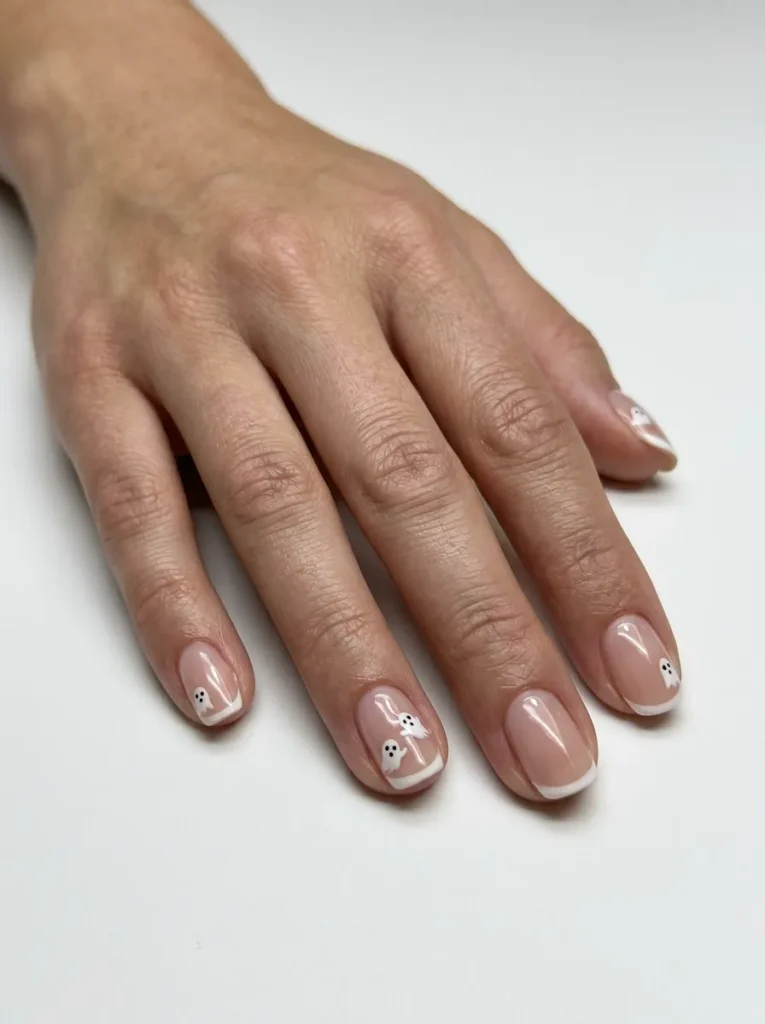
For the most wearable version of ghost nails, keep the base barely-there. Little ghosts floating over a sheer nude or a soft French base look chic enough for the office and still clearly festive up close.
The neutral background is what keeps it grown-up. Because the nail stays sheer, one or two small ghosts read as a subtle, tasteful detail rather than a costume. If you are not sure whether a warm nude or a cooler pink-nude suits you, our <a href=”https://stylesoloud.com/color-season-quiz/” style=”color:#7A2E3A; font-weight:600; text-decoration:underline;”>color season quiz</a> can help you land on the most flattering base.
Keep the base sheer and the ghosts small.
Limit ghosts to one or two nails for a subtle look.
A heavy opaque base that fights the delicate feel.
Crowding every nail, which tips it into costume.
8. Add Rosy Cheeks to Your Ghosts
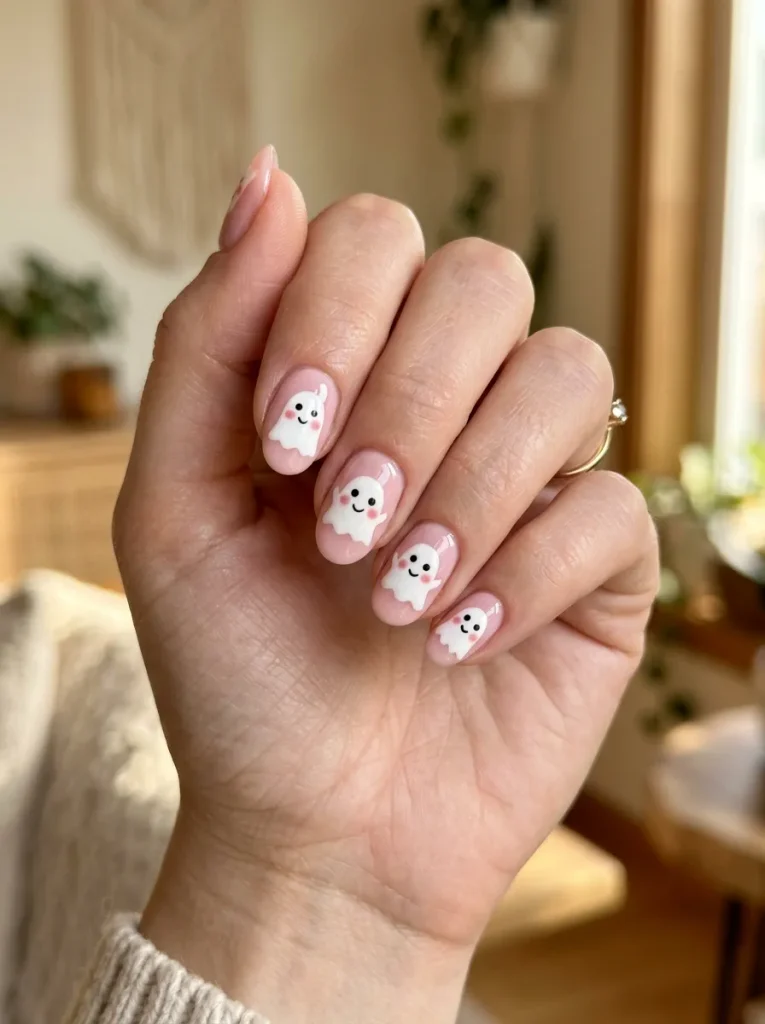
One tiny detail takes your ghosts from plain to adorable. Adding two little pink cheeks gives each ghost a sweet, blushing personality that people always notice.
It is the smallest change with the biggest payoff. After painting the white ghost and its dot eyes, dab two soft pink circles where the cheeks would sit and let them stay a little faded. Suddenly your ghosts look shy and cute instead of spooky.
“Two little pink cheeks are the difference between a plain ghost and one everyone wants to squeeze.”
9. Ghost and Spiderweb Combo
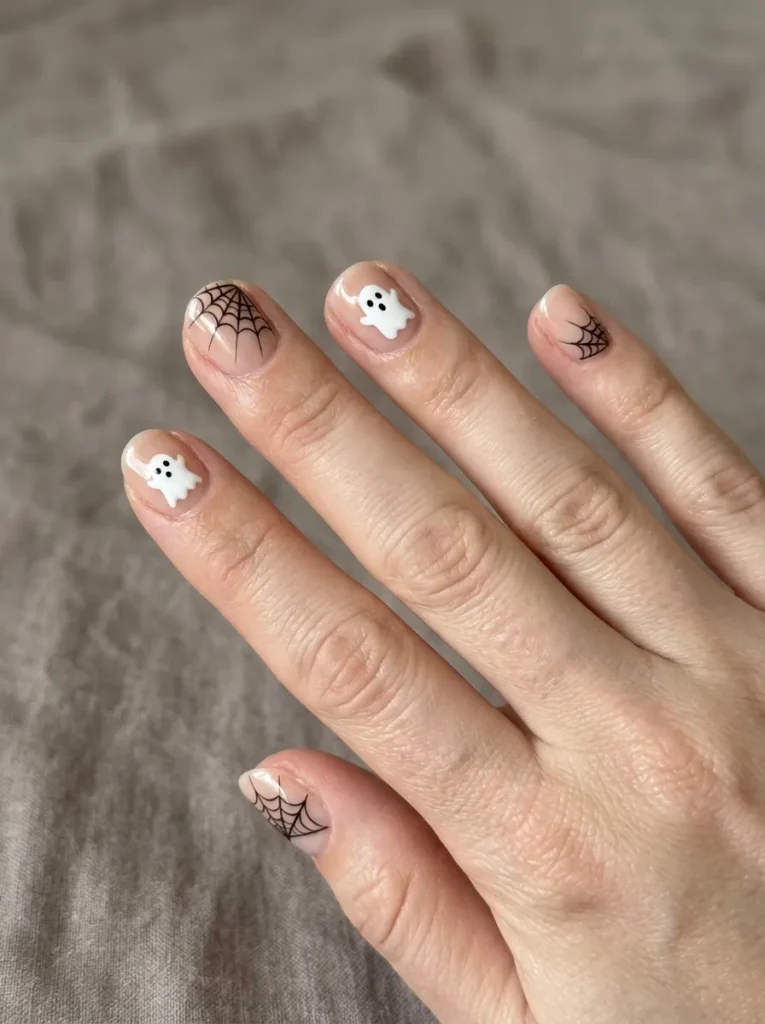
Pair two Halloween classics and you get a richer, more detailed look. A ghost on one nail and a spiderweb on another balances cute and spooky across the hand.
The mix keeps things interesting without clashing, since both designs share the same simple black-and-white feel. Paint ghosts on a couple of nails and a web on one or two others, keeping the base consistent so the set reads as one idea. It has a couple of trade-offs worth knowing before you start.
10. Glow-in-the-Dark Ghost Nails
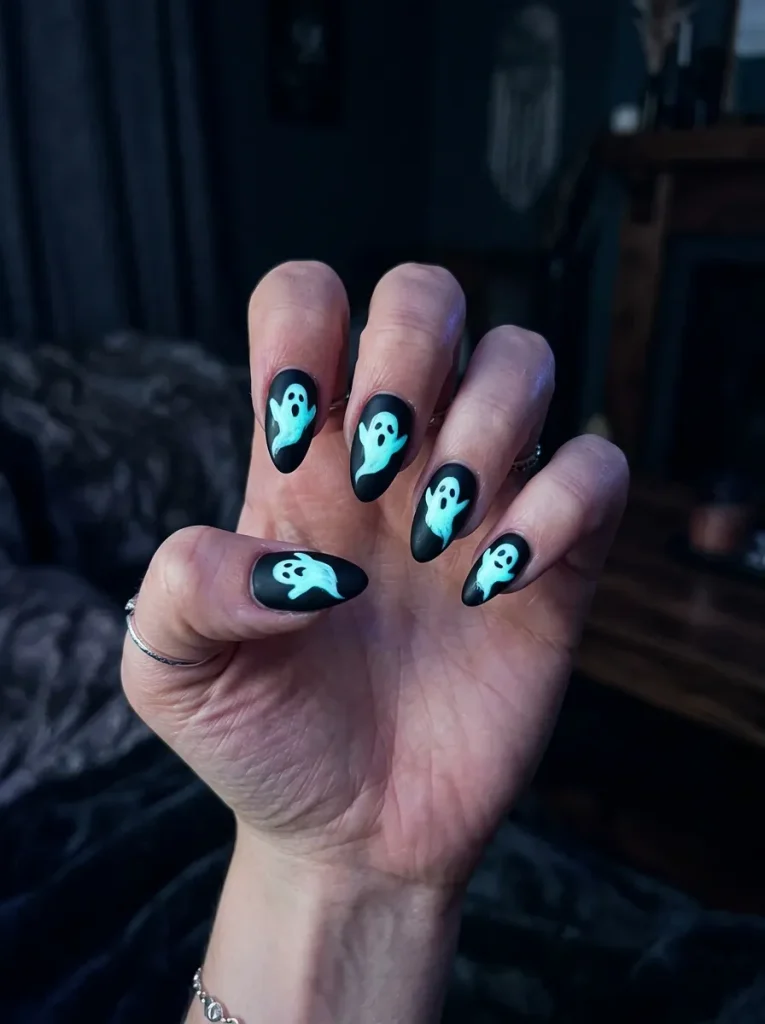
Ghosts and glow-in-the-dark polish were made for each other. Your ghosts look normal in daylight, then light up in the dark for a fun party surprise, which suits the theme perfectly.
Tap each question to see how it works.
11. Ghosts on Long Coffin Nails
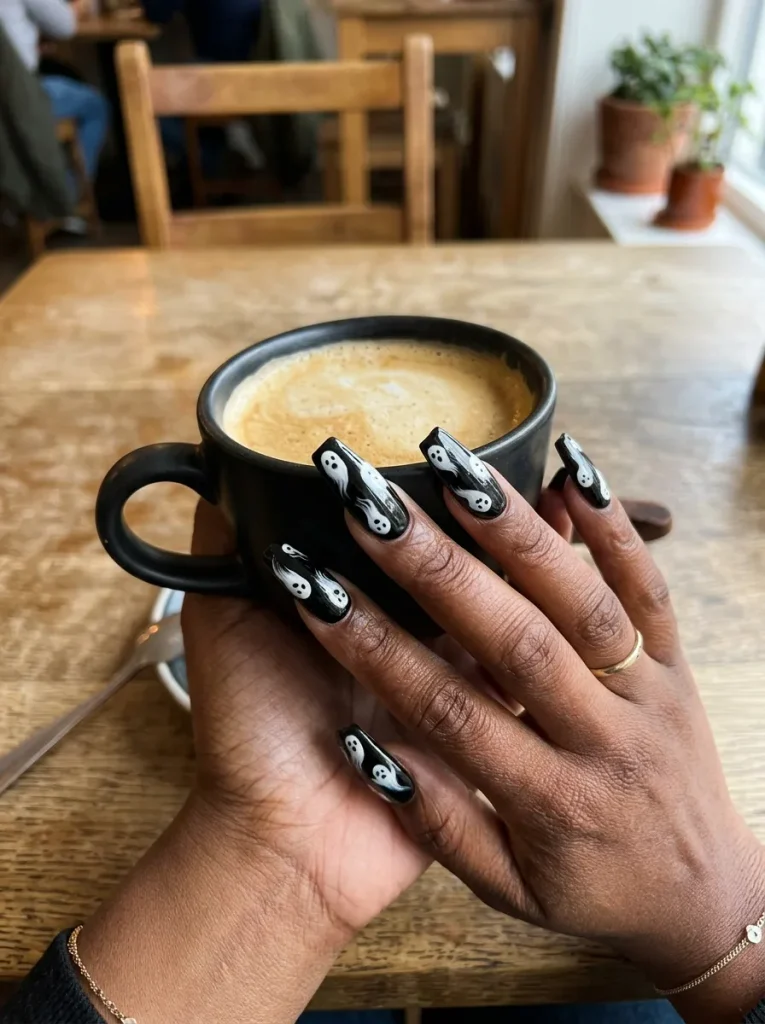
Long coffin nails give your ghosts room to float. The extra length lets you fit several ghosts at different heights, or one larger, more detailed ghost with real personality.
The long canvas is what makes the look feel high-end and salon-worthy. Space the ghosts so they drift up the nail rather than crowding the tip, and vary their sizes so the whole thing feels playful. On a black or nude base, long coffin ghosts are one of the most eye-catching cute ghost Halloween nails you can wear.
12. A Ghost-and-Bow Coquette Set
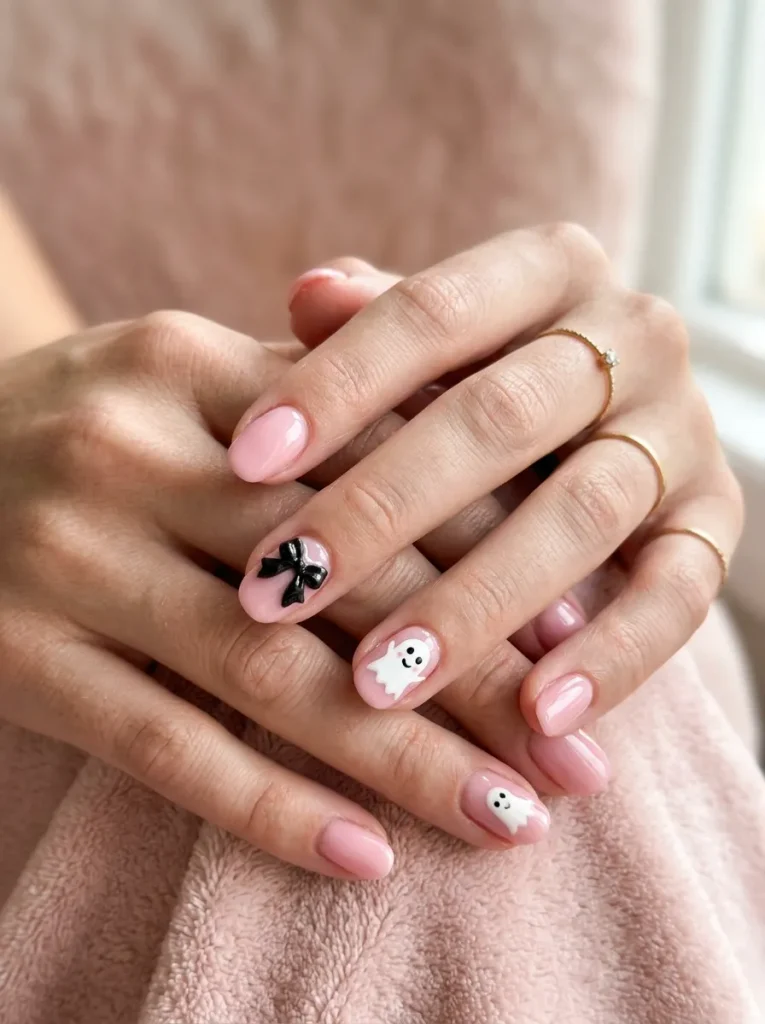
Sweet meets spooky in the ghost-and-bow trend, and it is everywhere right now. A cute ghost on one nail beside a dainty black or pink bow on another gives you that coquette-meets-Halloween feel.
The bow softens the whole set and makes it feel intentional. Here is how to build it.
Paint all nails a soft pink or nude base.
Add a cute white ghost on one or two nails.
Paint a dainty bow on another nail to finish.
13. Orange or Pastel Colored Ghosts
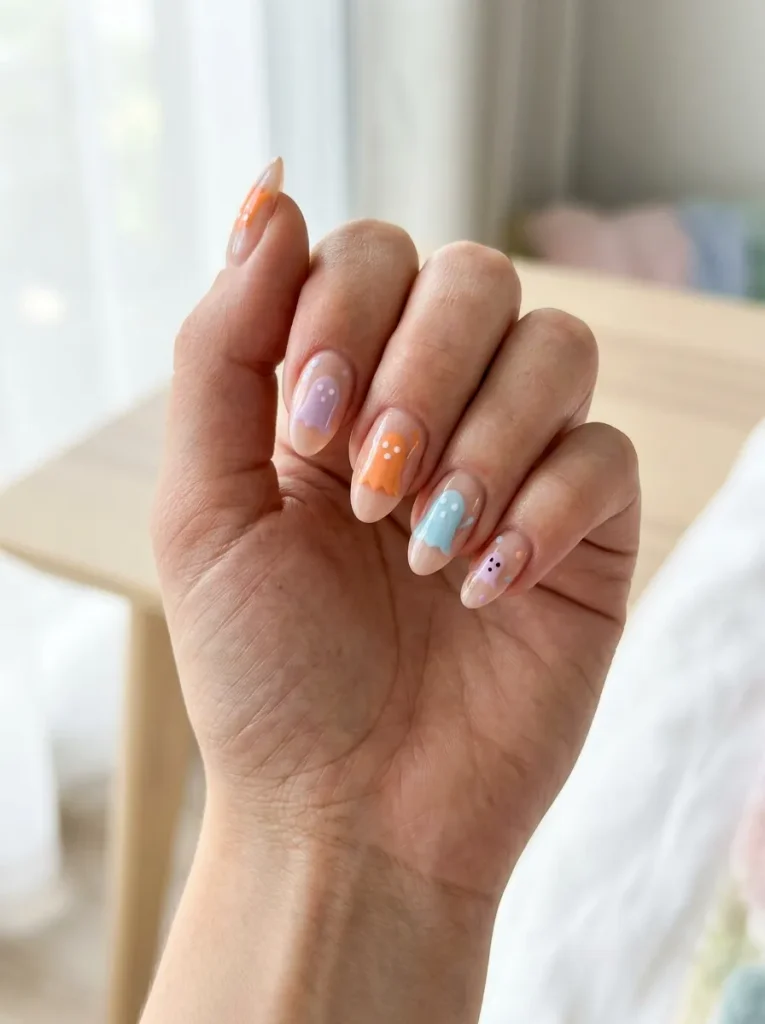
Who says ghosts have to be white? Painting them in orange, lilac, mint, or pastel blue gives the classic design a fresh, colorful twist that stands out from the crowd.
The color swap is the whole idea. Keep the ghost shape and dot-eye face exactly the same, but fill the body in a soft color instead of white. Orange ghosts feel punchy and Halloween, while pastels read sweet and dreamy. It is a fun way to match your ghosts to your favorite shade.
The usual white ghost, classic but the same as everyone else’s.
The same ghost in orange or pastel instantly feels fresh and personal.
14. Glitter Ghosts Over a Shimmer Base
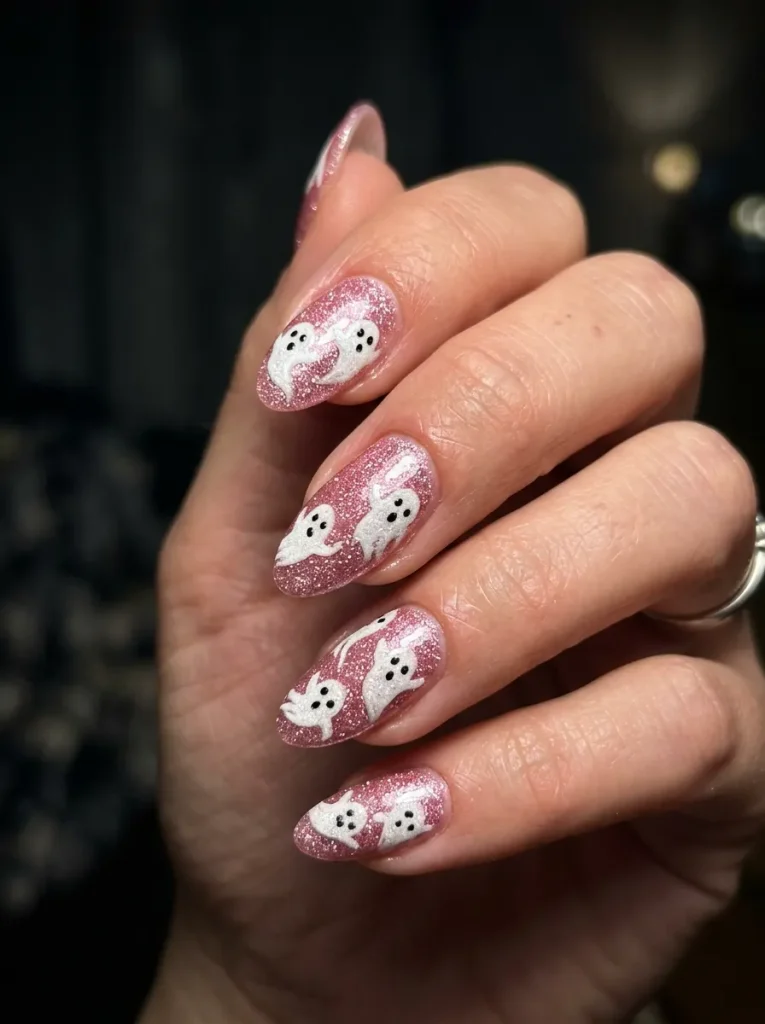
Make your ghosts sparkle from every angle. A shimmer or glitter base under white ghosts adds a soft, magical glow that catches the light beautifully.
The base does the glamorous work. Paint a sheer glitter or pearl shimmer over pink or nude, let it dry, then add your white ghosts on top so they float over the sparkle. As your hand moves, the whole nail shimmers behind the ghosts. It is an easy way to make a simple design feel special.
📌 Good To Know
Use a fine shimmer, not chunky glitter, under the ghosts. A smooth base lets the white ghost bodies sit flat and stay crisp instead of catching on raised flecks.
15. A Sad or Winking Ghost for Personality
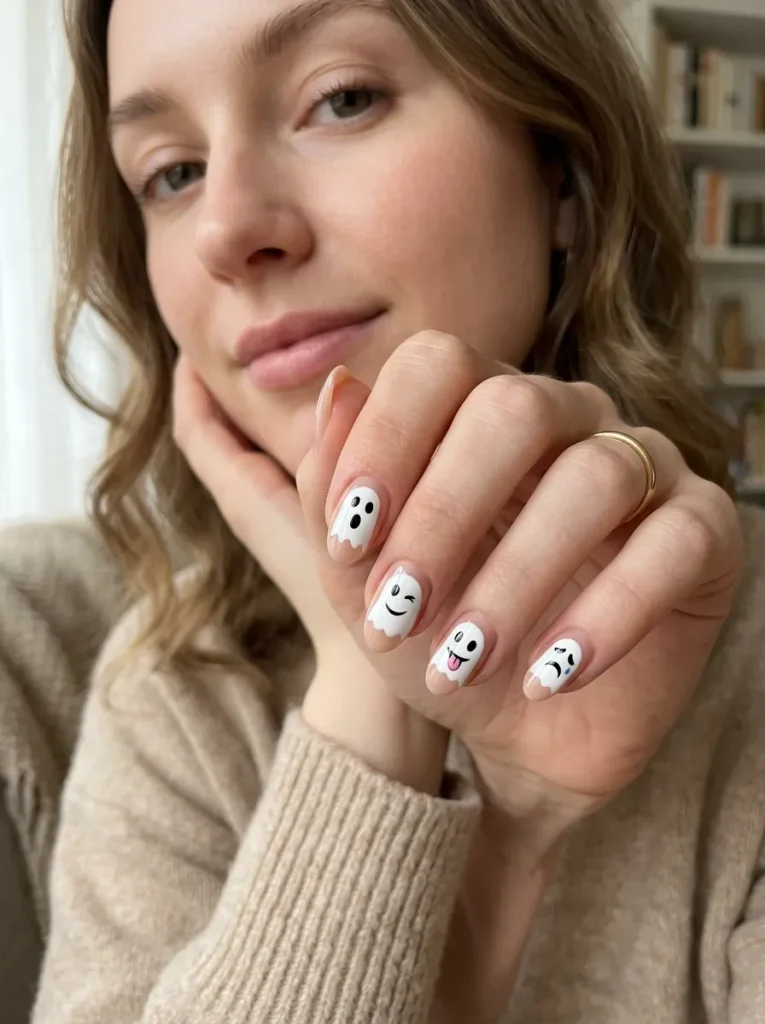
The face is where your ghost gets its character, and small changes make a big difference. A winking eye, a little tongue out, or a sad drop makes each ghost feel alive and full of personality.
Tiny tweaks are all it takes. Instead of two matching dot eyes, try one dot and one curved line for a wink, or add a small “o” mouth for a surprised look. Give each nail a slightly different expression, and your ghosts turn into a whole cast of characters.
Paint the ghost
Start with the white body and wavy bottom.
Change the eyes
One dot and one curved line makes a wink.
Vary each nail
Give every ghost a different little expression.
16. Ghosts on a Pink Ombre
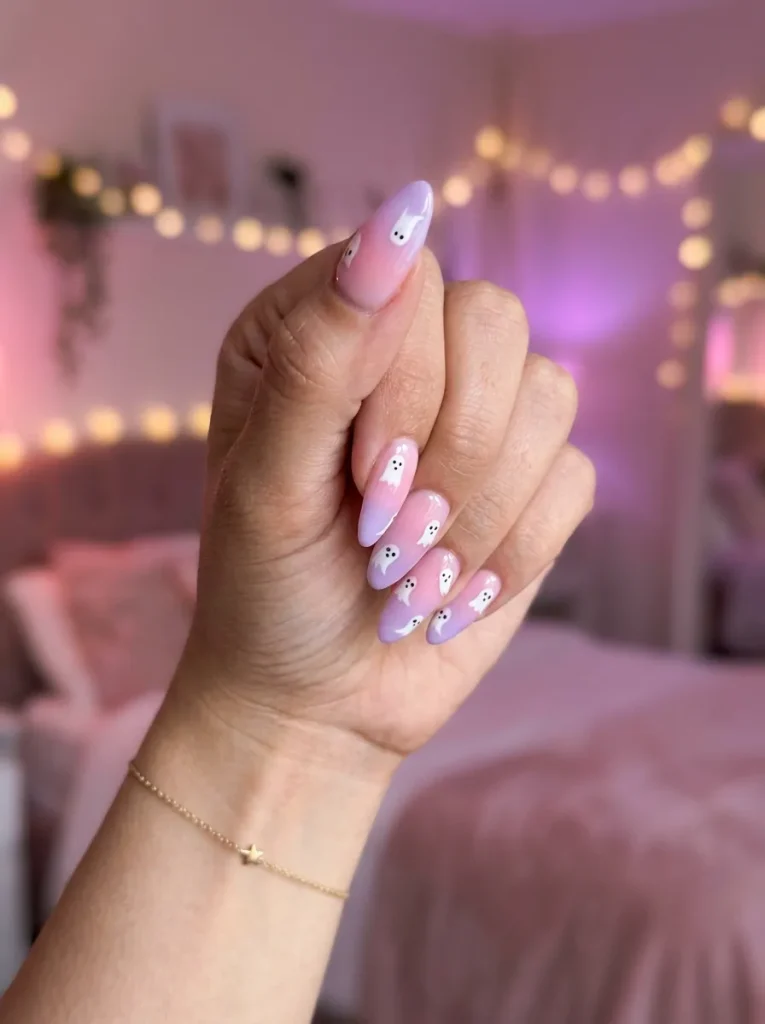
Float your ghosts over a soft gradient and the whole look turns dreamy. A pink-to-purple ombre base under white ghosts gives the design depth and a glam, sunset-sky feel.
The blended background does half the work of looking expensive. Sponge a soft pink into lilac across the nail, let it dry, then add your ghosts on top so they drift over the color. It photographs beautifully and feels a step above a flat base.
| Ombre base | Solid base |
|---|---|
| Dreamy, glam, and photo-ready. | Clean, simple, and quick. |
| Adds depth behind the ghosts. | Keeps ghosts the only focus. |
| Takes an extra sponging step. | Beginner-friendly, one coat. |
17. A Screaming-Ghost Statement Nail
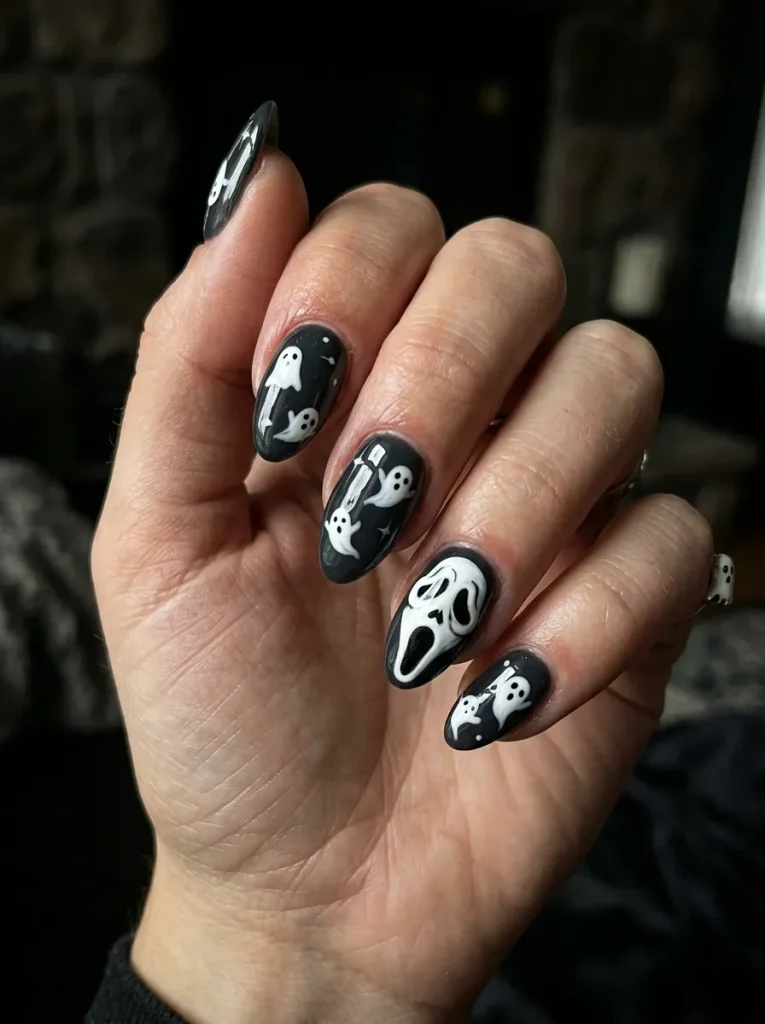
For a ghost with a little more attitude, give one an open, wailing mouth. A screaming-ghost statement nail brings drama to an otherwise cute set and makes a great focal point.
Let one nail carry the drama while the rest stay sweet. Paint a larger white ghost with wide oval eyes and a long open “o” mouth, so it looks like it is mid-shriek. Keep the other nails calm little ghosts, and the contrast reads intentional and fun rather than busy.
18. Tiny Ghosts Scattered Like Confetti
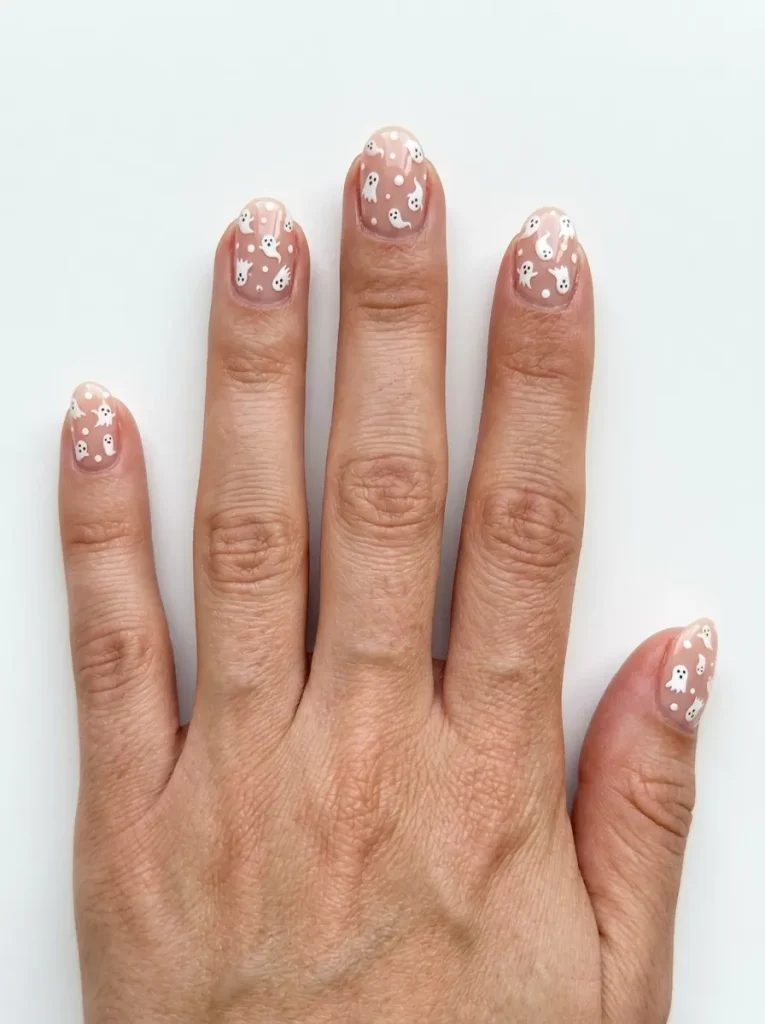
Sometimes more is more, and a scatter of tiny ghosts proves it. Painting lots of little ghosts across each nail like confetti gives a playful, all-over pattern that is endlessly cute.
The trick is to keep them small and varied. Dot ghosts of slightly different sizes at different angles across a nude, pink, or black base, so they look tossed on rather than lined up. It reads busy in the best way, like a whole tiny haunt on your fingertips.
| Placement | Look | Best for |
|---|---|---|
| One big ghost | Bold, simple | Short nails |
| A few floating | Balanced, cute | Medium nails |
| Tiny confetti | Playful, all-over | Long nails |
19. Deep Wine and White Ghosts for an Elegant Twist
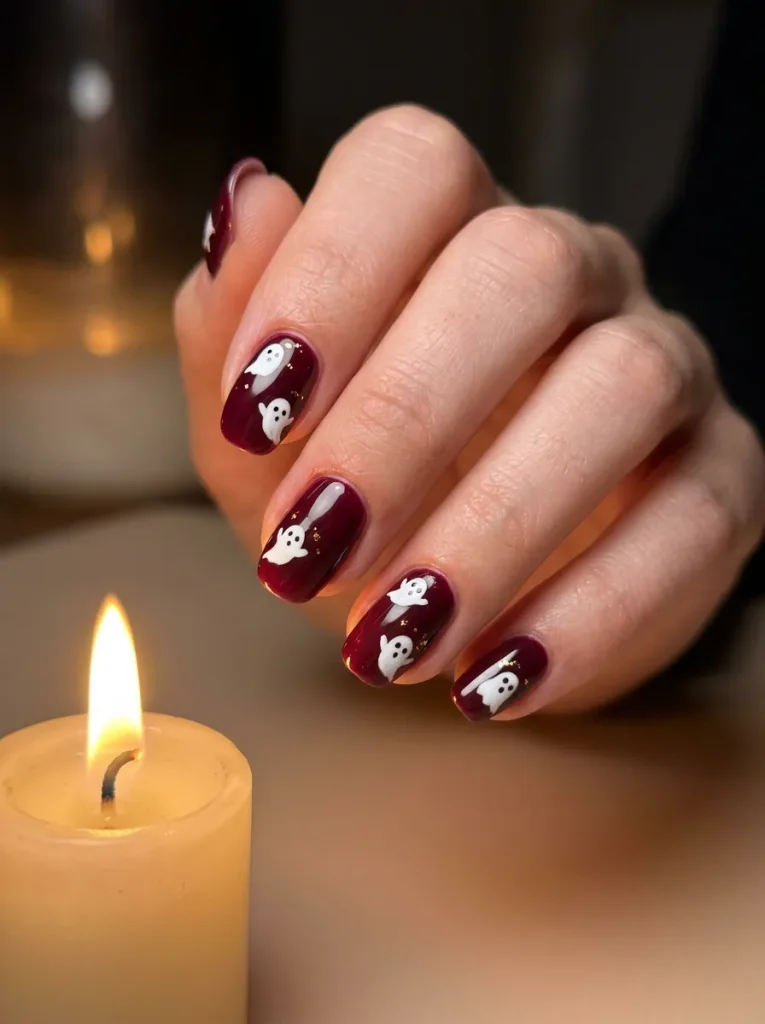
For the most grown-up ghost nails here, swap the black for wine. White ghosts on a deep wine or oxblood base feel rich and elegant rather than childlike, dressy enough for an autumn dinner.
The moody base is what elevates it. The dark wine grounds the cute white ghosts so the whole set looks sophisticated, and it carries you right through the season into the holidays. It is one of the most versatile picks on this list.
20. Press-On Ghost Nails
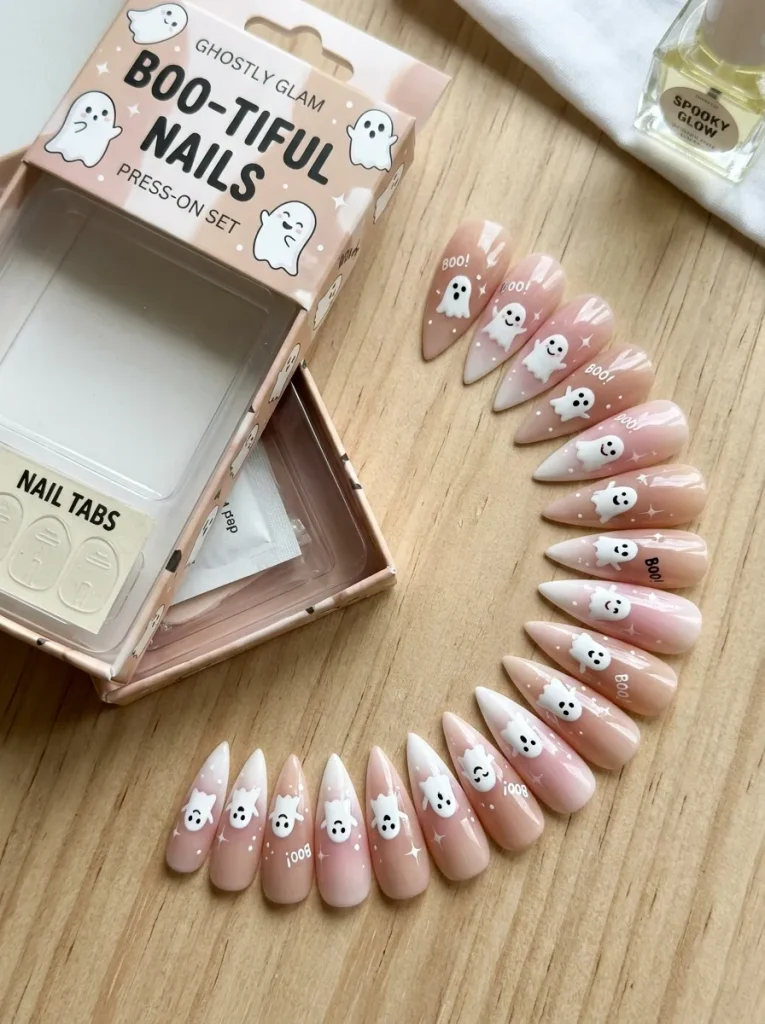
Not everyone wants to hand-paint tiny faces, and press-ons fix that instantly. A set of ready-made ghost press-ons gives you full salon-style ghost nails in minutes at home.
The appeal is speed and freedom. You get neat, even ghosts you might struggle to paint yourself, they pop off after the party, and many can be reused. It is the perfect option when you want the look without the time or the steady hand.
- ▸Ready in minutes, no drying time.
- ▸Neat, even ghosts every time.
- ▸Pop off after the party, no remover needed.
- ▸Many sets can be reused next year.
21. How to Paint a Clean Ghost and Make It Last
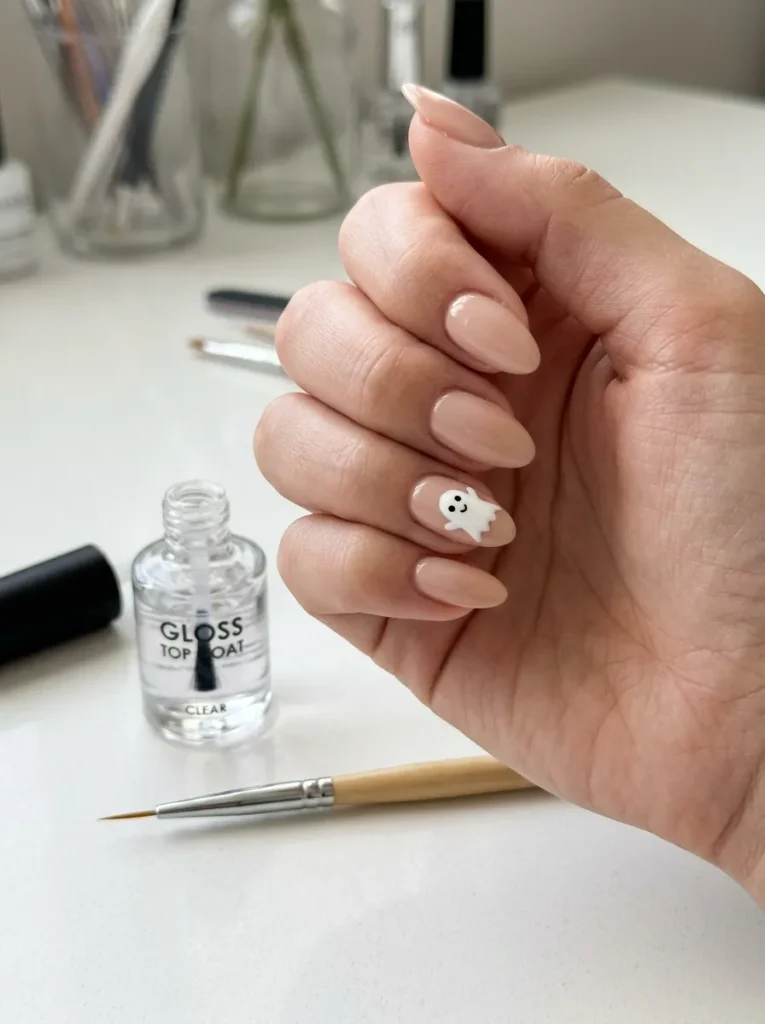
A cute ghost is all in the shape and the seal, and a few habits keep it looking salon-done for days. The secret is a bright body and a good top coat.
Paint the ghost body in two coats of white so it stays opaque, and keep the bottom edge wavy rather than straight for that floating look. Add the dot eyes only once the white is dry, so they do not smudge into it. Then seal everything, running your top coat along the very tip of the nail, and refresh that top coat after a couple of days to keep your ghosts crisp and chip-free.
Pro tip
Let the white ghost body dry fully before adding the eyes and mouth. Painting black dots onto wet white drags grey into the face, and that is what makes a home ghost look messy.
Give Your Fingertips a Friendly Haunt
Ghost nails win every Halloween because they are the rare design that is both easy and adorable. A ghost is just a white shape and two little eyes, so anyone can paint one, and yet the look never gets old. Cute on pink, bold on black, chic on nude, there is a version for every mood and skill level.
Start with a single ghost accent to find your groove, then play with cheeks, winks, colors, and glitter as your hand gets steadier. However you style your cute ghost Halloween nails, they turn getting ready into the sweetest part of spooky season.
Tuck this into your nail board so a friendly little ghost is always waiting when you are ready to switch up your manicure.