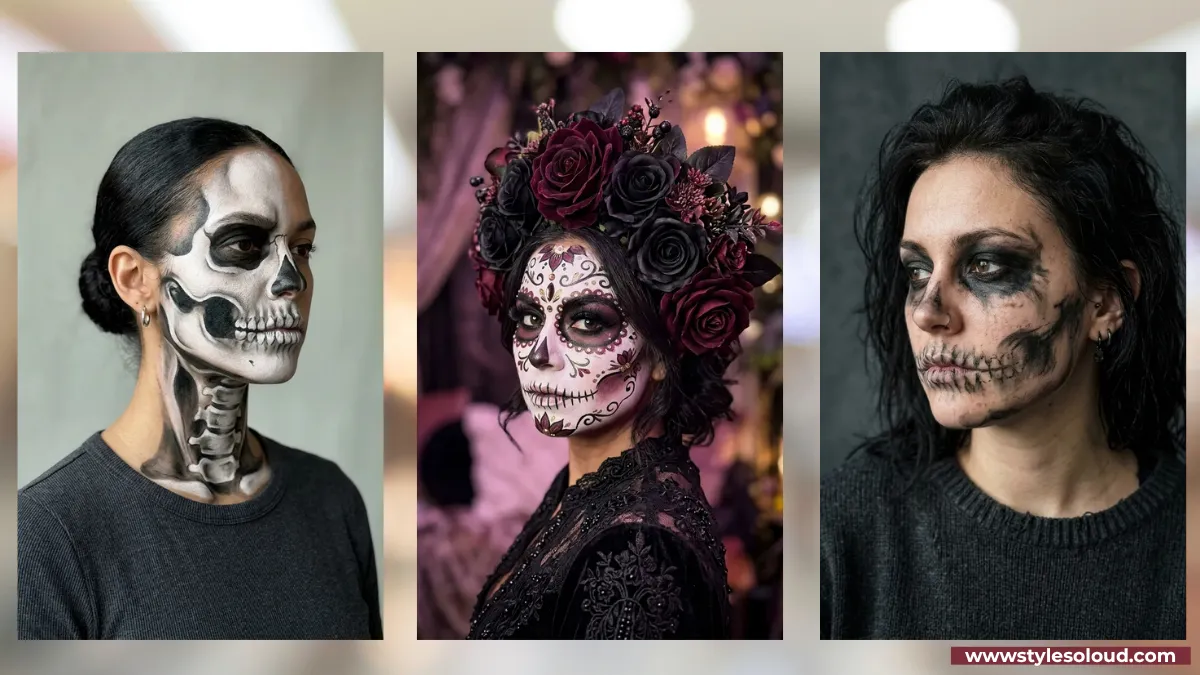
Skeleton makeup is the rare Halloween look that scales to whatever effort you have in you. Ten minutes and a black eyeliner gets you something genuinely striking. A free evening and a few brushes gets you something people photograph all night.
That range is why it never goes out of style. The same basic shapes, hollowed eyes, a shaded nose, a stitched smile, can be soft and smudged, sharp and graphic, covered in rhinestones, or extended all the way down your chest. You can wear it with a black dress and be done, or build a whole costume around it.
These 15 skeleton Halloween makeup ideas run from a five-minute half-skull to full ribcage body art, with sugar skull variations, glam versions, the products that hold up all night, and how to take it off without destroying your skin. Start wherever your skill level is and work up.
1. The Five-Minute Half-Skull for Beginners
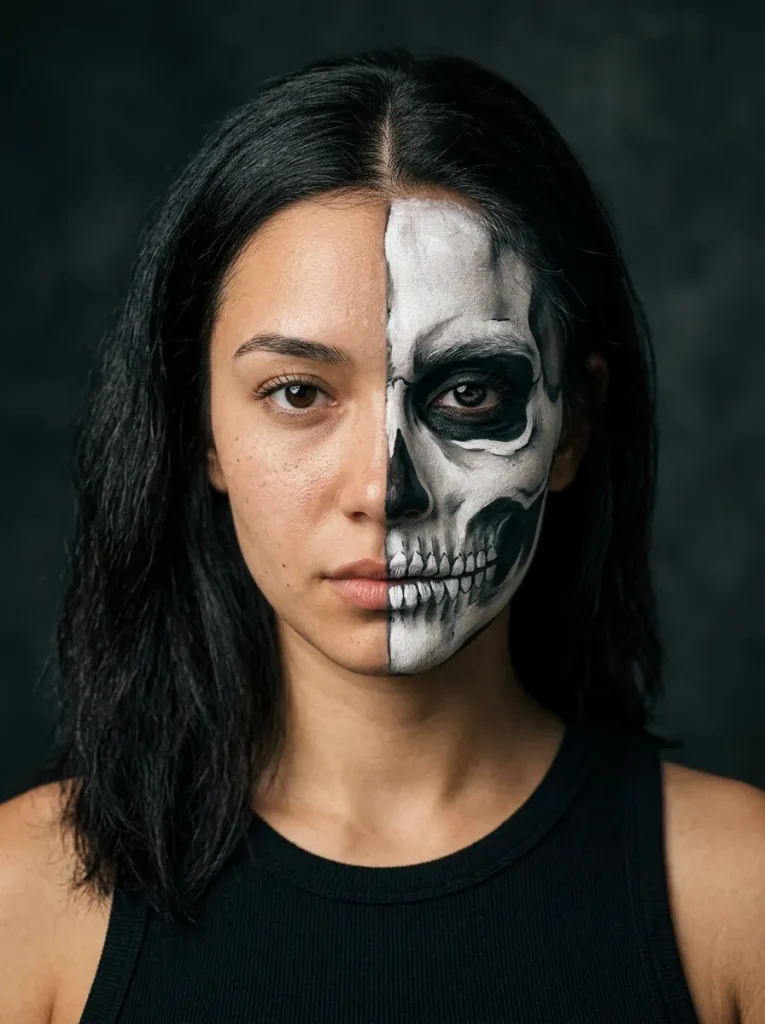
If you have never done this before, start here. Painting only half your face as a skull and leaving the other half bare is fast, forgiving, and looks intentional rather than unfinished.
The split is the whole concept, so you only need to get one side right. Work down the centre of your face, blacking out one eye socket, shading half the nose, and drawing teeth across one side of the lips. Everything you need is probably already in your makeup bag.
2. Classic Black-and-White Full Skull Face
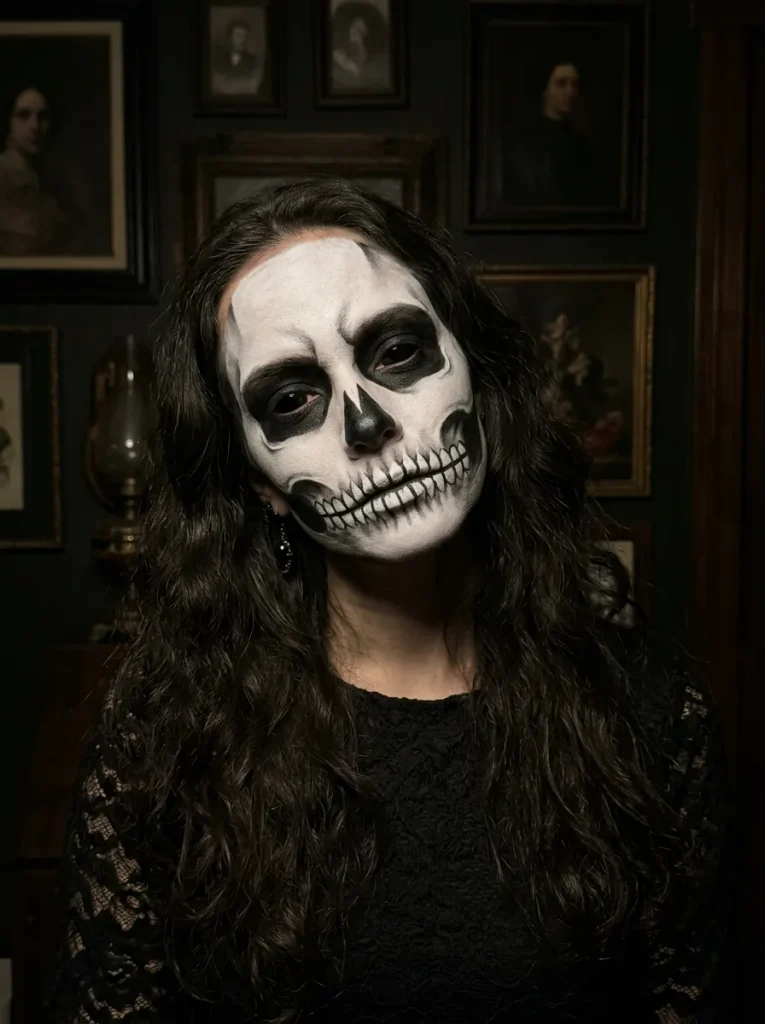
This is the version everyone pictures, and it is far more achievable than it looks. A white base, two blacked-out eye sockets, a shaded triangular nose, and a row of teeth across the lips.
Work in this order and the shapes fall into place naturally.
Lay the base
Cover the whole face in white cream paint and set it with powder.
Build the sockets
Black circles around each eye, blended out slightly at the edges.
Nose and teeth
A black heart shape on the nose tip, then vertical teeth lines across the lips.
3. A Hollow-Eye and Stitched-Smile Version
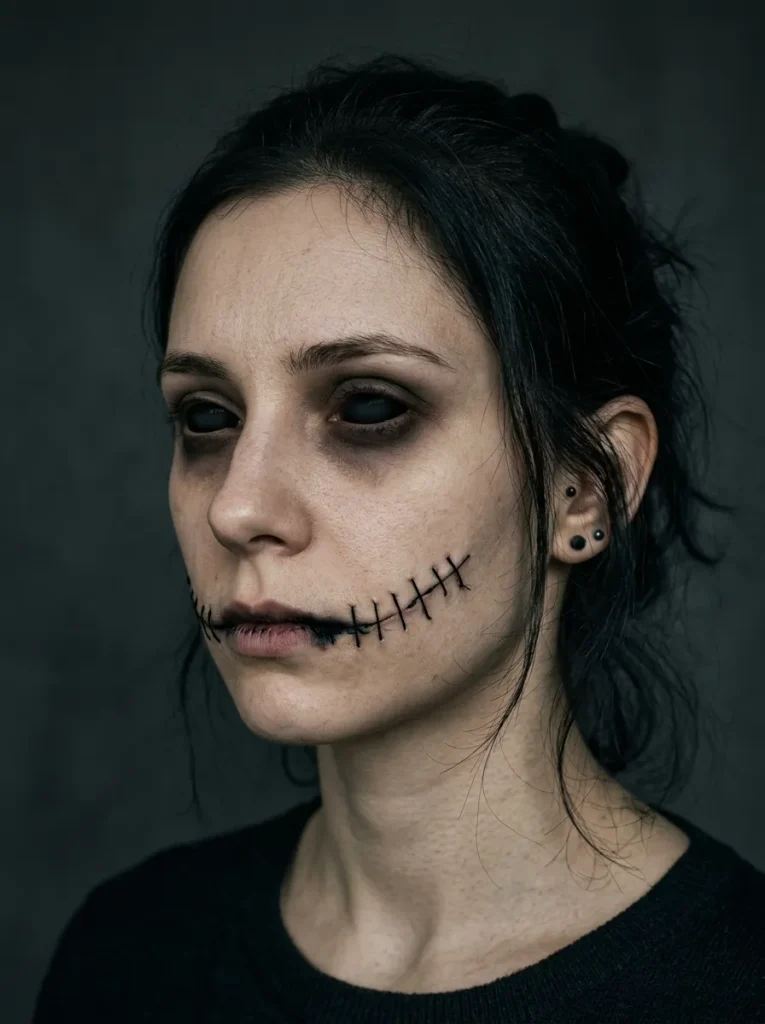
A slightly softer take that skips the full white base. You keep your natural skin tone and focus everything on two dramatic details: deeply hollowed eyes and a stitched smile extending from the corners of your mouth.
It reads as eerie rather than cartoonish, and it takes half the time of a full skull. Because there is no white paint, it also feels much lighter on the skin over a long night.
html
💡 Quick Tip
Draw the stitches with a fine liquid liner rather than a pencil. Liquid gives you crisp, even lines that read clearly in photos, while a pencil drags on the skin and looks patchy up close.
4. The Smudged Grunge Skull With Soft Edges
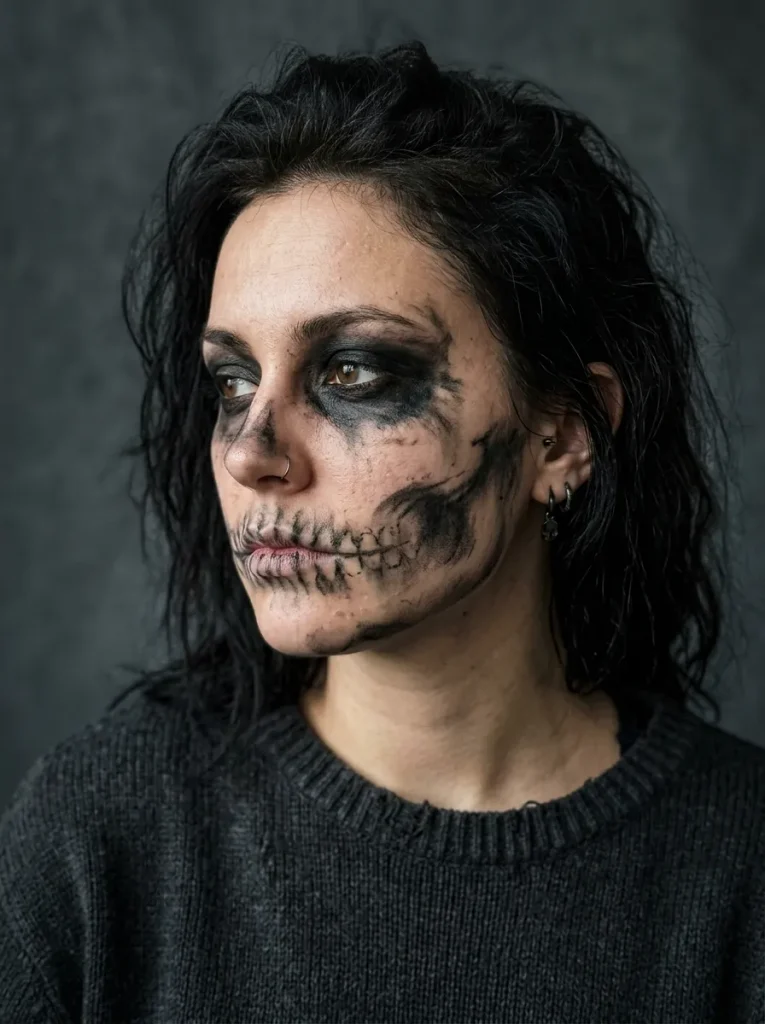
Not every skull needs sharp lines. A deliberately smudged version, with soot-black sockets blended out and a roughly sketched jaw, has a moody, editorial quality that photographs beautifully.
It is also the most forgiving look on this list, since imperfection is the point.
| Sharp graphic skull | Smudged grunge skull |
|---|---|
| Needs steady hands and clean lines. | Mistakes blend straight in. |
| Reads bold from a distance. | Reads moody and atmospheric. |
| Takes 30 to 45 minutes. | Takes about 15 minutes. |
5. Ornate Sugar Skull With Scrollwork
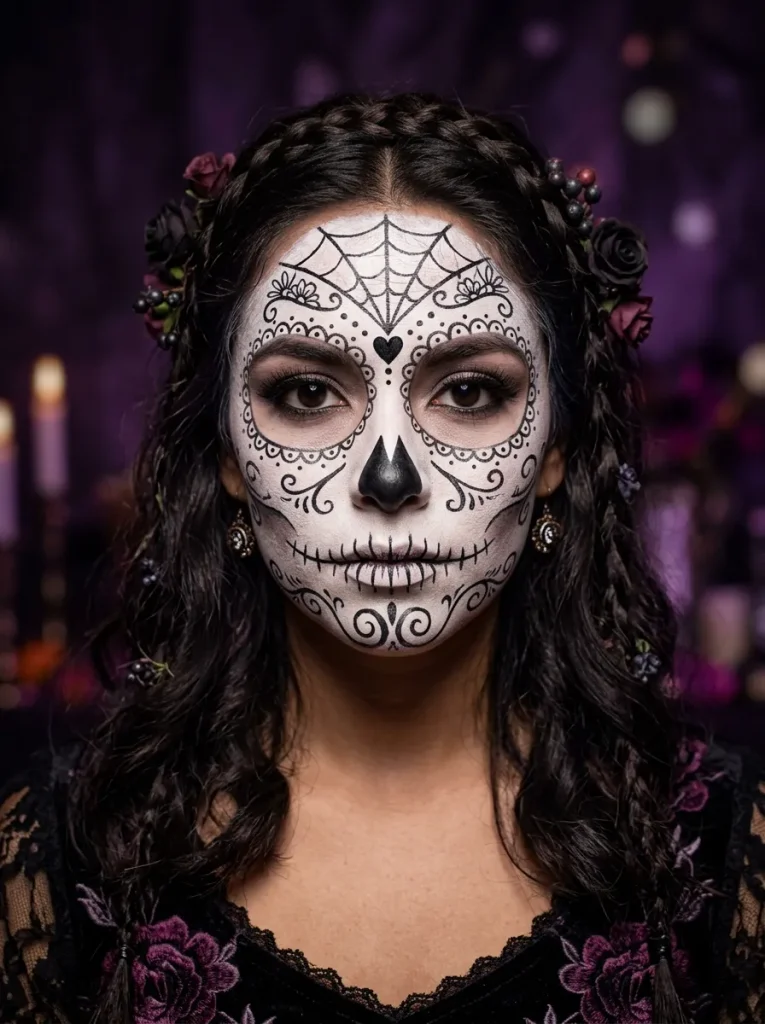
Here is where skeleton makeup becomes genuinely artistic. A sugar skull uses the same basic structure but adds decorative scrollwork, dots, petals, and swirls across the forehead and cheeks.
The difference between a plain skull and an ornate one is entirely in these small painted details.
A plain white base with black sockets and teeth, striking but quite flat.
Add scrolled swirls on the chin, dots around the sockets, and a web on the forehead, and it becomes art.
6. Adding Rhinestones Around the Eyes
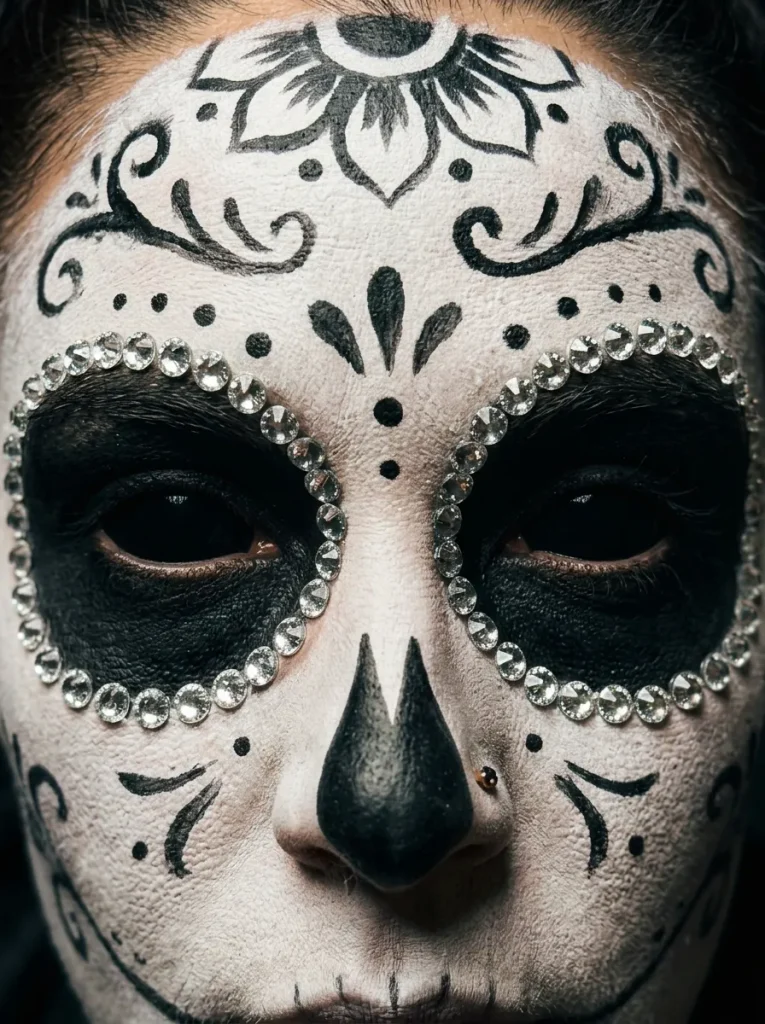
Rhinestones are what take a sugar skull from painted to jewelled. A ring of small gems around each eye socket catches every light and adds real dimension.
Gather these before you start, since stopping halfway to hunt for glue is how designs get smudged.
What to have ready
7. A Red-and-Pink Sugar Skull
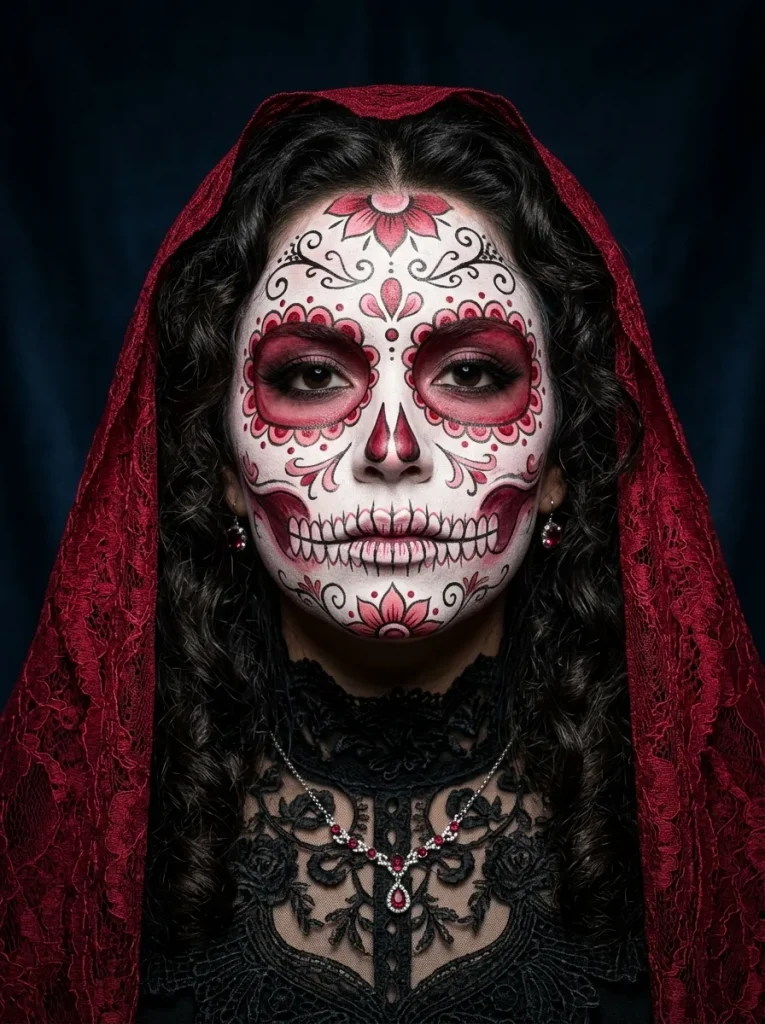
Colour changes the whole personality of a sugar skull. Swapping black detailing for deep red and soft pink creates something romantic and theatrical rather than eerie.
The colours need handling carefully to avoid looking muddy.
Outline every red or pink shape in fine black so it stays crisp.
Let each colour dry fully before adding the next one.
Blending red directly into the white base, which turns pink and murky.
Using more than three colours, which quickly looks chaotic.
8. The Floral Crown That Completes the Look
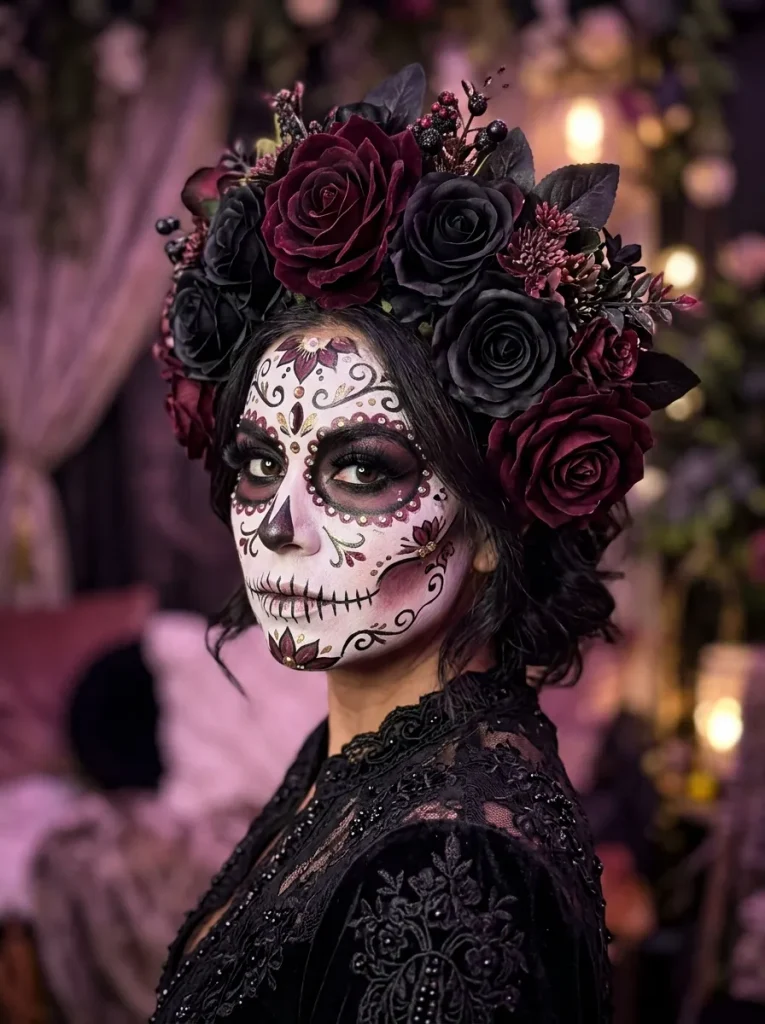
The makeup does most of the work, but a floral crown is what makes it feel finished. Dark roses, deep reds, and a little greenery frame the face and add height.
These are the questions that come up most when people put one together.
❓ Real or artificial flowers?
Artificial, every time. They hold their shape all night, weigh less, and you can reuse them next year.
❓ Which colours work best?
Deep burgundy, black, and dusty rose. They frame the face without competing with the makeup underneath.
❓ How do I keep it in place?
Build it on a wire headband and anchor it with bobby pins crossed underneath at each side.
9. Glam Skull With Full Lashes and Contour
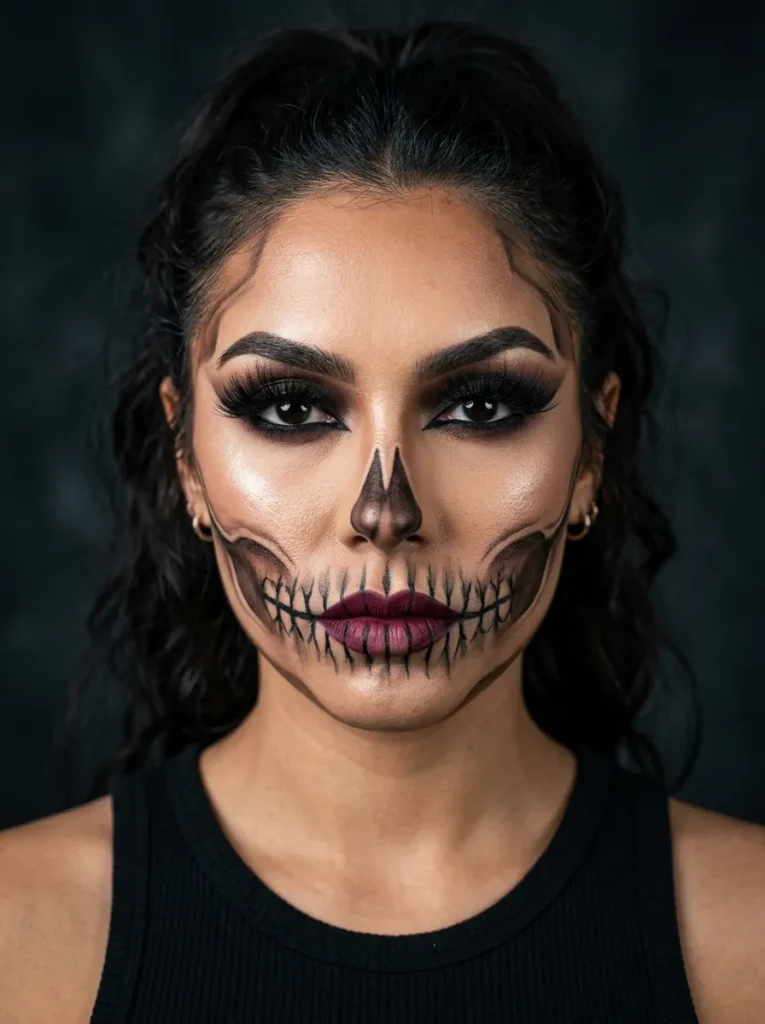
This is the version for anyone who wants to look striking rather than scary. You keep your full glam routine, sculpted contour, dramatic lashes, a strong brow, and layer skull elements on top.
The result is genuinely beautiful, though it does take longer than a straightforward skull.
10. Metallic and Chrome Skull Detailing
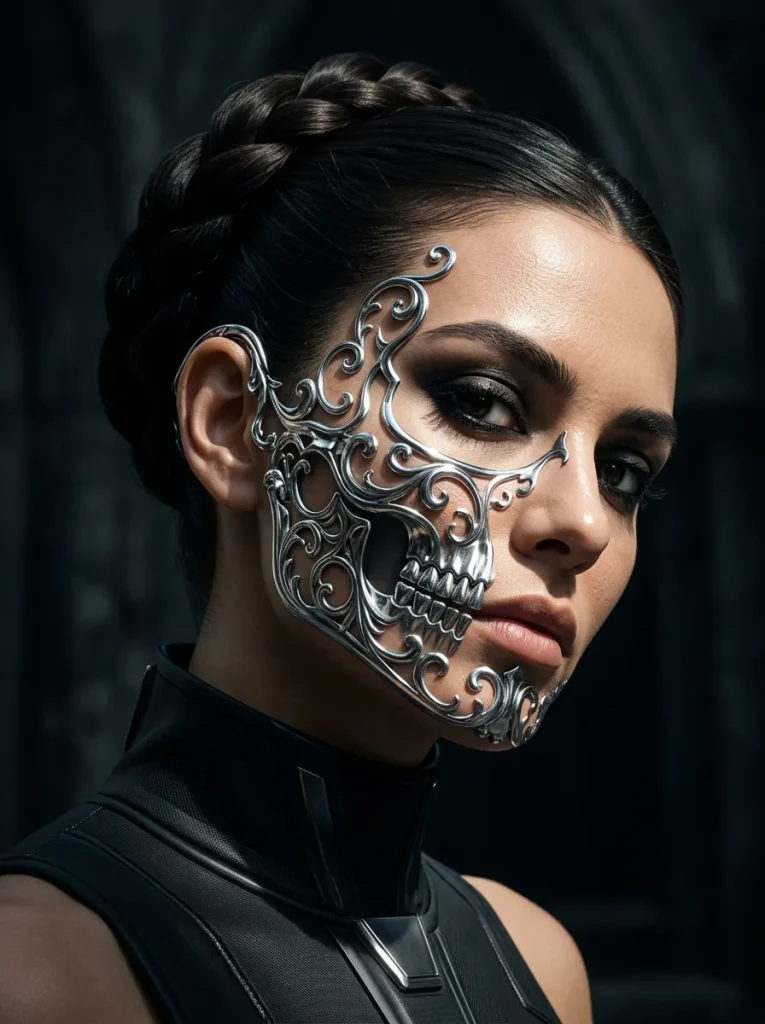
For something modern and unexpected, swap black detailing for metallic. Silver or chrome scrollwork on a white base looks futuristic and catches light in a way flat paint never does.
Apply the metallic last, once everything underneath is fully set.
Match your nails to the look, see our Halloween nail ideas →“Metallic pigment needs a dry surface to sit on. Applied over damp paint it goes grey and loses every bit of its shine.”
11. Extending the Skeleton Down the Neck
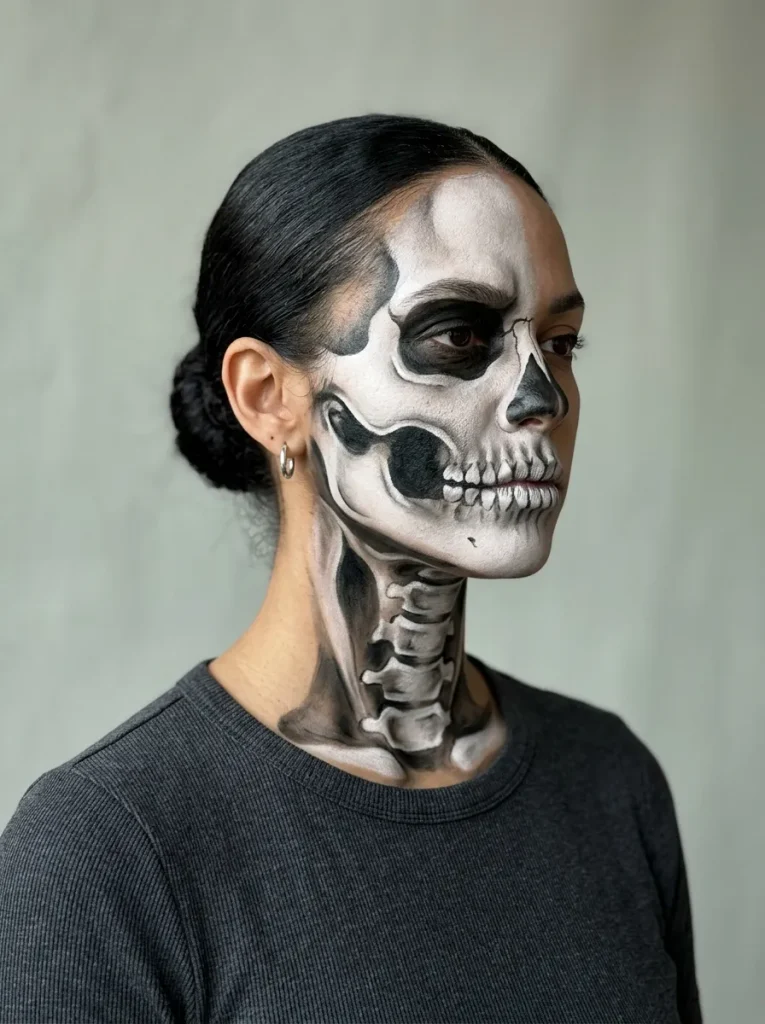
The moment your skull stops at the jawline, the illusion breaks. Carrying the bone structure down onto the neck is what makes people look twice.
Painted vertebrae and shadowed neck hollows turn a face look into a full transformation.
12. Full Chest and Collarbone Ribcage
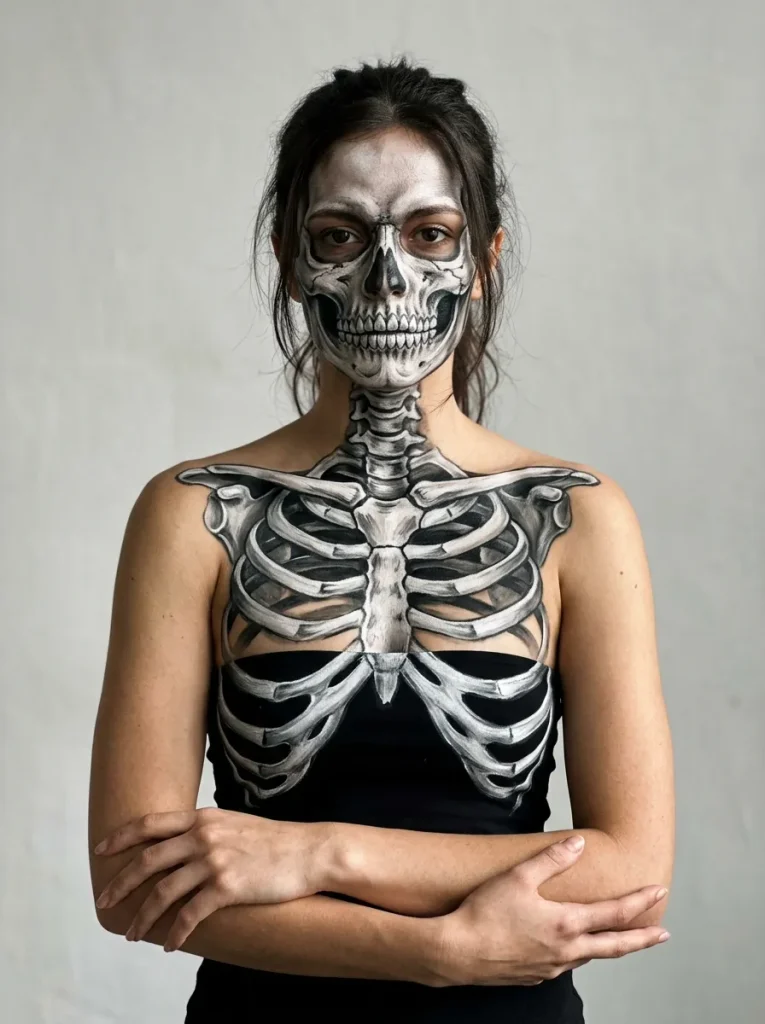
The most dramatic option here, and the one that turns heads immediately. A painted ribcage across the chest and collarbones reads as genuine body art.
Work outward from the centre so both sides stay symmetrical.
Paint the sternum first as a vertical line down the centre of the chest.
Add curved ribs outward from it in matching pairs, working top to bottom.
Soften the edges with a sponge so the bones look shadowed rather than drawn on.
13. Skeleton Hands to Finish the Illusion
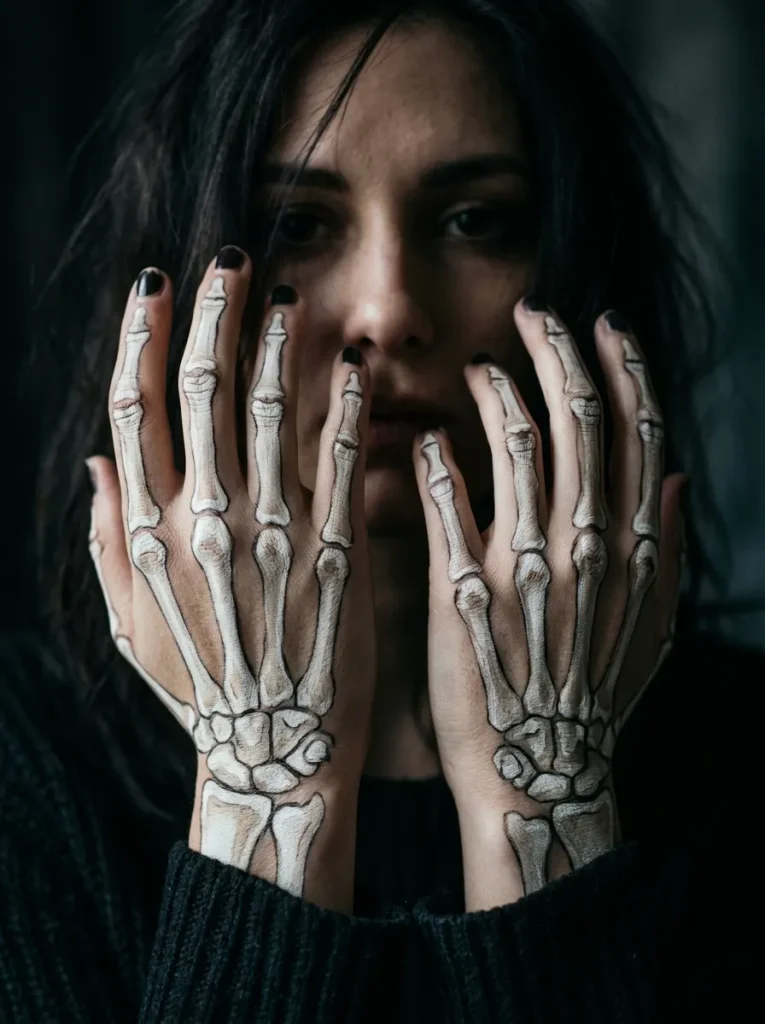
Your hands appear in almost every photo you take, so painting them is a small effort with a big payoff. Bones drawn down the backs of the hands and fingers complete the whole skeleton.
There are two approaches, depending on how much time you have.
| Method | Time | Durability |
|---|---|---|
| Painted by hand | 20 minutes | Rubs off when you wash |
| Temporary transfers | 5 minutes | Lasts all night |
| Printed gloves | Instant | Permanent, but less realistic |
14. The Products That Make It Last All Night
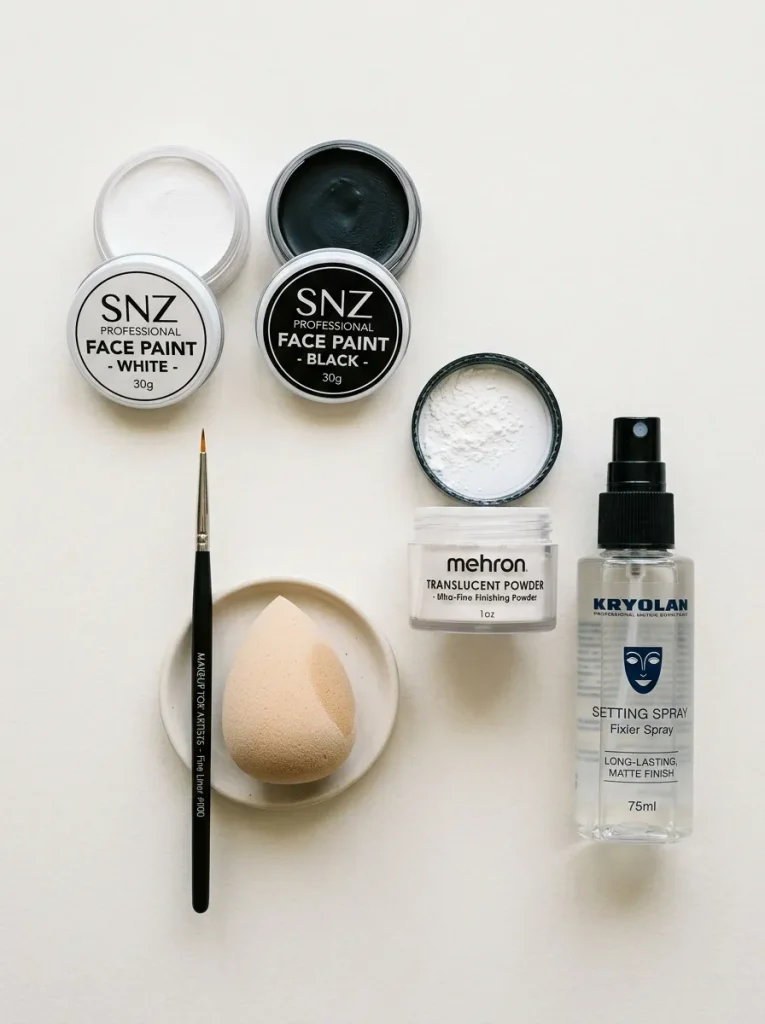
Nothing ruins hours of work faster than paint cracking by nine o’clock. The products you choose matter more than your painting skill.
Set every layer with translucent powder before adding the next one. Unset cream paint is what smudges, transfers, and slides off by the end of the night.
Use cream or water-activated face paints designed for skin rather than craft paint, which cracks and can irritate. A grippy primer underneath gives the paint something to hold onto, and a setting spray over the top locks everything in. Blot rather than wipe if you need to fix something mid-evening.
15. Removing It All Without Wrecking Your Skin
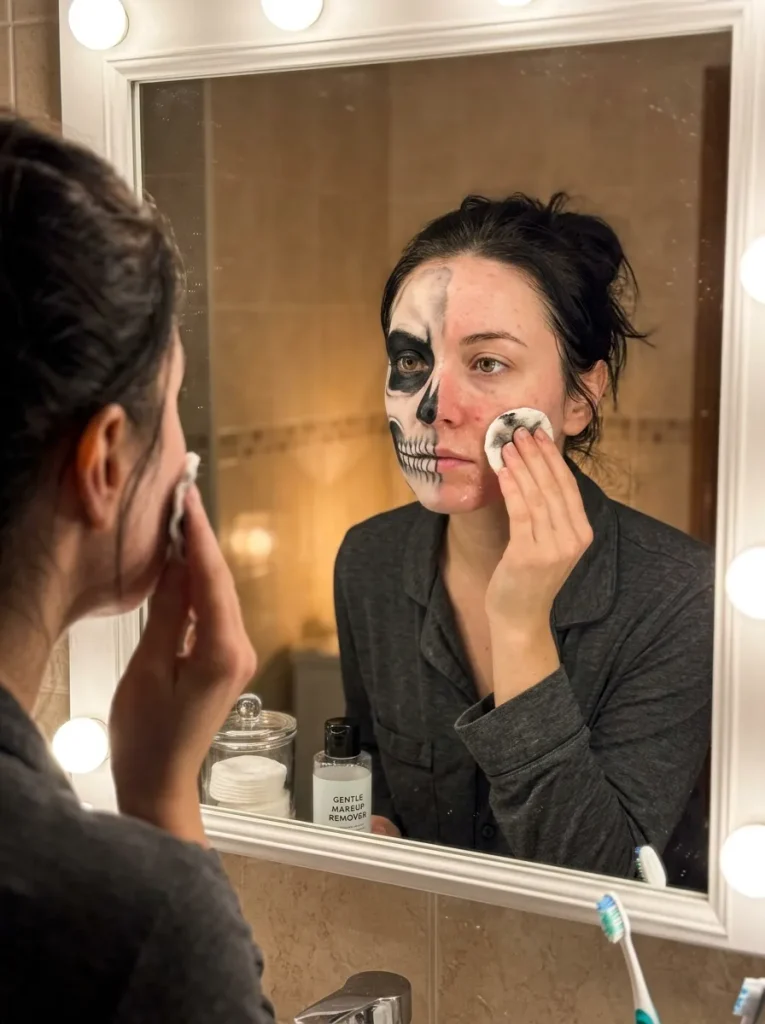
After all that effort, the temptation is to scrub it off and fall into bed. That is exactly how you end up with irritated skin for days afterwards.
Loosen everything with an oil-based cleanser or micellar water first, letting it sit for a minute before you touch anything. Wipe gently in one direction rather than scrubbing back and forth. Follow with a normal gentle cleanser to remove the residue, then a rich moisturiser, since face paint is genuinely drying. Take rhinestones off by easing them with oil rather than pulling.
Do a patch test on your inner arm a few days before, especially with white face paint and rhinestone adhesive. Finding out you react to something at eight o’clock on Halloween night is a problem with no good solution.
Start Simple and Build From There
The best thing about skeleton makeup is that there is no wrong version. A smudged half-skull done in ten minutes is just as valid as a jewelled sugar skull with a floral crown, and both will get you compliments all night.
Pick the look that matches the time you actually have, not the time you wish you had. Set every layer, keep your colours to three, and do a patch test first. Whichever of these skeleton Halloween makeup ideas you try, the shapes are simpler than they look once you start.
Pin this to your beauty board so it is ready when you sit down at the mirror on the 31st.