
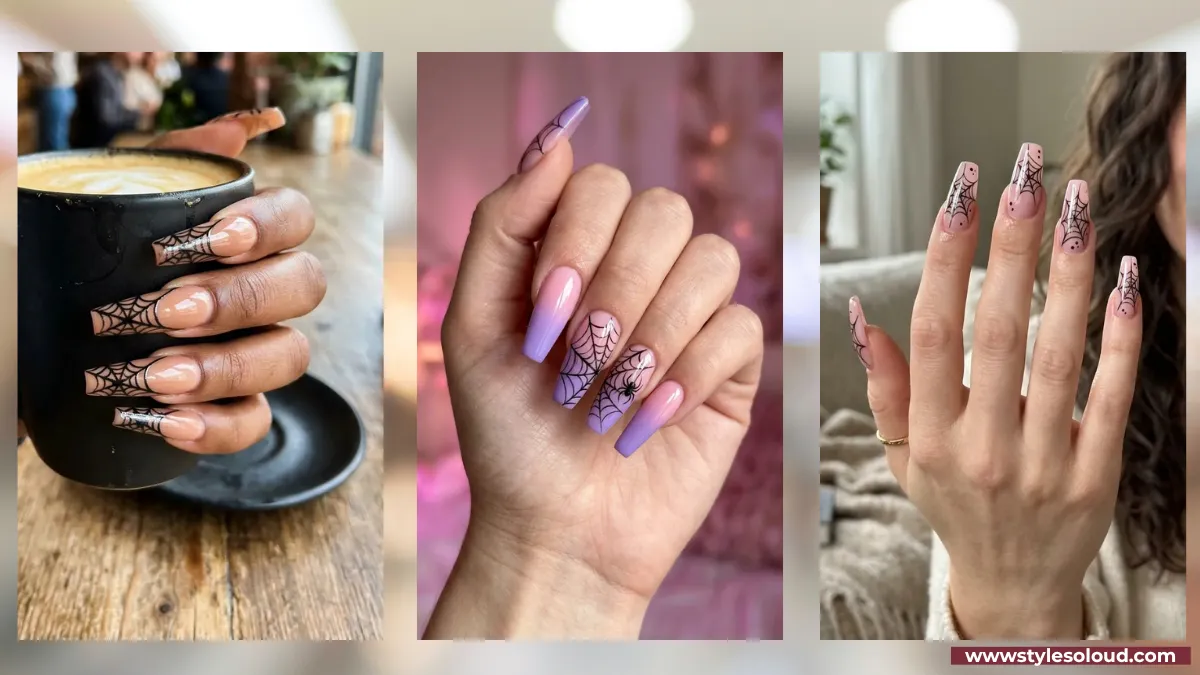
A spiderweb might be the single most perfect Halloween nail design. It is instantly recognizable, it looks intricate even when it is simple, and it works on any nail length, shape, or base color you can think of. One little web in the corner of a nail says spooky season better than almost anything else.
The best part is how forgiving it is. A web is really just a few lines crossing each other, so even a shaky first attempt reads clearly as a web. From there you can go anywhere: a soft pink base, a bold black-on-nude French tip, a rhinestone spider, or a full glam stiletto set dripping in delicate silk.
These 20 spiderweb Halloween nail designs run from the easiest corner web to advanced glam sets, mostly built around that classic black web you keep seeing everywhere. You will find clear how-tos, cute variations, and a few chic twists. Pick the ones that fit your skill and your mood, and spin your own web this season.
1. The Classic Corner Web Over Nude
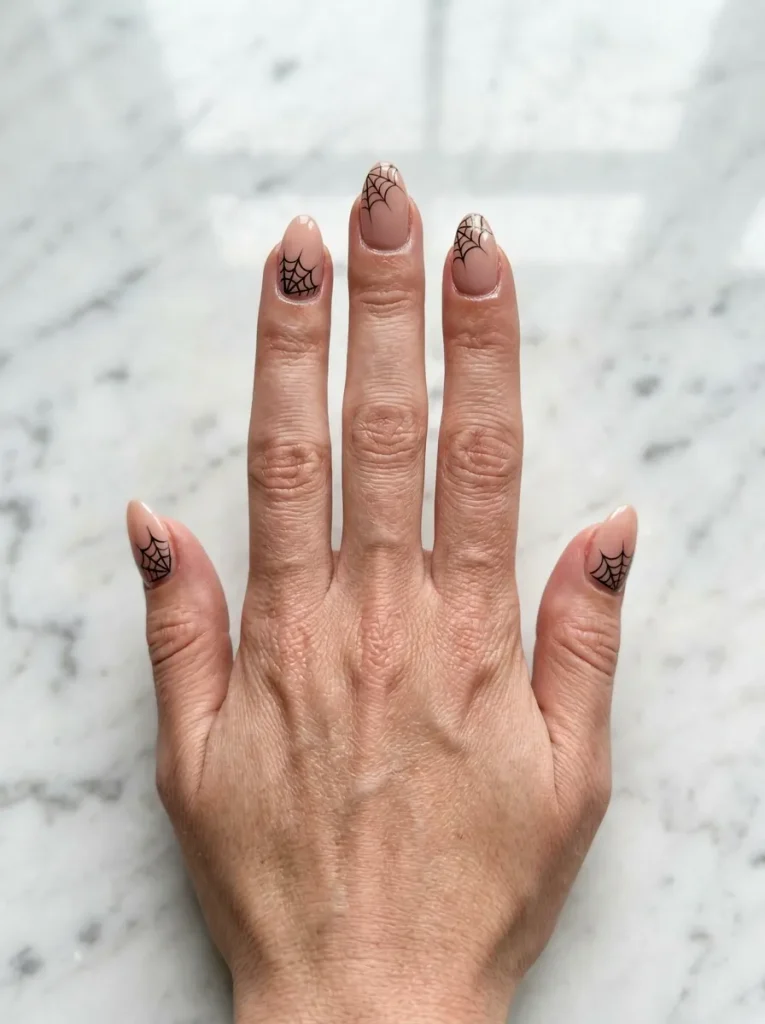
Start with the design that started it all. A single web spun out from one corner of a nude nail is the easiest, most versatile spiderweb look there is.
Because it sits in just one corner, it never overwhelms the nail, which keeps it wearable for work or everyday. Paint a sheer nude or soft pink base, then fan a few thin black lines out from the top corner and connect them with small curved arcs. It is the design every other web on this list builds from.
2. A Full Black Web Across the Whole Nail
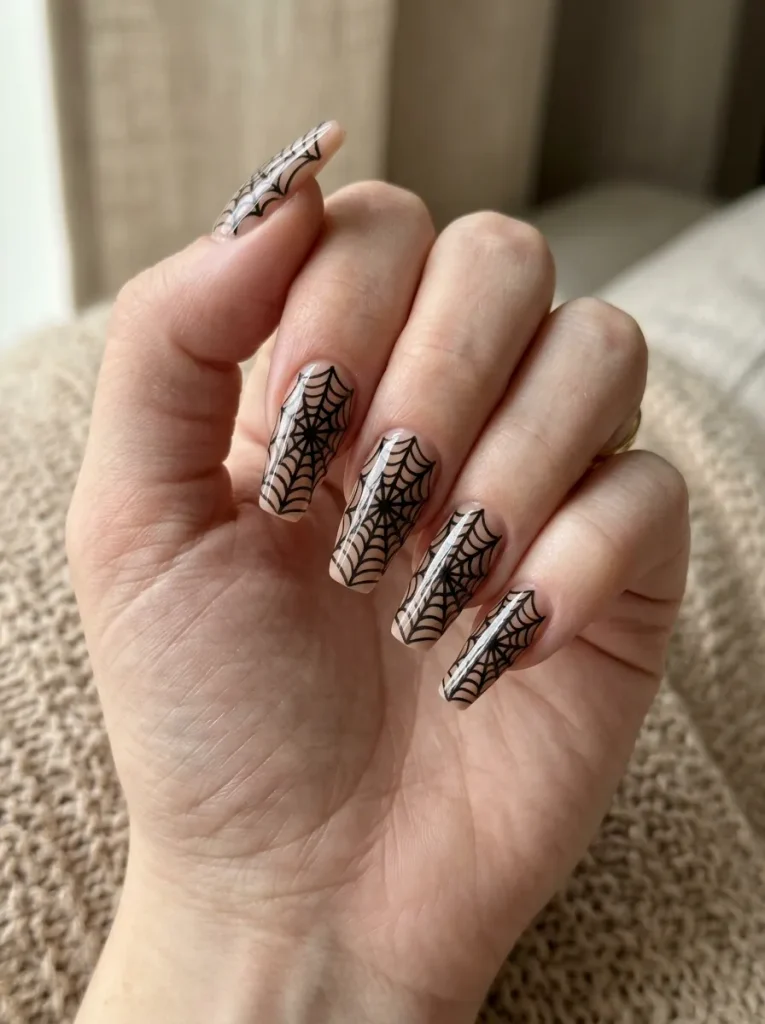
When you want more drama, let the web take over. A full spiderweb stretched across the entire nail looks intricate and bold, especially on longer shapes.
The key is spacing the lines so the web fills the nail without crowding. Start your anchor lines from one point, usually a corner or the center top, then fan them across the whole surface and connect with arcs. On a nude or pink base, the black web really stands out.
💡 Quick Tip
Paint your straight anchor lines first, then add the curved connecting arcs last. Building the frame before the webbing keeps the whole design even instead of lopsided.
3. Spiderweb French Tips
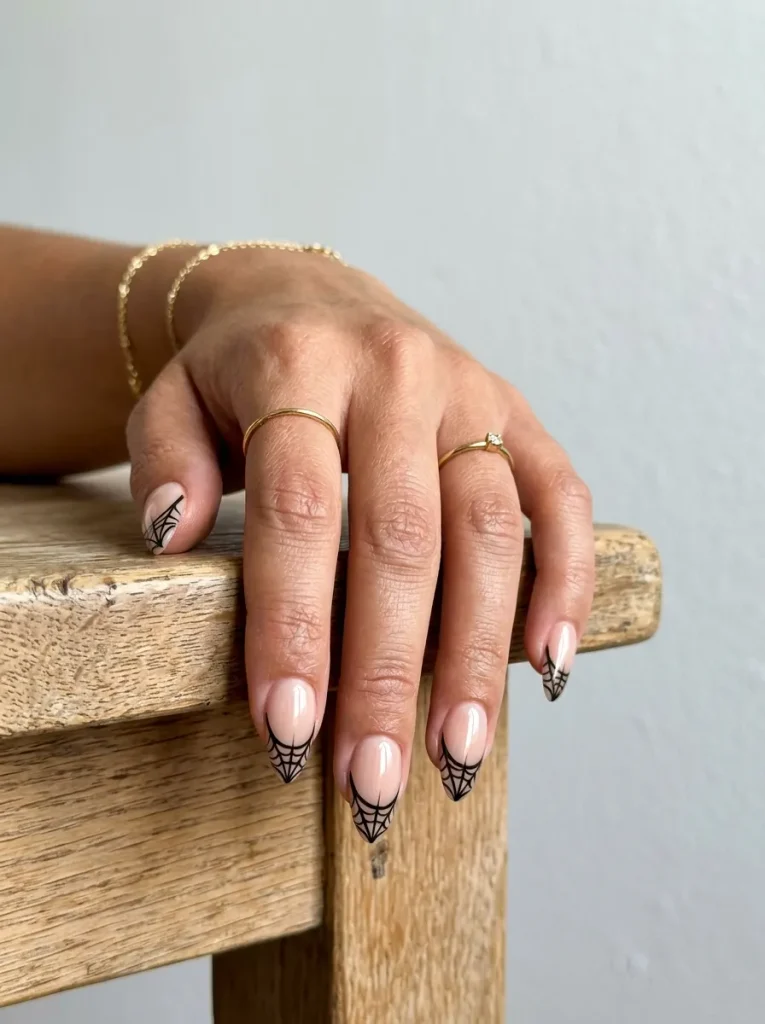
Give the classic French manicure a spooky update. Swapping the plain white tip for a black spiderweb keeps the elegant shape while making it clearly Halloween.
It comes together in a few steps, and the nude base keeps it chic and wearable.
Nude base
Paint a sheer nude or soft pink over the whole nail.
Web the tip
Fan black lines from a top corner across the tip only.
Connect and seal
Add small arcs, then finish with glossy top coat.
4. A Single Web Accent Nail
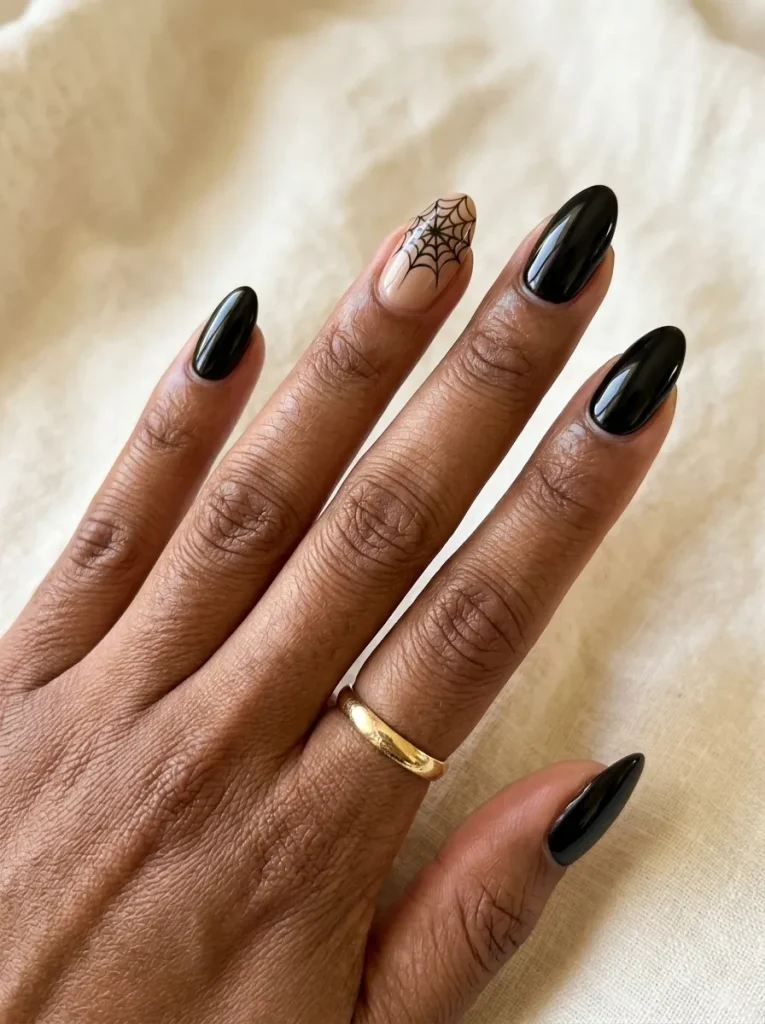
You do not have to web every finger. One spiderweb accent nail with the rest kept plain looks intentional and modern, and it cuts your painting time way down.
Letting a single nail carry the design keeps the whole hand from looking busy. Paint the web on your ring or middle finger, then keep the others a solid glossy black, nude, or pink. It is the most restrained option here, and often the chicest.
| One accent web | Full web set |
|---|---|
| Quick and beginner-friendly. | Takes more time and patience. |
| Subtle and modern. | Bold and clearly festive. |
| Easy to keep neat. | More room for uneven lines. |
5. Black Web on a Soft Pink Base
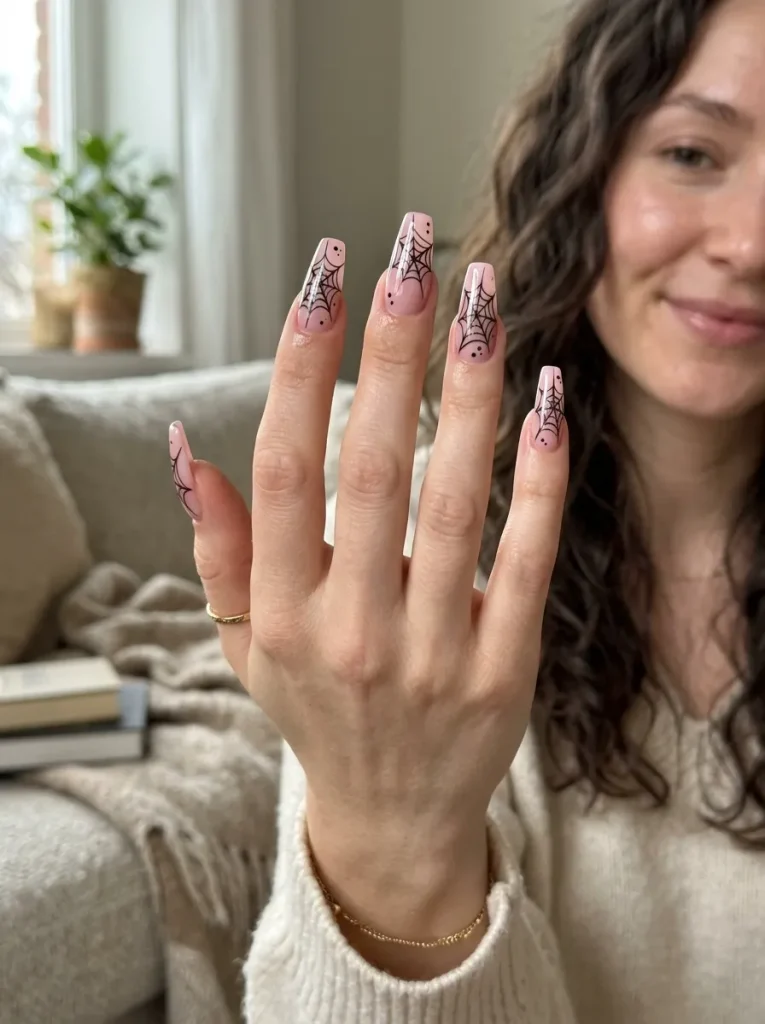
Swap the nude for pink and the whole look softens. A black spiderweb over a soft pink base is pretty and spooky at once, which is why it is all over Pinterest right now.
The contrast is what makes it pop. The girly pink keeps the design sweet while the black web keeps it Halloween, a balance that suits almost everyone. Choose a milky or bubblegum pink depending on how bold you want it, then add your web on top.
A plain soft pink nail, pretty but not seasonal on its own.
A black web spun on top turns the same pink into a sweet-but-spooky Halloween look.
6. White Web on a Dark Base
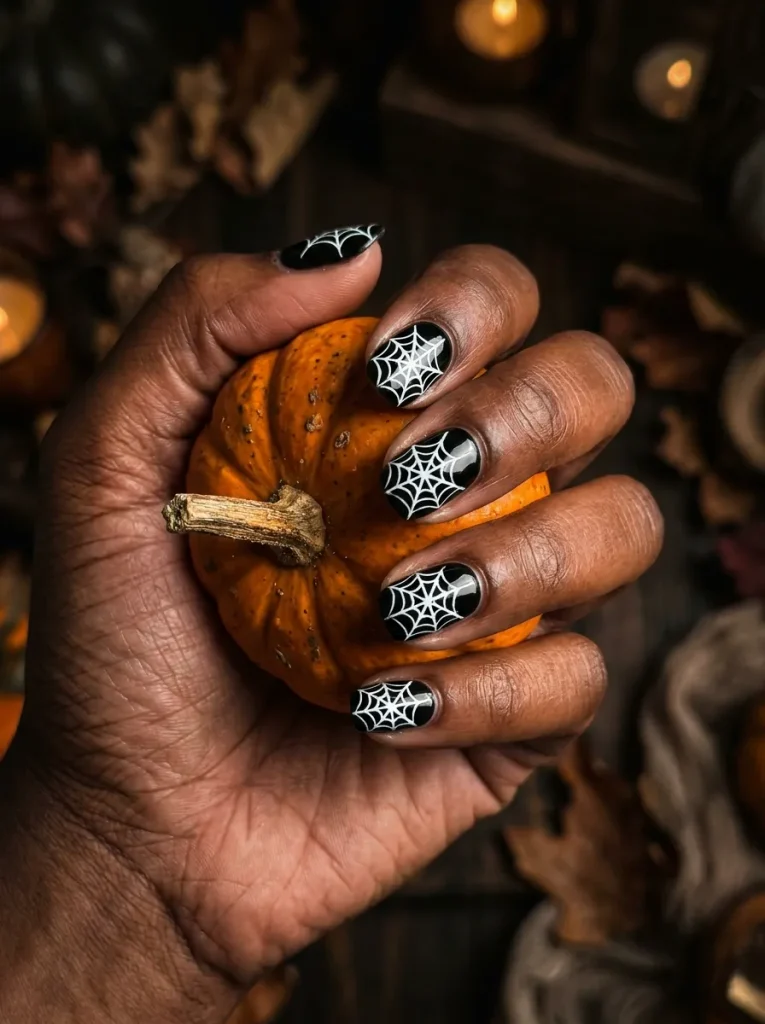
Flip the usual color scheme and the web looks striking. A white spiderweb over a black or deep base stands out sharp and bright, and it shows up beautifully on every skin tone.
The high contrast is the whole appeal. Where a black web can disappear on a dark nail, a white one glows against it. Paint a glossy black, deep plum, or charcoal base, then spin the web in white so every line pops.
Getting a crisp white web
7. Add a Tiny Painted Spider to the Web
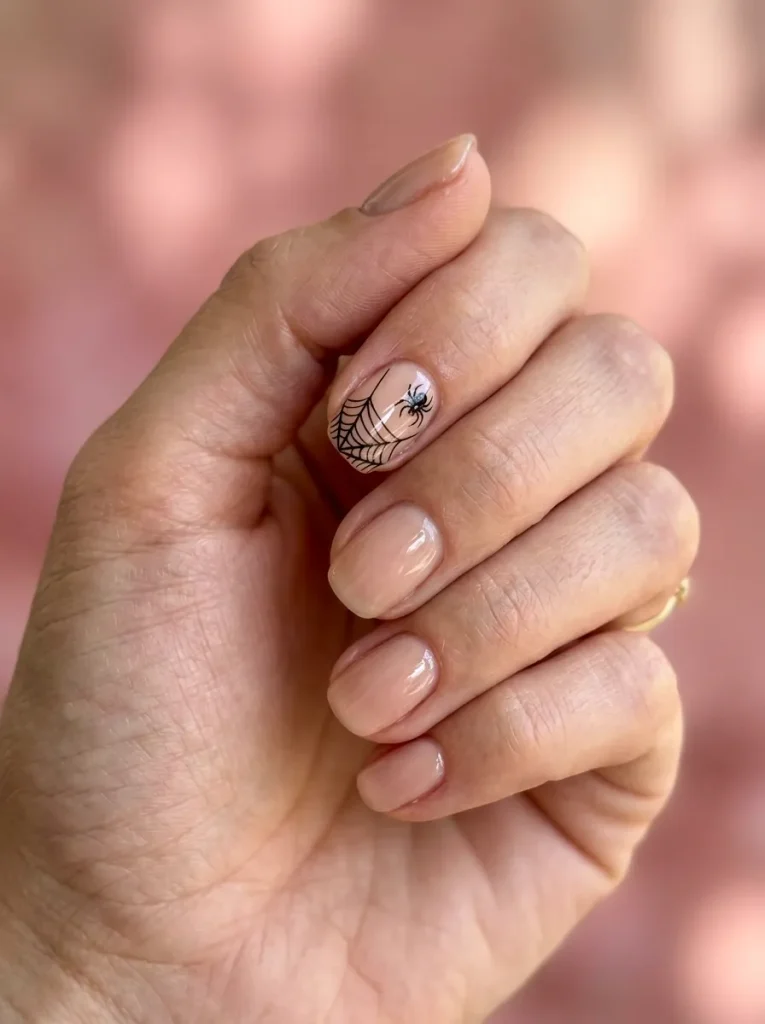
Every web needs its spider, and a little painted one brings the whole design to life. A small black spider tucked into the corner of a web makes the nail feel finished and playful.
The spider is simpler than it looks. Paint a small round body, add a tinier head, then flick four short legs on each side. Keep it on one or two nails so it stays a special detail rather than an army.
Keep the spider small and set it near a web edge.
Add a tiny white dot on the body for a glossy highlight.
A spider on every finger, which looks cluttered.
Legs so thick the spider turns into a blob.
8. A Rhinestone Spider on the Web
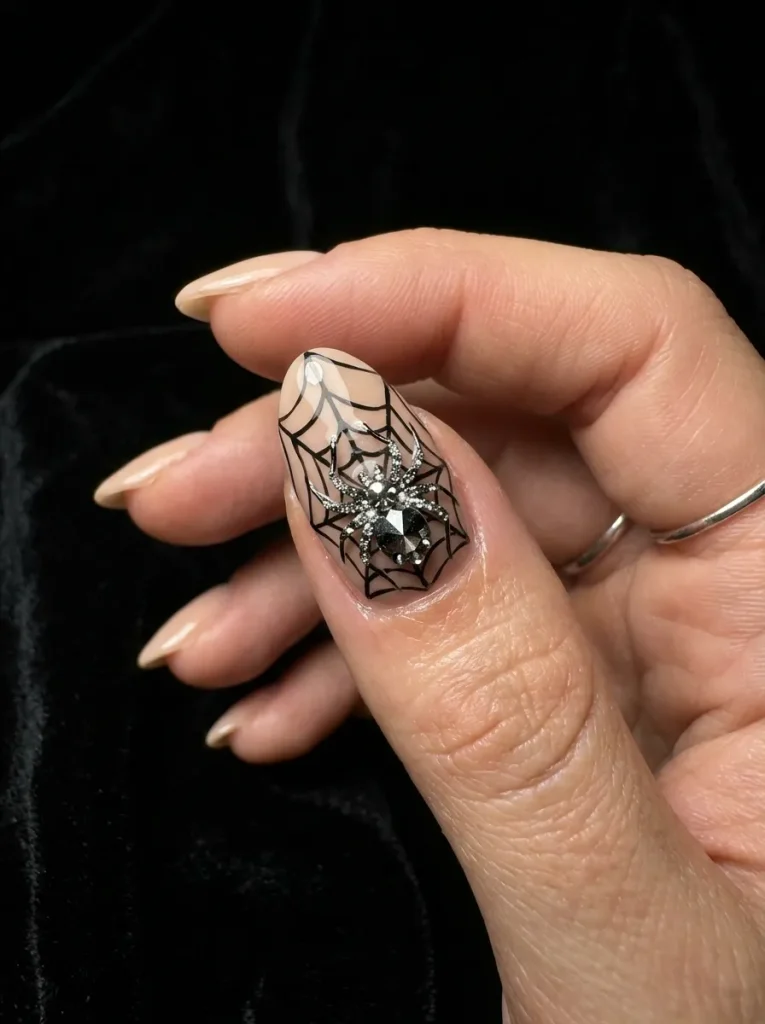
For a touch of glam, swap the painted spider for a sparkling one. A single black or crystal rhinestone set into the web reads as a jeweled spider and adds real texture.
The gem is the payoff. Paint your web, then glue a small rhinestone where the spider would sit and add a few thin painted legs around it. Keep it to one accent nail so the sparkle stays luxe instead of busy.
“A single rhinestone spider turns a painted web into fine jewelry. One gem does more than a whole nail of detail.”
9. Negative-Space Spiderweb
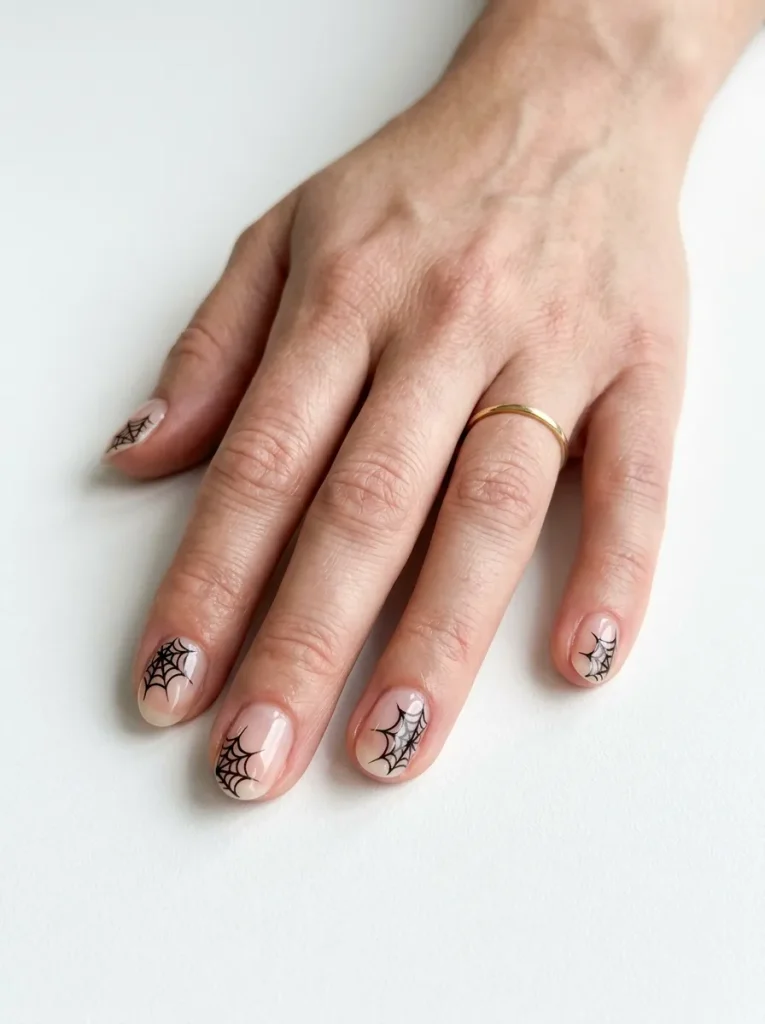
For a modern, minimal spin, let your bare nail become the background. A negative-space spiderweb uses the natural nail as the canvas, with only a fine web painted in one area.
The empty space is the design. Because most of the nail stays bare or sheer, a single delicate web in the upper corner looks clean and current rather than heavy. It is proof that spiderweb nails can be subtle and still unmistakable.
10. Spiderweb Over a Pink Ombre
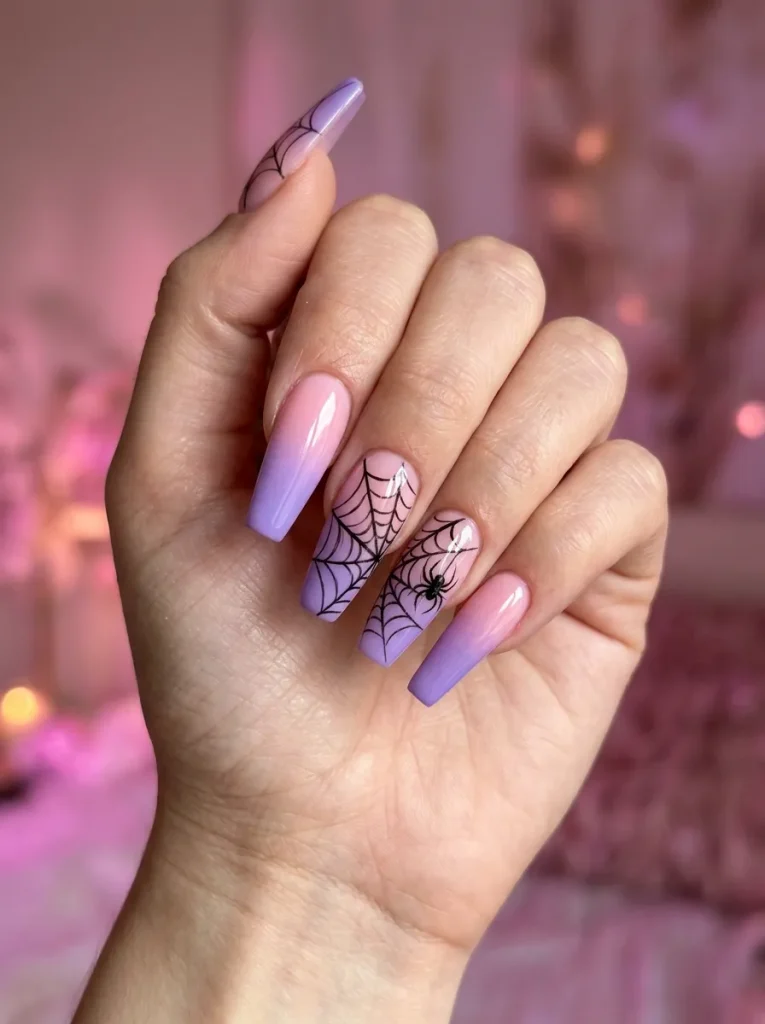
Take the pink web up a level with a gradient background. A black web over a pink-to-purple ombre gives the design depth and a dreamy, glam finish that photographs beautifully.
The blended base does half the work of making it look expensive. Here is how to build it.
Sponge a soft pink-to-purple ombre across the nail and let it dry.
Fan thin black web lines over the top from one corner.
Connect with arcs, add a small spider, and seal with gloss.
11. Matte Black Web for a Softer Finish

The same web takes on a whole new mood with a matte finish. A matte topcoat over a black spiderweb softens the shine into something moodier and more velvety.
The texture is what changes it. Matte mutes the glossy sharpness, so the design reads as elegant and understated rather than flashy. It is a lovely option if a high-shine web feels too bold, and it looks especially rich over a nude or grey base.
12. Web Tips on Long Coffin Nails

Long coffin nails give a spiderweb room to shine. The extra length lets the web stretch out over the tips into something dramatic and salon-worthy.
The long canvas is what makes it feel high-end, and it is one of the most popular spiderweb Halloween nail designs on longer shapes. These are the questions people ask most before committing to the look.
❓ Do webs look better on long nails?
They have more room to stretch and read as intricate, but a corner web works beautifully on short nails too.
❓ Where should the web start?
From a top corner or the tip, so it fans down and out over the length of the coffin shape.
❓ Full web or just the tips?
Web tips over a nude base stay wearable, while a full-nail web makes the boldest statement.
13. Web and Bow Combo
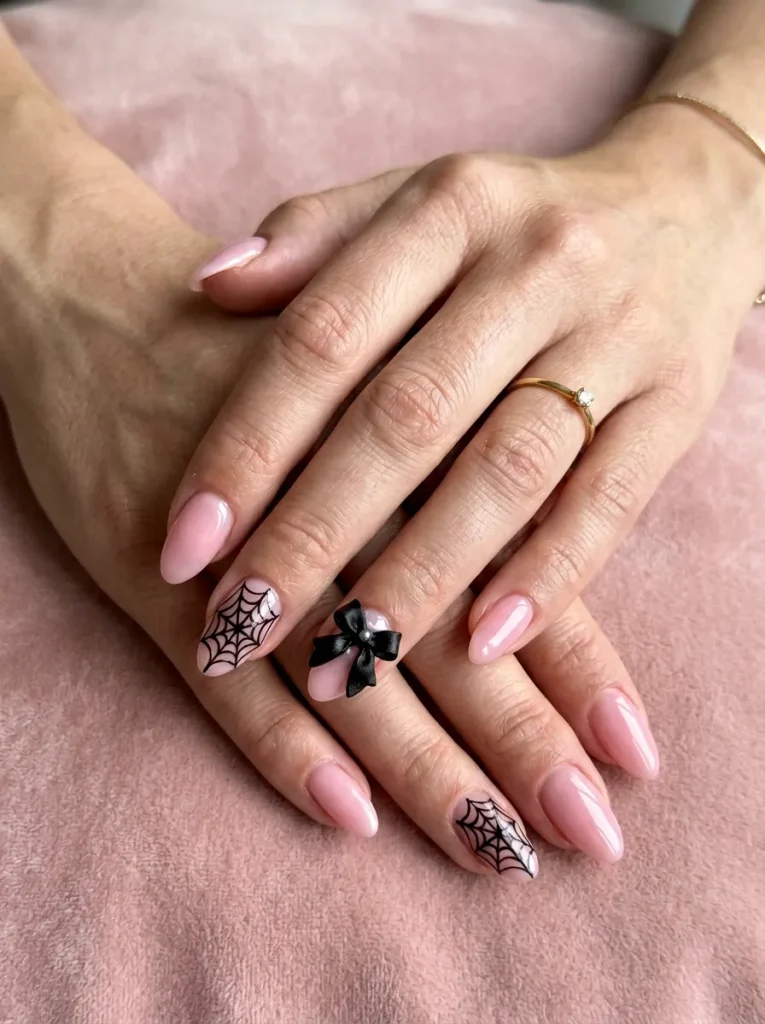
Mixing spooky with cute is having a real moment, and the web-and-bow combo nails it. A delicate black bow on one nail beside a spiderweb on another balances sweet and eerie perfectly.
The pairing feels intentional rather than random. Paint a web on one or two nails, then add a small painted or 3D bow on another, keeping both in the same black. On a pink or nude base, the mix reads coquette-meets-Halloween, which is exactly the trend.
A plain spiderweb set, spooky but a little one-note.
Add a little black bow and it turns into a sweet coquette-meets-Halloween set.
14. Glitter Web Over a Shimmer Base
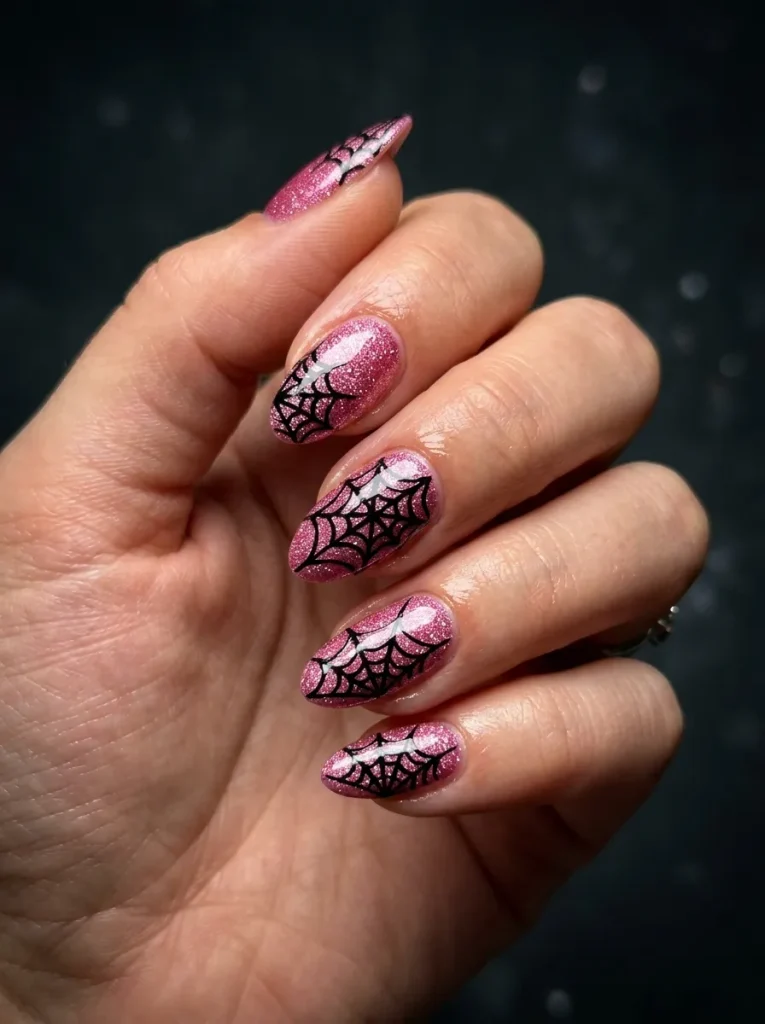
Make your web sparkle from every angle with a shimmer base. A black web over a soft glitter or shimmer background catches the light and feels a little magical.
The base does the glamorous work. Paint a sheer glitter or pearl shimmer over pink or nude, let it dry, then spin your black web on top so it sits against the sparkle. As your hand moves, the web appears to float over a glittering sky.
📌 Good To Know
Use a fine shimmer, not chunky glitter, under the web. A smooth shimmer base lets your thin web lines sit flat and clean instead of catching on raised flecks.
15. A Delicate Web on Stiletto Nails
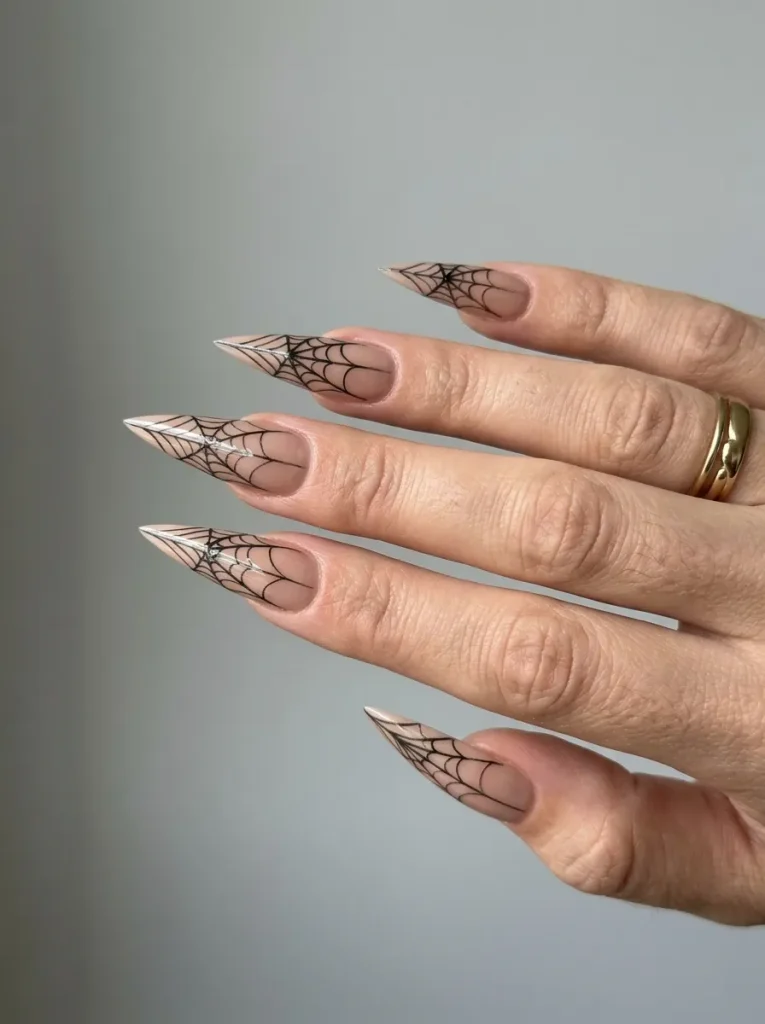
On sharp stiletto nails, a fine web looks especially dramatic. The pointed shape and a thin, delicate web together read edgy and high-fashion.
The elongated point stretches the web into something sleek. Here is how to build a clean web on the tapered shape.
Anchor at the point
Start your web lines from the sharp tip or a top corner.
Keep lines thin
Use a fine brush so the web stays delicate on the narrow shape.
Seal it
Finish with a glossy top coat all the way to the point.
16. Chrome or Foil Spiderweb
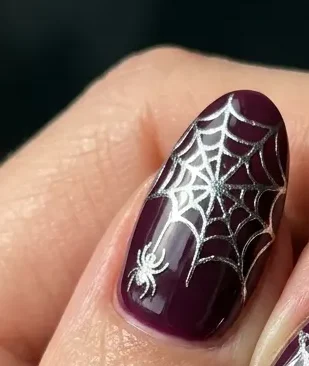
Take the classic web somewhere futuristic with chrome. A silver foil web over a dark base shimmers and shifts in the light, which makes a familiar design feel brand new.
The metallic finish does the heavy lifting. Paint your web in a chrome polish, or press on nail foil and seal it, over black or deep plum. As your hand moves, the web catches the light and almost looks liquid. It is an easy upgrade to a design you may already know how to paint.
| Chrome web | Matte black web |
|---|---|
| Shiny, metallic, eye-catching. | Soft, velvety, understated. |
| Shifts and glows in the light. | Stays flat and moody. |
| Feels glam and modern. | Feels classic and chic. |
17. Half-Web, Half-Solid Split Design
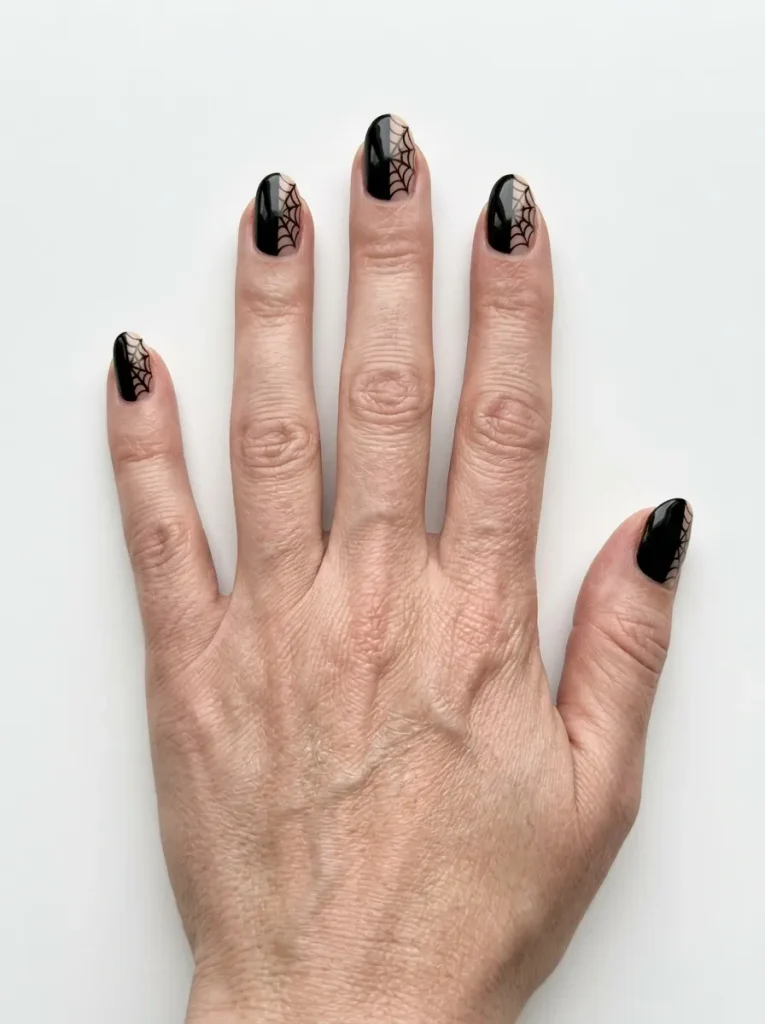
For a bold, graphic look, split the nail in two. Painting one half solid and leaving the other half a web creates a striking contrast that feels modern and edgy.
The clean divide is the whole idea. Paint half the nail solid black, then web the other half over a nude or pink base so the two sides meet down the middle. It is a fresh way to wear a web that looks more designed than a full cover.
18. Deep Wine and Gold Web for an Elegant Twist
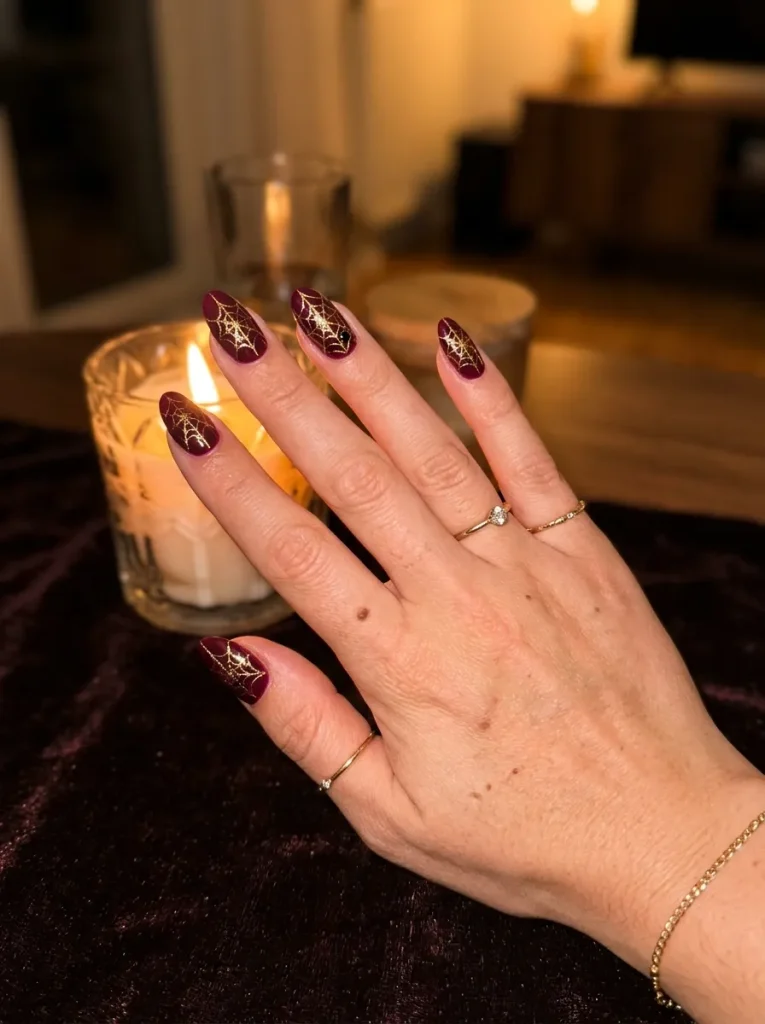
For the most grown-up spiderweb on this list, skip the black. A deep wine base with a fine gold web feels elegant and luxe rather than spooky, rich enough for any autumn event.
The color combination is what elevates it. A dark wine base with a thin gold web, or a few gold flecks caught in the design, looks dressy instead of cartoonish. It carries you right through the season and into the holidays, which makes it one of the most versatile picks here.
19. Press-On Spiderweb Nails
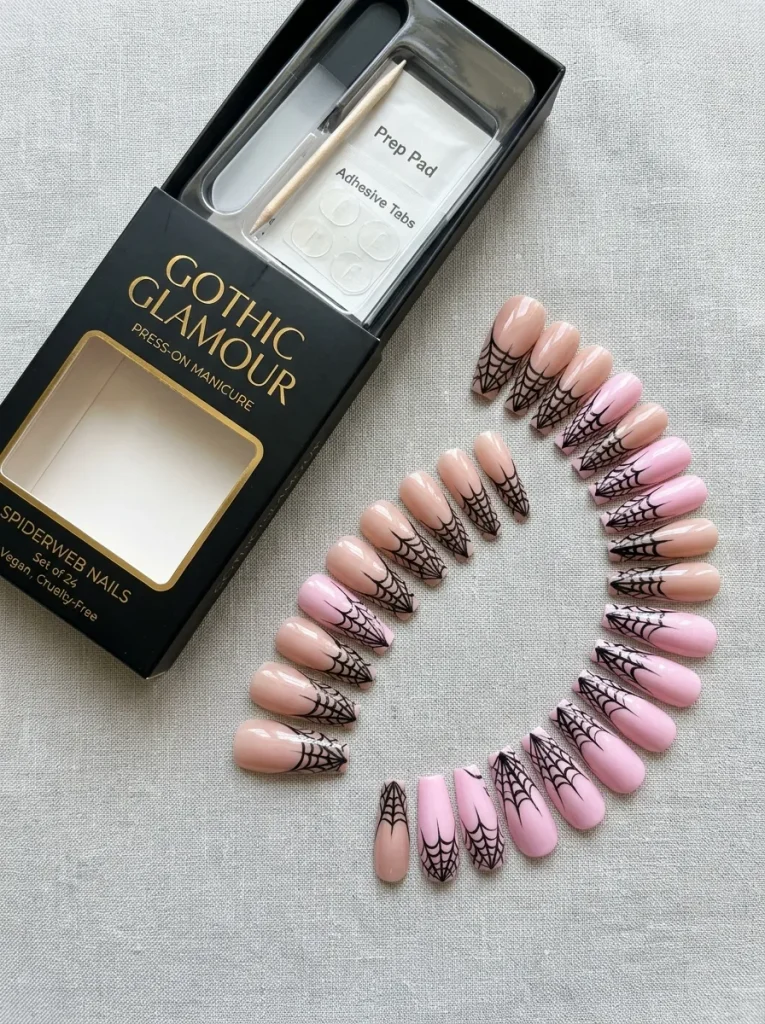
Not everyone wants to hand-paint tiny webs, and press-ons solve that instantly. A set of ready-made spiderweb press-ons gives you full salon-style webs in minutes at home.
The appeal is speed and freedom. You get intricate, even webs you might struggle to paint yourself, they pop off after the party, and many can be reused. Here is how they compare to the other ways to get the look.
| Press-ons | Painted at home | |
|---|---|---|
| Time | Minutes | An hour or more |
| Web neatness | Perfectly even | Depends on skill |
| Lasts | A few days | Up to a week or two |
| Reusable | Often yes | No |
20. How to Paint a Clean Web and Make It Last
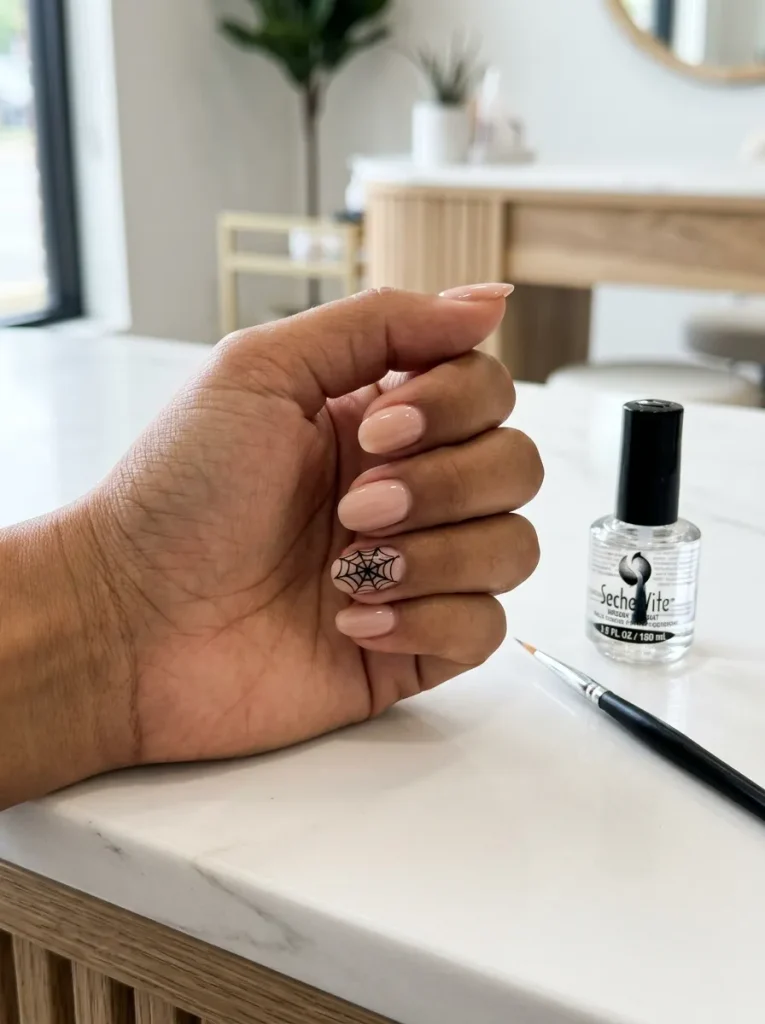
A neat web is all in the technique, and a few habits make it look salon-done and last longer. The secret is thin lines and a good seal.
Use a striping brush, a toothpick, or a fine detail brush, and paint your straight anchor lines first, then add the curved arcs between them. Keep the lines as thin as you can, since delicate webs always look more professional. Then seal everything, running your top coat along the very tip of the nail, and refresh that top coat after a couple of days to keep the web sharp and chip-free.
Pro tip
Thin your black polish with a drop of thinner or use a gel liner for the web lines. Runnier polish flows off the brush in fine, even strokes, which is the real secret to a delicate, professional web.
Spin Your Own Web This Season
Spiderweb nails earn their spot every Halloween because they give you so much for so little. A few thin lines read as intricate, the design fits any shape or length, and you can keep it minimal or take it all the way to glam. There is a web here for every skill level and every mood.
Start with a simple corner web to find your rhythm, then work up to ombre backgrounds, rhinestone spiders, and delicate stiletto sets as your hand gets steadier. However you spin it, a spiderweb is one of the most satisfying spooky designs you can wear.
Bookmark this to your nail board so your next web design is waiting whenever the spooky mood strikes.